iOS
The Swift SDK is experimental. Its public API may change or be removed in any minor release until the SDK is promoted to stable.
Integrate the Aghanim to start accepting payments for your game items online through a prebuilt checkout page. The Checkout on iOS uses our Swift SDK. For it to work properly, you need:
- Xcode 15 or higher.
- Minimum iOS deployment target 13.0 or higher.
- Deployment target 14.0 or higher to follow the SwiftUI examples, which use the SwiftUI app lifecycle.
The Checkout integration mode that works in the player's default browser. Use when you want to redirect the players outside your game.
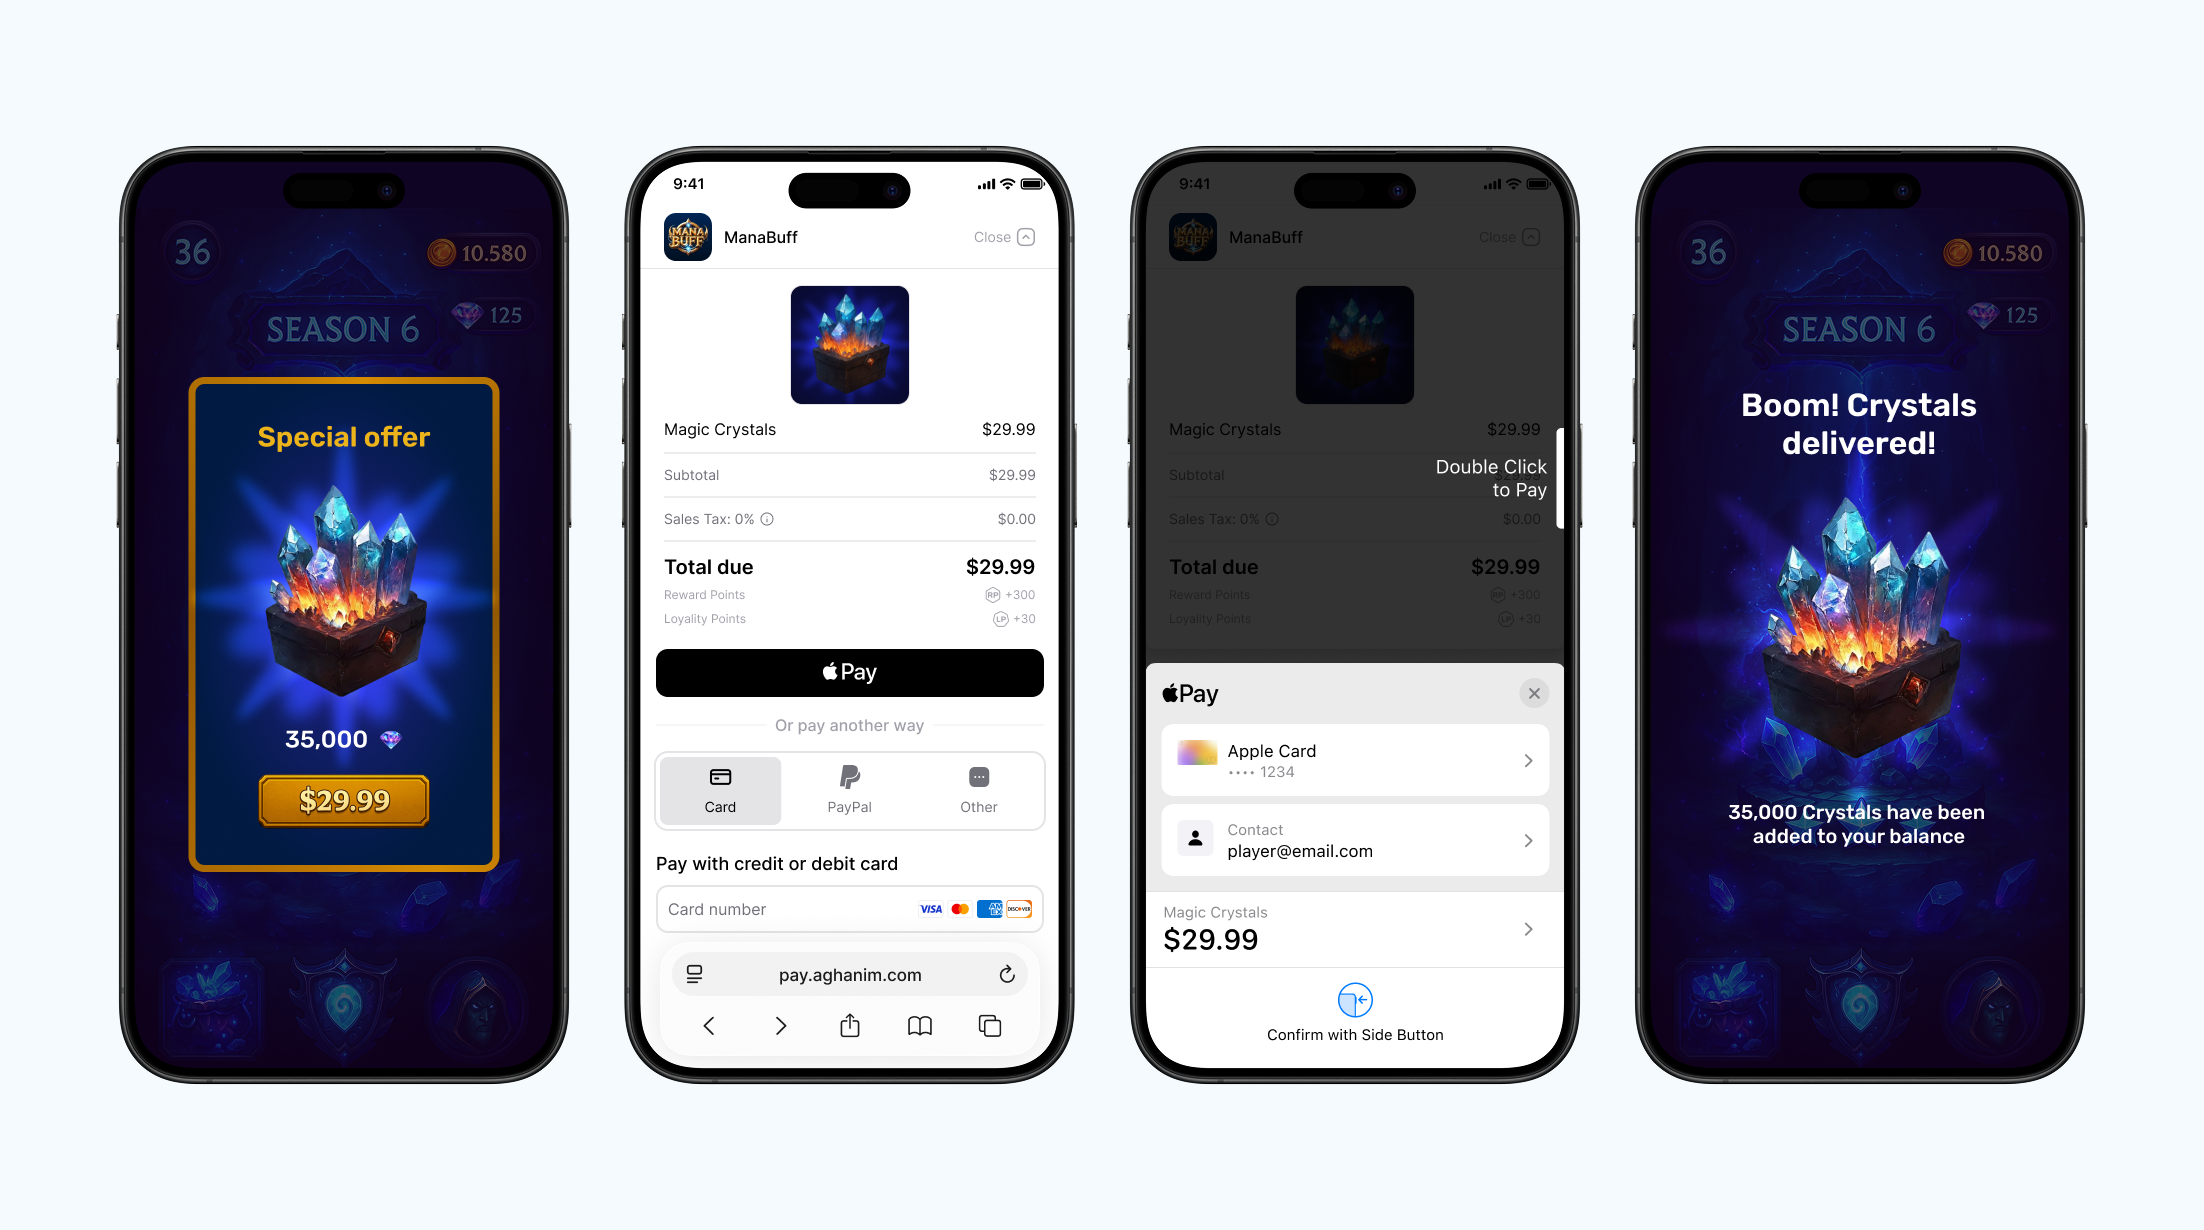
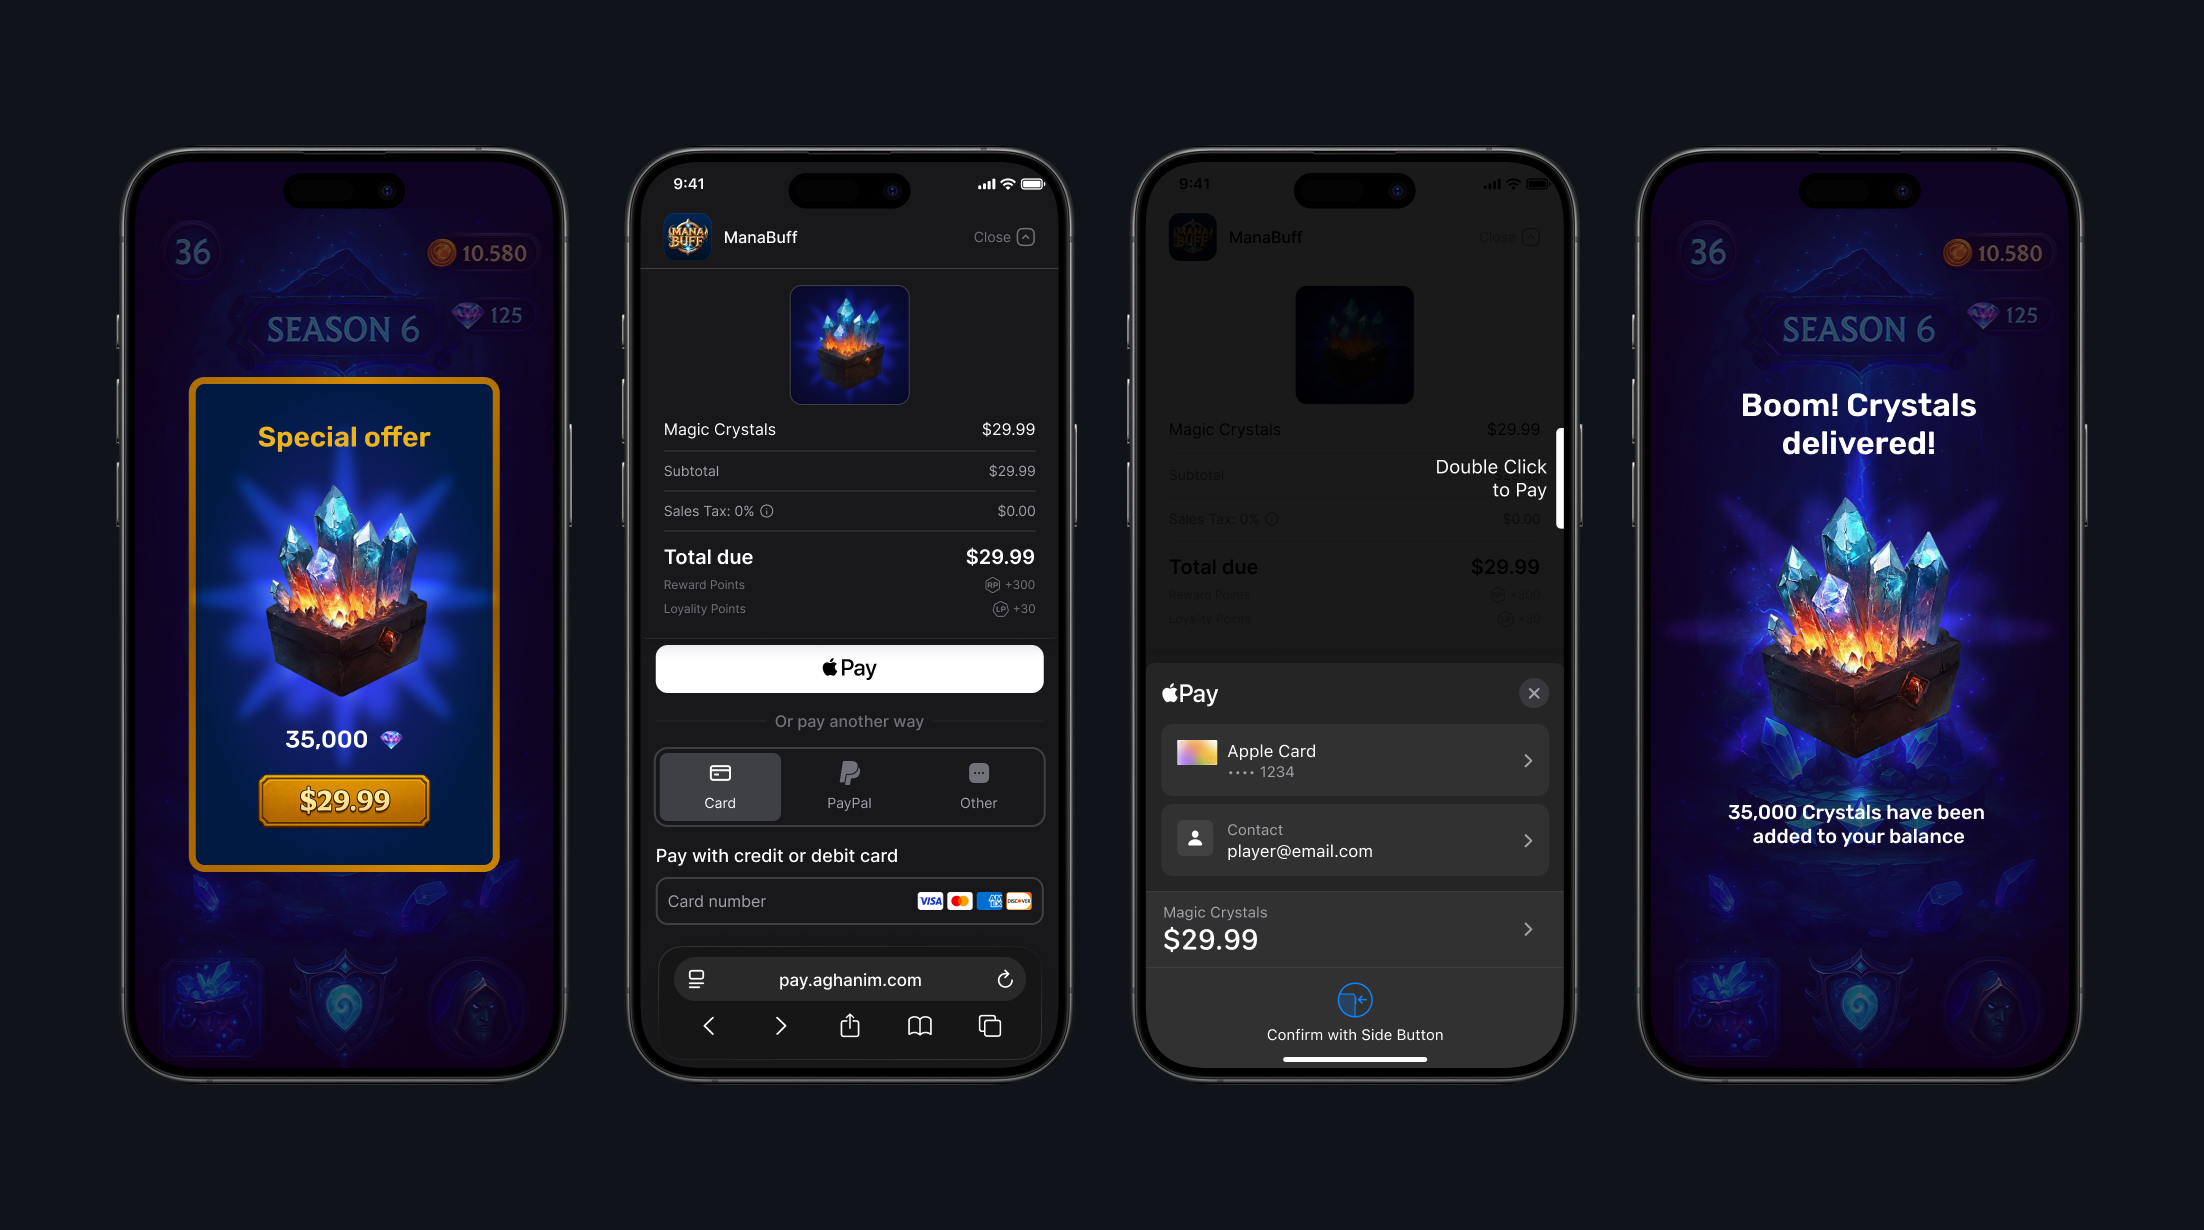
Register with Aghanim and link your game
First, register for an Aghanim account. At the end of registration, add the link to your mobile game. It should be published in Apple App Store or Google Play Store.
Set up environment
If you want to make real payments, you are all set as the live mode is used as default. Otherwise, use a sandbox, an isolated test environment, to simulate the Aghanim events to test payments without real money movement. To turn on the sandbox mode, set the Sandbox toggle to the active position.
Sandbox supports card payments only. Alternative methods (PayPal, wallets, local payment methods) appear only in live. See Test payments for the test cards.
While integrating, you will need an SDK key to authenticate requests to the Aghanim. Keep in mind that the sandbox and live modes have different keys. Find the SDK key in Integration → API keys.
Configure game client-side
Configure your game client to work with the Checkout by setting up the SDK and implementing the necessary code to process its methods.
Install SDK
To install the Swift SDK, download the latest XCFramework bundle from the Aghanim Artifact Registry, verify its checksum, and embed the frameworks in your Xcode project.
- XCFramework
VERSION="1.2.0"
BUNDLE="swift-sdk-v${VERSION}-xcframeworks.zip"
EXPECTED_SHA256="152ec7da96abf098aee5301a6515d9502694deb629d134b4cc188c4c13f1cb21"

# Download the XCFramework bundle.
curl -L -o "${BUNDLE}" \
  "https://artifactregistry.googleapis.com/v1/projects/ag-registry/locations/us-central1/repositories/swift-sdk/files/swift-sdk:v${VERSION}:${BUNDLE}:download?alt=media"

# Verify the SHA-256 against the value published in the release notes.
ACTUAL_SHA256=$(shasum -a 256 "${BUNDLE}" | awk '{print $1}')
if [ "${ACTUAL_SHA256}" != "${EXPECTED_SHA256}" ]; then
  echo "Checksum mismatch — aborting." >&2
  exit 1
fi

# Unzip alongside your Xcode project.
unzip -q "${BUNDLE}" -d swift-sdk
The bundle contains seven XCFrameworks. Drag every .xcframework directory into your Xcode project, then in General → Frameworks, Libraries, and Embedded Content set each one to Embed & Sign.
| Framework | Role |
|---|---|
AghanimCheckout.xcframework | Umbrella entry point. Re-exports the modules below so you can import AghanimCheckout. |
AghanimCheckoutDefaultBrowser.xcframework | Default-browser launch mode (external Safari via UIApplication.open). |
AghanimCheckoutInAppBrowser.xcframework | In-app browser launch mode (SFSafariViewController). |
AghanimCheckoutWebView.xcframework | WebView launch mode (WKWebView in an SDK-owned bottom sheet). |
AghanimCheckoutCore.xcframework | Shared checkout types: CheckoutParams, CheckoutItem, AghanimPresenter, and the handleRedirect(_:) method. |
AghanimCore.xcframework | Aghanim actor, AghanimConfig, ApiKey, ApiError, OrdersAPI, ItemsAPI, PricePointsAPI, and the Order, Item and PricePoint models. |
AghanimLogging.xcframework | Logger protocol, OSLogLogger, LogLevel. |
Each framework ships ad-hoc signed; Embed & Sign re-signs them with your team identity at build time.
If you ship release-mode builds and want symbolicated crash reports, also download swift-sdk-v1.2.0-dSYMs.zip from the same Artifact Registry repository and add the .dSYM directories to your crash-reporter pipeline. They are not needed for development.
Initialize SDK
Build an AghanimConfig with your API key, then construct the Aghanim actor and hold it for the lifetime of the process. The SDK is designed to be instantiated once at app launch.
ApiKey(_:) is failable and rejects a blank key, so unwrap it before building the config.
- SwiftUI
- UIKit
- Swift
import SwiftUI
import AghanimCheckout

@main
struct MyGameApp: App {
    @StateObject private var session = GameSession(aghanim: Self.makeAghanim())

    var body: some Scene {
        WindowGroup {
            RootView()
                .environmentObject(session)
                .aghanimCheckoutPresenter()
        }
    }

    private static func makeAghanim() -> Aghanim {
        guard let apiKey = ApiKey("YOUR_API_KEY") else {
            fatalError("API key cannot be blank.")
        }
        let config = AghanimConfig.builder(apiKey: apiKey)
            .with(logLevel: .debug)
            .build()
        return Aghanim(config: config)
    }
}

@MainActor
final class GameSession: ObservableObject {
    let aghanim: Aghanim

    init(aghanim: Aghanim) {
        self.aghanim = aghanim
    }
}
- Swift
import UIKit
import AghanimCheckout

@main
final class AppDelegate: UIResponder, UIApplicationDelegate {

    static let aghanim: Aghanim = makeAghanim()
    static let presenter = KeyWindowPresenter()

    func application(
        _ application: UIApplication,
        didFinishLaunchingWithOptions launchOptions: [UIApplication.LaunchOptionsKey: Any]?
    ) -> Bool {
        true
    }

    private static func makeAghanim() -> Aghanim {
        guard let apiKey = ApiKey("YOUR_API_KEY") else {
            fatalError("API key cannot be blank.")
        }
        let config = AghanimConfig.builder(apiKey: apiKey)
            .with(logLevel: .debug)
            .build()
        return Aghanim(config: config)
    }
}
AghanimConfig.builder(apiKey:) defaults to LogLevel.warning and OSLogLogger(). Call .with(logLevel: .debug) during development to see SDK lifecycle and network activity in the console.
With the SDK, you can read its logs from one of the supported levels. By default the SDK writes them through OSLogLogger, which routes into the unified logging system you already read in Console and Xcode.
- Simple
- Advanced
The simple usage of the SDK log messages means setting the log level you are interested in the most:
.debug: detailed debug information on almost every event..info: general information on the SDK instance state and its events..warning: warnings and recoverable errors. Used by default..error: critical and fatal errors..none: no logging.
- Swift
let config = AghanimConfig.builder(apiKey: apiKey)
    .with(logLevel: .debug)
    .build()
You can reroute the SDK logs to the system you have chosen for logging. Implement the Logger protocol and pass it to .with(logger:). The level filter still applies, so a message below the configured level never reaches your logger.
- Swift
import AghanimCheckout
import AghanimLogging

struct GameLogger: AghanimLogging.Logger {
    func d(_ message: String, error: (any Error)?) {
        // TODO: Send debug messages to your logging system
    }

    func i(_ message: String, error: (any Error)?) {
        // TODO: Send info messages to your logging system
    }

    func w(_ message: String, error: (any Error)?) {
        // TODO: Send warning messages to your logging system
    }

    func e(_ message: String, error: (any Error)?) {
        // TODO: Send error messages to your logging system
    }
}

func makeConfig(apiKey: ApiKey) -> AghanimConfig {
    AghanimConfig.builder(apiKey: apiKey)
        .with(logger: GameLogger())
        .with(logLevel: .debug)
        .build()
}
The SDK marks its log values as private, so the unified logging system redacts them. A custom Logger receives the message already interpolated, so whatever you forward to a third-party service leaves the device unredacted.
Configure player ID
Since a mobile game has one instance per device, the SDK allows to set the player ID once to use it in all following method calls.
When your game client has the player ID, set it for the current SDK instance. The call is async throws. Surrounding whitespace is trimmed, and a blank or whitespace-only ID is rejected with ApiError.invalidArgument. When the player signs out, call clearPlayerId() so the SDK stops attaching the previous identity to API requests.
- SwiftUI
- UIKit
- Swift
import SwiftUI
import AghanimCheckout

struct SignInView: View {
    @EnvironmentObject private var session: GameSession

    var body: some View {
        Button("Sign in") {
            Task {
                let playerId = await authenticatePlayer()
                do {
                    try await session.aghanim.setPlayerId(playerId)
                } catch {
                    // Surface to the user as a sign-in error.
                }
            }
        }
    }

    private func signOut() {
        Task {
            await session.aghanim.clearPlayerId()
        }
    }
}
- Swift
import UIKit
import AghanimCheckout

final class SignInViewController: UIViewController {

    private func signIn() {
        Task {
            let playerId = await authenticatePlayer()
            do {
                try await AppDelegate.aghanim.setPlayerId(playerId)
            } catch {
                // Surface to the user as a sign-in error.
            }
        }
    }

    private func signOut() {
        Task {
            await AppDelegate.aghanim.clearPlayerId()
        }
    }
}
Every call that needs a player throws ApiError.playerIdNotSet without one: aghanim.orders.getUnconsumed(), aghanim.orders.consume(orderId:), and all three startCheckout launch modes. Set the player ID immediately after authentication. aghanim.orders.get(id:) and presentCheckout do not need one.
Create item
The integration needs the items to be added to the Dashboard. When creating items, each should have its SKU, a unique identifier for the item within your game backend. You can add their prices, currency, sale configuration, and more.
To add an item to the Dashboard:
- Go to SKU Management → Items.
- Click Add Item. The site will open the Add Item page.
- Enter the item name New item.
- Enter the item SKU items.new.ba68a028-2d51-46b4-a854-68fc16af328a.
- In the Price block:
- Select the Fiat price type for a real money item.
- Enter the price 1.99.
- Click Add item.
For integration purposes, we have shortened an item setup. Before going live, use every suitable feature while adding items to the Dashboard.
Get items with localized prices
The SDK retrieves items created in the Dashboard with prices localized to the player's region. Use it to show accurate prices in your in-game store before the player proceeds to the Checkout.
- Swift
let items = try await aghanim.items.get(skus: [
    "items.new.ba68a028-2d51-46b4-a854-68fc16af328a",
    "items.new.1f2c4d16-9b83-4b52-9e0d-72f3a1c5d904",
])

for storeItem in items {
    // Use name, price.display and imageUrl to populate your store.
    print("\(storeItem.name): \(storeItem.price.display)")
}
Ask for as many SKUs as your store needs: there is no SKU-count cap to work around. Duplicates are collapsed, items come back in the order you asked for them, and a SKU that is not in the catalog is left out of the result rather than failing the whole call. An empty array throws ApiError.invalidArgument.
Create Checkout item
Create a CheckoutItem value that references the SKU you added to the Dashboard. sku is the only required field; name, description, and imageUrl override the catalog entry for this Order.
- Swift
let item = CheckoutItem(sku: "items.new.ba68a028-2d51-46b4-a854-68fc16af328a")
Configure deep links
As the SDK launches the Checkout in the player's default browser (external Safari), the player needs to be returned to your app once they complete the payment. To return the player to your app, the SDK needs you to specify a deep link.
- Universal Links
- Custom URL schemes
With Universal Links, the player goes directly to the app without an OS confirmation dialog. Universal Links use standard HTTPS URLs that iOS validates against the Apple App Site Association (AASA) file hosted on your domain. This is the recommended approach for production.
Create a variable for the deep link URL. We will use it later.
- Swift
let backToGameUrl = "https://yourdomain.com/checkout/return"
Host an apple-app-site-association file at https://<YOUR_DOMAIN>/.well-known/apple-app-site-association. The file must be served over HTTPS with Content-Type: application/json, with no redirects.
- apple-app-site-association
{
  "applinks": {
    "details": [
      {
        "appIDs": ["ABCDE12345.com.yourcompany.yourgame"],
        "components": [
          {
            "/": "/checkout/return*"
          }
        ]
      }
    ]
  }
}
Add the Associated Domains capability to your target in Xcode and list the domain there.
- App.entitlements
<?xml version="1.0" encoding="UTF-8"?>
<!DOCTYPE plist PUBLIC "-//Apple//DTD PLIST 1.0//EN" "http://www.apple.com/DTDs/PropertyList-1.0.dtd">
<plist version="1.0">
<dict>
    <key>com.apple.developer.associated-domains</key>
    <array>
        <string>applinks:yourdomain.com</string>
    </array>
</dict>
</plist>
When the player returns to your app via the Universal Link, iOS hands the URL to your app. Pass it to aghanim.handleRedirect(_:) so the SDK can complete the checkout flow.
- SwiftUI
- UIKit
- Swift
import SwiftUI
import AghanimCheckout

struct RootView: View {
    @EnvironmentObject private var session: GameSession

    var body: some View {
        ContentView()
            .onOpenURL { url in
                Task {
                    let handled = await session.aghanim.handleRedirect(url)
                    guard handled else { return }
                    // The player came back from a Checkout. Check unconsumed Orders to grant the purchase.
                }
            }
    }
}
- Swift
import UIKit
import AghanimCheckout

final class SceneDelegate: UIResponder, UIWindowSceneDelegate {
    func scene(
        _ scene: UIScene,
        continue userActivity: NSUserActivity
    ) {
        guard userActivity.activityType == NSUserActivityTypeBrowsingWeb,
              let url = userActivity.webpageURL else {
            return
        }
        Task {
            let handled = await AppDelegate.aghanim.handleRedirect(url)
            guard handled else { return }
            // The player came back from a Checkout. Check unconsumed Orders to grant the purchase.
        }
    }
}
Custom URL schemes may show a system dialog asking the player whether to open your app. They are easier to set up but don't provide the same security level as Universal Links, which makes them suitable for development and testing environments.
Create a variable for the deep link. We will use it later.
- Swift
let backToGameUrl = "yourgame://checkout/return"
Register the scheme in your app's Info.plist under CFBundleURLTypes. iOS will route any URL with this scheme to your app.
- Info.plist
<key>CFBundleURLTypes</key>
<array>
    <dict>
        <key>CFBundleTypeRole</key>
        <string>Editor</string>
        <key>CFBundleURLName</key>
        <string>com.yourcompany.yourgame.checkout</string>
        <key>CFBundleURLSchemes</key>
        <array>
            <string>yourgame</string>
        </array>
    </dict>
</array>
When the player returns via the custom scheme, iOS hands the URL to your app. Pass it to aghanim.handleRedirect(_:).
- SwiftUI
- UIKit
- Swift
import SwiftUI
import AghanimCheckout

struct RootView: View {
    @EnvironmentObject private var session: GameSession

    var body: some View {
        ContentView()
            .onOpenURL { url in
                Task {
                    let handled = await session.aghanim.handleRedirect(url)
                    guard handled else { return }
                    // The player came back from a Checkout. Check unconsumed Orders to grant the purchase.
                }
            }
    }
}
- Swift
import UIKit
import AghanimCheckout

final class SceneDelegate: UIResponder, UIWindowSceneDelegate {
    func scene(
        _ scene: UIScene,
        openURLContexts URLContexts: Set<UIOpenURLContext>
    ) {
        guard let url = URLContexts.first?.url else { return }
        Task {
            let handled = await AppDelegate.aghanim.handleRedirect(url)
            guard handled else { return }
            // The player came back from a Checkout. Check unconsumed Orders to grant the purchase.
        }
    }
}
Create Checkout params
When all data variables are ready, create another one that represents Checkout params. Checkout params are the programmatic representation of what the player sees when they are on the payment form. Checkout params are associated with a player and items, they are crucial for the Checkout to work. Pass the backToGameUrl you defined earlier so the SDK can route the player back to your app after the payment.
- Swift
let params = CheckoutParams(
    items: [item],
    backToGameUrl: backToGameUrl
)
You can attach custom metadata to the Checkout for item tracking purposes. You can access it through webhooks and in API responses from the Aghanim. Metadata has a structure of "key-value" pairs.
- Swift
let params = CheckoutParams(
    items: [item],
    metadata: [
        "campaign": "summer_sale",
        "ab_variant": "B"
    ],
    backToGameUrl: backToGameUrl
)
You can choose the behavior of redirecting the player after they have completed the payment successfully. The difference in the provided by the SDK modes is a delay before redirecting or absence of redirecting.
- Immediate
- Delayed
- No redirect
When the player has completed the payment, the SDK redirects them immediately to the deep link from backToGameUrl.
- Swift
let params = CheckoutParams(
    items: [item],
    backToGameUrl: backToGameUrl,
    redirectSettings: RedirectSettings(mode: .immediate)
)
When the player has completed the payment, the SDK shows the screen for the successful payment for the given number of seconds and then redirects the player to the deep link from backToGameUrl.
- Swift
let params = CheckoutParams(
    items: [item],
    backToGameUrl: backToGameUrl,
    redirectSettings: RedirectSettings(mode: .delayed, delaySeconds: 5)
)
When the player has completed the payment, they stay on the screen for the successful payment. To exit it, they manually close it or navigate away. After, you should redirect them to the deep link from backToGameUrl by yourself.
- Swift
let params = CheckoutParams(
    items: [item],
    backToGameUrl: backToGameUrl,
    redirectSettings: RedirectSettings(mode: .noRedirect)
)
You can set the appearance mode for the Checkout UI. The SDK supports automatic detection based on the system setting, or you can force a specific mode.
- Auto
- Dark
- Light
The SDK automatically detects and applies the appropriate appearance mode based on the system setting.
- Swift
let params = CheckoutParams(
    items: [item],
    backToGameUrl: backToGameUrl,
    uiSettings: CheckoutUiSettings(mode: .auto)
)
The SDK forces dark mode appearance for the Checkout UI.
- Swift
let params = CheckoutParams(
    items: [item],
    backToGameUrl: backToGameUrl,
    uiSettings: CheckoutUiSettings(mode: .dark)
)
The SDK forces light mode appearance for the Checkout UI.
- Swift
let params = CheckoutParams(
    items: [item],
    backToGameUrl: backToGameUrl,
    uiSettings: CheckoutUiSettings(mode: .light)
)
Launch Checkout
Add a checkout button to your game client that launches the payment form. The SDK creates an order from the provided checkout params and opens it in the player's default browser. On success, you receive the Order ID to track the order. On failure, startCheckout throws an ApiError with debug information for troubleshooting.
- SwiftUI
- UIKit
- Swift
import SwiftUI
import AghanimCheckout

struct CheckoutButton: View {
    @EnvironmentObject private var session: GameSession
    let params: CheckoutParams

    var body: some View {
        Button("Buy") {
            Task {
                do {
                    let orderId = try await session.aghanim.startCheckout(params, mode: .defaultBrowser)
                    // Track the order ID so you can reconcile the purchase after the player returns.
                    print("Aghanim checkout started for order \(orderId)")
                } catch {
                    // Log debug information for troubleshooting.
                    print("Aghanim checkout failed: \(error)")
                    // TODO: Surface the failure to the player.
                }
            }
        }
    }
}
- Swift
import UIKit
import AghanimCheckout

final class CheckoutViewController: UIViewController {

    private func launchCheckout(params: CheckoutParams) {
        Task {
            do {
                let orderId = try await AppDelegate.aghanim.startCheckout(
                    params,
                    mode: .defaultBrowser
                )
                // Track the order ID so you can reconcile the purchase after the player returns.
                print("Aghanim checkout started for order \(orderId)")
            } catch {
                // Log debug information for troubleshooting.
                print("Aghanim checkout failed: \(error)")
                // TODO: Surface the failure to the player.
            }
        }
    }
}
The Default browser mode is designed for flows where the player leaves your app entirely. The SDK does not stay attached to the external browser, so the only signal that the player has returned is the deep link routed to aghanim.handleRedirect(_:).
Throwing SDK methods fail with an ApiError. Match on the case to decide what the player sees.
- Swift
do {
    let orderId = try await aghanim.startCheckout(params, mode: launchMode)
    print("Aghanim checkout started for order \(orderId)")
} catch let error as ApiError {
    switch error {
    case .playerIdNotSet:
        // Set the player ID after sign-in, then let the player retry.
        break
    case .invalidArgument(.presenter, _, _):
        // No window to present over: the app is backgrounded, or several scenes are
        // foreground-active. The Order was already created and its ID is not returned, so
        // check the presenter before launching rather than calling startCheckout again.
        break
    case let .invalidArgument(name, reason, _):
        // The SDK rejected an argument before the call reached the network.
        print("Aghanim rejected \(name): \(reason)")
        // TODO: Fix the value you passed.
    case let .validation(_, details):
        for detail in details {
            print("\(detail.location.joined(separator: ".")): \(detail.message)")
        }
    case .network, .timeout, .serverUnavailable:
        // Transient. Offer the player a retry.
        break
    case .rateLimitExceeded:
        // Back off before retrying.
        break
    case .notAuthenticated, .notAuthorized:
        // The API key is missing, wrong, or not permitted for this call. A retry will not help.
        break
    case .disposed:
        // This instance was disposed. Build a new one before calling again.
        break
    default:
        // Log debug information for troubleshooting.
        print("Aghanim checkout failed: \(error)")
    }
} catch is CancellationError {
    print("Aghanim checkout cancelled")
} catch {
    // Log debug information for troubleshooting.
    print("Aghanim checkout failed: \(error)")
}
ApiError.invalidArgument carries a typed name and reason so you can tell which argument the SDK rejected, and ApiError.validation carries one ValidationErrorDetail per field the server rejected. Cases that carry a payload include a debugMessage meant for your logs, not for the player.
Find the full list of cases in the Swift SDK reference.
Check unconsumed Orders
After the Checkout has launched and you have an Order ID, the player can step away from the payment form, complete the payment, or abandon it entirely. The launch call only confirms that the Order was created and the form opened — it does not tell you whether the player paid. To know which Orders the player has actually paid for and should be granted to them, ask the SDK for the list of unconsumed paid Orders.
- Swift
let unconsumedOrderIds = try await aghanim.orders.getUnconsumed()

for orderId in unconsumedOrderIds {
    do {
        try await aghanim.orders.consume(orderId: orderId)
    } catch {
        print("Aghanim could not consume order \(orderId): \(error)")
        continue
    }

    grantItems(forOrder: orderId) // TODO: Grant the items to the player
}
Consume paid Orders
Consume the Order the player has paid for, then grant its items once the consume succeeds. Consuming the same Order twice fails, so the grant runs only once.
- Swift
try await aghanim.orders.consume(orderId: orderId)
Full implementation code
- SwiftUI
- UIKit
- Swift
import SwiftUI
import AghanimCheckout

@main
struct MyGameApp: App {
    @StateObject private var session = GameSession(aghanim: Self.makeAghanim())

    var body: some Scene {
        WindowGroup {
            RootView()
                .environmentObject(session)
                .onOpenURL { url in
                    Task {
                        let handled = await session.aghanim.handleRedirect(url)
                        guard handled else { return }
                        // The player came back from a Checkout. Check unconsumed Orders to grant the purchase.
                    }
                }
        }
    }

    private static func makeAghanim() -> Aghanim {
        guard let apiKey = ApiKey("YOUR_API_KEY") else {
            fatalError("API key cannot be blank.")
        }
        let config = AghanimConfig.builder(apiKey: apiKey)
            .with(logLevel: .debug)
            .build()
        return Aghanim(config: config)
    }
}

@MainActor
final class GameSession: ObservableObject {
    let aghanim: Aghanim

    init(aghanim: Aghanim) {
        self.aghanim = aghanim
    }
}

struct RootView: View {
    @EnvironmentObject private var session: GameSession

    var body: some View {
        Button("Buy") {
            Task { await buy() }
        }
    }

    private func buy() async {
        do {
            try await session.aghanim.setPlayerId("player_42")
            let item = CheckoutItem(sku: "items.new.ba68a028-2d51-46b4-a854-68fc16af328a")
            let params = CheckoutParams(
                items: [item],
                backToGameUrl: "https://yourdomain.com/checkout/return"
            )
            let orderId = try await session.aghanim.startCheckout(params, mode: .defaultBrowser)
            // Track the order ID so you can reconcile the purchase after the player returns.
            print("Aghanim checkout started for order \(orderId)")
        } catch {
            // Log debug information for troubleshooting.
            print("Aghanim checkout failed: \(error)")
            // TODO: Surface the failure to the player.
        }
    }
}
- Swift
import UIKit
import AghanimCheckout

@main
final class AppDelegate: UIResponder, UIApplicationDelegate {

    static let aghanim: Aghanim = {
        guard let apiKey = ApiKey("YOUR_API_KEY") else {
            fatalError("API key cannot be blank.")
        }
        let config = AghanimConfig.builder(apiKey: apiKey)
            .with(logLevel: .debug)
            .build()
        return Aghanim(config: config)
    }()
}

final class SceneDelegate: UIResponder, UIWindowSceneDelegate {

    // Universal Links.
    func scene(
        _ scene: UIScene,
        continue userActivity: NSUserActivity
    ) {
        guard userActivity.activityType == NSUserActivityTypeBrowsingWeb,
              let url = userActivity.webpageURL else { return }
        handle(url)
    }

    // Custom URL schemes.
    func scene(
        _ scene: UIScene,
        openURLContexts URLContexts: Set<UIOpenURLContext>
    ) {
        for context in URLContexts {
            handle(context.url)
        }
    }

    private func handle(_ url: URL) {
        Task {
            let handled = await AppDelegate.aghanim.handleRedirect(url)
            guard handled else { return }
            // The player came back from a Checkout. Check unconsumed Orders to grant the purchase.
        }
    }
}

final class CheckoutViewController: UIViewController {

    @IBAction private func buyTapped() {
        Task { await buy() }
    }

    private func buy() async {
        do {
            try await AppDelegate.aghanim.setPlayerId("player_42")
            let item = CheckoutItem(sku: "items.new.ba68a028-2d51-46b4-a854-68fc16af328a")
            let params = CheckoutParams(
                items: [item],
                backToGameUrl: "https://yourdomain.com/checkout/return"
            )
            let orderId = try await AppDelegate.aghanim.startCheckout(
                params,
                mode: .defaultBrowser
            )
            // Track the order ID so you can reconcile the purchase after the player returns.
            print("Aghanim checkout started for order \(orderId)")
        } catch {
            // Log debug information for troubleshooting.
            print("Aghanim checkout failed: \(error)")
            // TODO: Surface the failure to the player.
        }
    }
}
Make payment
Make a payment. If you have set the sandbox mode, use the test card below. In the sandbox, you can make payments only with the test cards — alternative methods like PayPal, wallets, and local payment methods appear only in the live environment. The test cards accept any digits as CVV and any future date as expiry date. Don’t forget to fill in an email address to check the receipt is sent and any postal code as a billing address.
Successful payments
After you complete the payment, you will receive a receipt sent to the specified email address and a transaction record in Aghanim Dashboard → Transactions.
| Card Brand | Card Number | CVV | Expiry date | Country |
|---|---|---|---|---|
| VISA (credit) | 4242 4242 4242 4242 | Any 3 digits | Any future date | GB |
Unsuccessful payments
Make an unsuccessful payment just in case you are curious. You will see the transaction in Aghanim Dashboard → Transactions as well.
| Number | CVV | Expiry date | Response code | Description |
|---|---|---|---|---|
4832 2850 6160 9015 | Any 3 digits | Any future date | 16 | Payment declined |
For the live mode, you can find all supported payment methods in Company settings → Payment methods. Turn on or off those you see suitable. Some payment methods are available globally by default. You can’t disable Credit cards, Apple Pay, Google Pay, and PayPal.
In Checkout, the Aghanim evaluates the currency and any restrictions, then dynamically presents only the payment methods available to the player based on evaluation.
When you use the live mode, the payment form shows to the player a setting to save their payment method so they can make a one-click payment in the future.
Handle post-payment events on game server-side
To complete the Checkout, handle items’ granting and chargebacks on your game backend. To do so, implement a webhook system that accepts the item.add and item.remove webhooks. See the code example with the implementation.
Comply with the Aghanim requirements for these webhooks:
- Use HTTPS schema for the single POST webhook endpoint.
- Check that webhooks are generated and signed by the Aghanim.
- Handle the
idempotency_keyfield in the webhook payload to prevent processing duplicate webhooks. - Respond with the HTTP status codes:
2xxfor successfully processed webhooks.4xxand5xxfor errors.
Grant items to player
The Aghanim sends the item.add webhook to let you know about the purchased items and ask for your permission to grant them to the player.
When the Aghanim has your 2xx answer, it can complete the checkout logic and redirect the player to a deep link if provided.
Support refunds and chargebacks
The Aghanim sends the item.remove webhook when a bank or payment system reverses the transaction, or you have requested refund in Aghanim Dashboard → Transactions. Partial refunds are not supported.
The suggested implementation handles the webhooks mentioned before:
item.addfor granting items. You need it for integration.item.removefor refunds and chargebacks. You might need it for integration.
- Python
- Ruby
- Node.js
- Go
# 통합에서 웹훅 이벤트를 처리하기 위해 이 샘플 코드를 사용하세요.
#
# 1. 이 코드를 `server.py`라는 새 파일에 붙여 넣으세요.
#
# 2. 의존성 설치:
#    python -m pip install fastapi[all]
#
# 3. http://localhost:8000에서 서버를 실행합니다
#    python server.py

import fastapi, hashlib, hmac, json, typing
from fastapi.responses import JSONResponse

app = fastapi.FastAPI()

@app.post("/webhook")
async def webhook(request: fastapi.Request) -> dict[str, typing.Any]:
    secret_key = "<YOUR_S2S_KEY>"  # 실제 웹훅 비밀 키로 교체하세요

    raw_payload = await request.body()
    payload = raw_payload.decode()
    timestamp = request.headers["x-aghanim-signature-timestamp"]
    received_signature = request.headers["x-aghanim-signature"]

    if not verify_signature(secret_key, payload, timestamp, received_signature):
        raise fastapi.HTTPException(status_code=403, detail="Invalid signature")

    data = json.loads(payload)
    event_type = data["event_type"]
    event_data = data["event_data"]

    if event_type == "item.add":
        add_item(event_data)
        return {"status": "ok"}

    if event_type == "item.remove":
        remove_item(event_data)
        return {"status": "ok"}

    raise fastapi.HTTPException(status_code=400, detail="Unknown event type")

def verify_signature(secret_key: str, payload: str, timestamp: str, received_signature: str) -> bool:
    signature_data = f"{timestamp}.{payload}"
    computed_hash = hmac.new(secret_key.encode(), signature_data.encode(), hashlib.sha256)
    computed_signature = computed_hash.hexdigest()
    return hmac.compare_digest(computed_signature, received_signature)

def add_item(event_data: dict[str, typing.Any]) -> None:
    # 이벤트를 처리하고 항목을 추가하기 위한 플레이스홀더 로직입니다.
    # 실제 애플리케이션에서는 이 함수가 데이터베이스나 인벤토리 시스템과 상호작용합니다.
    player_id = event_data["player_id"]
    for item in event_data["items"]:
      sku = item["sku"]
      print(f"Item {sku} has been credited to player's {player_id} account.")

def remove_item(event_data: dict[str, typing.Any]) -> None:
    # 이벤트를 처리하고 항목을 제거하기 위한 플레이스홀더 로직입니다.
    # 실제 애플리케이션에서는 이 함수가 데이터베이스나 인벤토리 시스템과 상호작용합니다.
    player_id = event_data["player_id"]
    for item in event_data["items"]:
      sku = item["sku"]
      print(f"Item {sku} has been removed from player's {player_id} account.")

if __name__ == "__main__":
    import uvicorn
    uvicorn.run(app, host="0.0.0.0", port=8000)
# 통합에서 웹훅 이벤트를 처리하기 위해 이 샘플 코드를 사용하세요.
#
# 1. 이 코드를 `server.rb`라는 새 파일에 붙여 넣으세요.
#
# 2. 의존성 설치:
#    gem install sinatra json hmac
#
# 3. http://localhost:8000에서 서버를 실행합니다
#    ruby server.rb

require 'sinatra'
require 'json'
require 'openssl'

post '/webhook' do
  secret_key = "<YOUR_S2S_KEY>"  # 실제 웹훅 비밀 키로 교체하세요

  payload = request.body.read
  timestamp = request.env["HTTP_X_AGHANIM_SIGNATURE_TIMESTAMP"]
  received_signature = request.env["HTTP_X_AGHANIM_SIGNATURE"]

  unless verify_signature(secret_key, payload, timestamp, received_signature)
    halt 403, "Invalid signature"
  end

  data = JSON.parse(payload)
  event_type = data["event_type"]
  event_data = data["event_data"]

  if event_type == "item.add"
    add_item(event_data)
    return { status: "ok" }.to_json
  end

  if event_type == "item.remove"
    remove_item(event_data)
    return { status: "ok" }.to_json
  end

  halt 400, "Unknown event type"
end

def verify_signature(secret_key, payload, timestamp, received_signature)
  signature_data = "#{timestamp}.#{payload}"
  computed_signature = OpenSSL::HMAC.hexdigest('sha256', secret_key, signature_data)
  OpenSSL.secure_compare(computed_signature, received_signature)
end

def add_item(event_data)
  # 이벤트를 처리하고 항목을 추가하기 위한 플레이스홀더 로직입니다.
  # 실제 애플리케이션에서는 이 함수가 데이터베이스나 인벤토리 시스템과 상호작용합니다.
  player_id = event_data["player_id"]
  for item in event_data["items"] do
    sku = item["sku"]
    puts "Item #{sku} has been credited to player's #{player_id} account."
  end
end

def remove_item(event_data)
  # 이벤트를 처리하고 항목을 제거하기 위한 플레이스홀더 로직입니다.
  # 실제 애플리케이션에서는 이 함수가 데이터베이스나 인벤토리 시스템과 상호작용합니다.
  player_id = event_data["player_id"]
  for item in event_data["items"] do
    sku = item["sku"]
    puts "Item #{sku} has been removed from player's #{player_id} account."
  end
end

if __FILE__ == $0
  require 'sinatra'
  set :bind, '0.0.0.0'
  set :port, 8000
end
// 통합에서 웹훅 이벤트를 처리하기 위해 이 샘플 코드를 사용하세요.
//
// 1. 이 코드를 새로운 파일 `server.js`에 붙여 넣으세요.
//
// 2. 의존성 설치:
//    npm install express
//
// 3. http://localhost:8000에서 서버를 실행합니다
//    node server.js

const express = require('express');
const crypto = require('crypto');

const app = express();

app.post('/webhook', express.raw({ type: "*/*" }), async (req, res) => {
  const secretKey = '<YOUR_S2S_KEY>'; // 실제 웹훅 비밀 키로 교체하세요

  const rawPayload = req.body;
  const timestamp = req.headers['x-aghanim-signature-timestamp'];
  const receivedSignature = req.headers['x-aghanim-signature'];

  if (!verifySignature(secretKey, rawPayload, timestamp, receivedSignature)) {
    return res.status(403).send('Invalid signature');
  }

  const payload = JSON.parse(req.body);
  const { event_type, event_data } = payload;

  if (event_type === 'item.add') {
    addItem(event_data);
    return res.json({ status: 'ok' });
  }

  if (event_type === 'item.remove') {
    removeItem(event_data);
    return res.json({ status: 'ok' });
  }

  return res.status(400).send('Unknown event type');
});

function verifySignature(secretKey, payload, timestamp, receivedSignature) {
  const signatureData = `${timestamp}.${payload}`;
  const computedSignature = crypto
    .createHmac('sha256', secretKey)
    .update(signatureData)
    .digest('hex');
  return crypto.timingSafeEqual(Buffer.from(computedSignature), Buffer.from(receivedSignature));
}

function addItem(event_data) {
  // 이벤트를 처리하고 항목을 추가하기 위한 플레이스홀더 로직입니다.
  // 실제 애플리케이션에서는 이 함수가 데이터베이스나 인벤토리 시스템과 상호작용합니다.
  const playerId = event_data.player_id;
  for (const item of event_data.items) {
    const sku = item.sku;
    console.log(`Item ${item.sku} has been credited to player's ${playerId} account.`);
 }
}

function removeItem(event_data) {
  // 이벤트 처리 및 항목 제거를 위한 플레이스홀더 로직입니다.
  // 실제 애플리케이션에서는 이 함수가 데이터베이스나 인벤토리 시스템과 상호작용합니다.
  const playerId = event_data.player_id;
  for (const item of event_data.items) {
    const sku = item.sku;
    console.log(`Item ${item.sku} has been removed from player's ${playerId} account.`);
 }
}

app.listen(8000, () => {
  console.log('Server is running on http://localhost:8000');
});
// 통합에서 웹훅 이벤트를 처리하기 위한 샘플 코드입니다.
//
// 1. 이 코드를 새로운 파일 `server.go`에 붙여넣으세요.
//
// 2. http://localhost:8000에서 서버를 실행하세요
//    go run server.go

package main

import (
  "crypto/hmac"
  "crypto/sha256"
  "encoding/hex"
  "encoding/json"
  "fmt"
  "io/ioutil"
  "net/http"
)

func webhookHandler(w http.ResponseWriter, r *http.Request) {
  secretKey := "<YOUR_S2S_KEY>"  // 실제 웹훅 비밀 키로 교체하세요

  rawPayload, _ := ioutil.ReadAll(r.Body)
  payload := string(rawPayload)
  timestamp := r.Header.Get("X-Aghanim-Signature-Timestamp")
  receivedSignature := r.Header.Get("X-Aghanim-Signature")

  if !verifySignature(secretKey, payload, timestamp, receivedSignature) {
    http.Error(w, "Invalid signature", http.StatusForbidden)
    return
  }

  var data map[string]interface{}
  if err := json.Unmarshal(rawPayload, &data); err != nil {
    http.Error(w, "Invalid payload", http.StatusBadRequest)
    return
  }

  eventType := data["event_type"].(string)
  eventData := data["event_data"].(map[string]interface{})

  if eventType == "item.add" {
    addItem(eventData)
    w.WriteHeader(http.StatusOK)
    json.NewEncoder(w).Encode(map[string]string{"status": "ok"})
    return
  }

  if eventType == "item.remove" {
    removeItem(eventData)
    w.WriteHeader(http.StatusOK)
    json.NewEncoder(w).Encode(map[string]string{"status": "ok"})
    return
  }

  http.Error(w, "Unknown event type", http.StatusBadRequest)
}

func verifySignature(secretKey, payload, timestamp, receivedSignature string) bool {
  signatureData := fmt.Sprintf("%s.%s", timestamp, payload)
  mac := hmac.New(sha256.New, []byte(secretKey))
  mac.Write([]byte(signatureData))
  computedSignature := hex.EncodeToString(mac.Sum(nil))
  return hmac.Equal([]byte(computedSignature), []byte(receivedSignature))
}

func addItem(eventData map[string]interface{}) {
  // 이벤트를 처리하고 항목을 추가하기 위한 플레이스홀더 로직입니다.
  // 실제 애플리케이션에서는 이 함수가 데이터베이스나 인벤토리 시스템과 상호작용합니다.
  playerID := eventData["player_id"].(string)
  items := eventData["items"].([]interface{})
  for _, item := range items {
    itemMap := item.(map[string]interface{})
    sku := itemMap["sku"].(string)
    fmt.Printf("Item %s has been credited to player's %s account.\\n", sku, playerID)
  }
}

func removeItem(eventData map[string]interface{}) {
  // 이벤트 처리 및 항목 제거를 위한 플레이스홀더 로직입니다.
  // 실제 애플리케이션에서는 이 함수가 데이터베이스나 인벤토리 시스템과 상호작용합니다.
  playerID := eventData["player_id"].(string)
  items := eventData["items"].([]interface{})
  for _, item := range items {
    itemMap := item.(map[string]interface{})
    sku := itemMap["sku"].(string)
    fmt.Printf("Item %s has been removed from player's %s account.\\n", sku, playerID)
  }
}

func main() {
  http.HandleFunc("/webhook", webhookHandler)
  fmt.Println("Server is running on http://localhost:8000")
  http.ListenAndServe(":8000", nil)
}
Add webhook endpoint to Aghanim
When the webhook handling is ready, add the endpoint to the account so the Aghanim could start sending the events.
- Dashboard
- API
- Go to Integration → Webhooks.
- Click Add webhook. The site will open the Create webhook window.
- Copy and paste the URL
https://<YOUR_DOMAIN>/webhook. - Click Select events. The site will open the Select events to send window.
- Expand the Main class and select the Item add, Item remove checkboxes.
- Click Apply.
- Click Add. The site will redirect you to the webhook page.
- Click Back.
- cURL
- Python
- Ruby
- Node.js
- Go
curl -X POST https://api.aghanim.com/s2s/v1/webhooks \
  -H 'Content-Type: application/json' \
  -H 'Authorization: Bearer <YOUR_S2S_KEY>' \
  -d '{
    "events": [
      "item.add",
      "item.remove"
    ],
    "url": "https://<YOUR_DOMAIN>/webhook",
    "description": "The endpoint for all webhooks",
    "method": "POST",
    "enabled": true,
    "enabled_logs": true,
    "player_context_enabled": true
  }'
import requests

def create_webhook():
    payload = {
        "events": ["item.add", "item.remove"],
        "url": "https://<YOUR_DOMAIN>/webhook",
        "description": "The endpoint for all webhooks",
        "method": "POST",
        "enabled": True,
        "enabled_logs": True,
        "player_context_enabled": True
    }

    headers = {"Authorization": "Bearer <YOUR_S2S_KEY>", "Content-Type": "application/json"}
    resp = requests.post("https://api.aghanim.com/s2s/v1/webhooks", json=payload, headers=headers)
    return resp.json()
require 'net/http'
require 'json'
require 'uri'

def create_webhook
  uri = URI("https://api.aghanim.com/s2s/v1/webhooks")
  req = Net::HTTP::Post.new(uri, 'Content-Type' => 'application/json', 'Authorization' => 'Bearer <YOUR_S2S_KEY>')
  req.body = {
    events: ["item.add", "item.remove"],
    url: "https://<YOUR_DOMAIN>/webhook",
    description: "The endpoint for all webhooks",
    method: "POST",
    enabled: true,
    enabled_logs: true,
    player_context_enabled: true
  }.to_json

  res = Net::HTTP.start(uri.hostname, uri.port, use_ssl: true) { |http| http.request(req) }
  JSON.parse(res.body)
end
const axios = require('axios');

async function createWebhook() {
  const payload = {
    events: ["item.add", "item.remove"],
    url: "https://<YOUR_DOMAIN>/webhook",
    description: "The endpoint for all webhooks",
    method: "POST",
    enabled: true,
    enabled_logs: true,
    player_context_enabled: true
  };

  const res = await axios.post('https://api.aghanim.com/s2s/v1/webhooks', payload, {
    headers: { 'Authorization': 'Bearer <YOUR_S2S_KEY>', 'Content-Type': 'application/json' }
  });
  return res.data;
}
package main

import (
	"bytes"
	"encoding/json"
	"net/http"
)

func createWebhook() map[string]interface{} {
	payload := map[string]interface{}{
		"events":                 []string{"item.add", "item.remove"},
		"url":                    "https://<YOUR_DOMAIN>/webhook",
		"description":            "The endpoint for all webhooks",
		"method":                 "POST",
		"enabled":                true,
		"enabled_logs":           true,
		"player_context_enabled": true,
	}
	data, _ := json.Marshal(payload)

	req, _ := http.NewRequest("POST", "https://api.aghanim.com/s2s/v1/webhooks", bytes.NewBuffer(data))
	req.Header.Set("Authorization", "Bearer <YOUR_S2S_KEY>")
	req.Header.Set("Content-Type", "application/json")

	client := &http.Client{}
	resp, _ := client.Do(req)
	defer resp.Body.Close()

	var webhook map[string]interface{}
	json.NewDecoder(resp.Body).Decode(&webhook)
	return webhook
}
Test your integration
After you have handled the webhooks, check that the purchased items are in your inventory. That’s all.
Next steps
- See Currency codes and minor units to learn how the Aghanim represents monetary amounts.
- See Payment Webhook to learn about the payment progress when the player visits the payment form.
FAQ
The Swift SDK targets iOS 13.0 and higher. It supports both physical devices (arm64) and the iOS Simulator (arm64 + x86_64). macOS, Mac Catalyst, tvOS, watchOS, and visionOS are not supported.
The AghanimPresenter protocol decouples the SDK from how your app composes its window hierarchy. The bundled KeyWindowPresenter works well for single-scene apps; in SwiftUI you can also read the presenter from the environment via .aghanimCheckoutPresenter() applied to a view inside a specific scene.
For apps that connect more than one foreground scene at the same time (multi-window iPad apps, multitasking-aware apps, Catalyst-style layouts), implement your own AghanimPresenter that returns the view controller of the scene you want to present from, then pass that instance to startCheckout(_:mode:) for that scene's checkout calls.
Both flows are supported and you can mix them.
Server-driven (recommended for games with a backend): Configure the item.add webhook in the Aghanim Dashboard. Aghanim calls your server when an order is paid; your server grants the items to the player. The client SDK is only responsible for launching the Checkout and routing the redirect.
Client-driven (for games without a dedicated server): Use aghanim.orders.getUnconsumed() on app launch and after the player returns from checkout to find paid orders the player hasn't been credited for yet, call aghanim.orders.consume(orderId:) for each one, and grant the items once the consume succeeds.
Pick server-driven when you can — webhooks survive the player closing your app mid-flow and don't require the player to re-open it before the grant happens.
The Checkout integration mode that works in an in-app Safari browser (SFSafariViewController) presented over your app for the seamless players' experience.
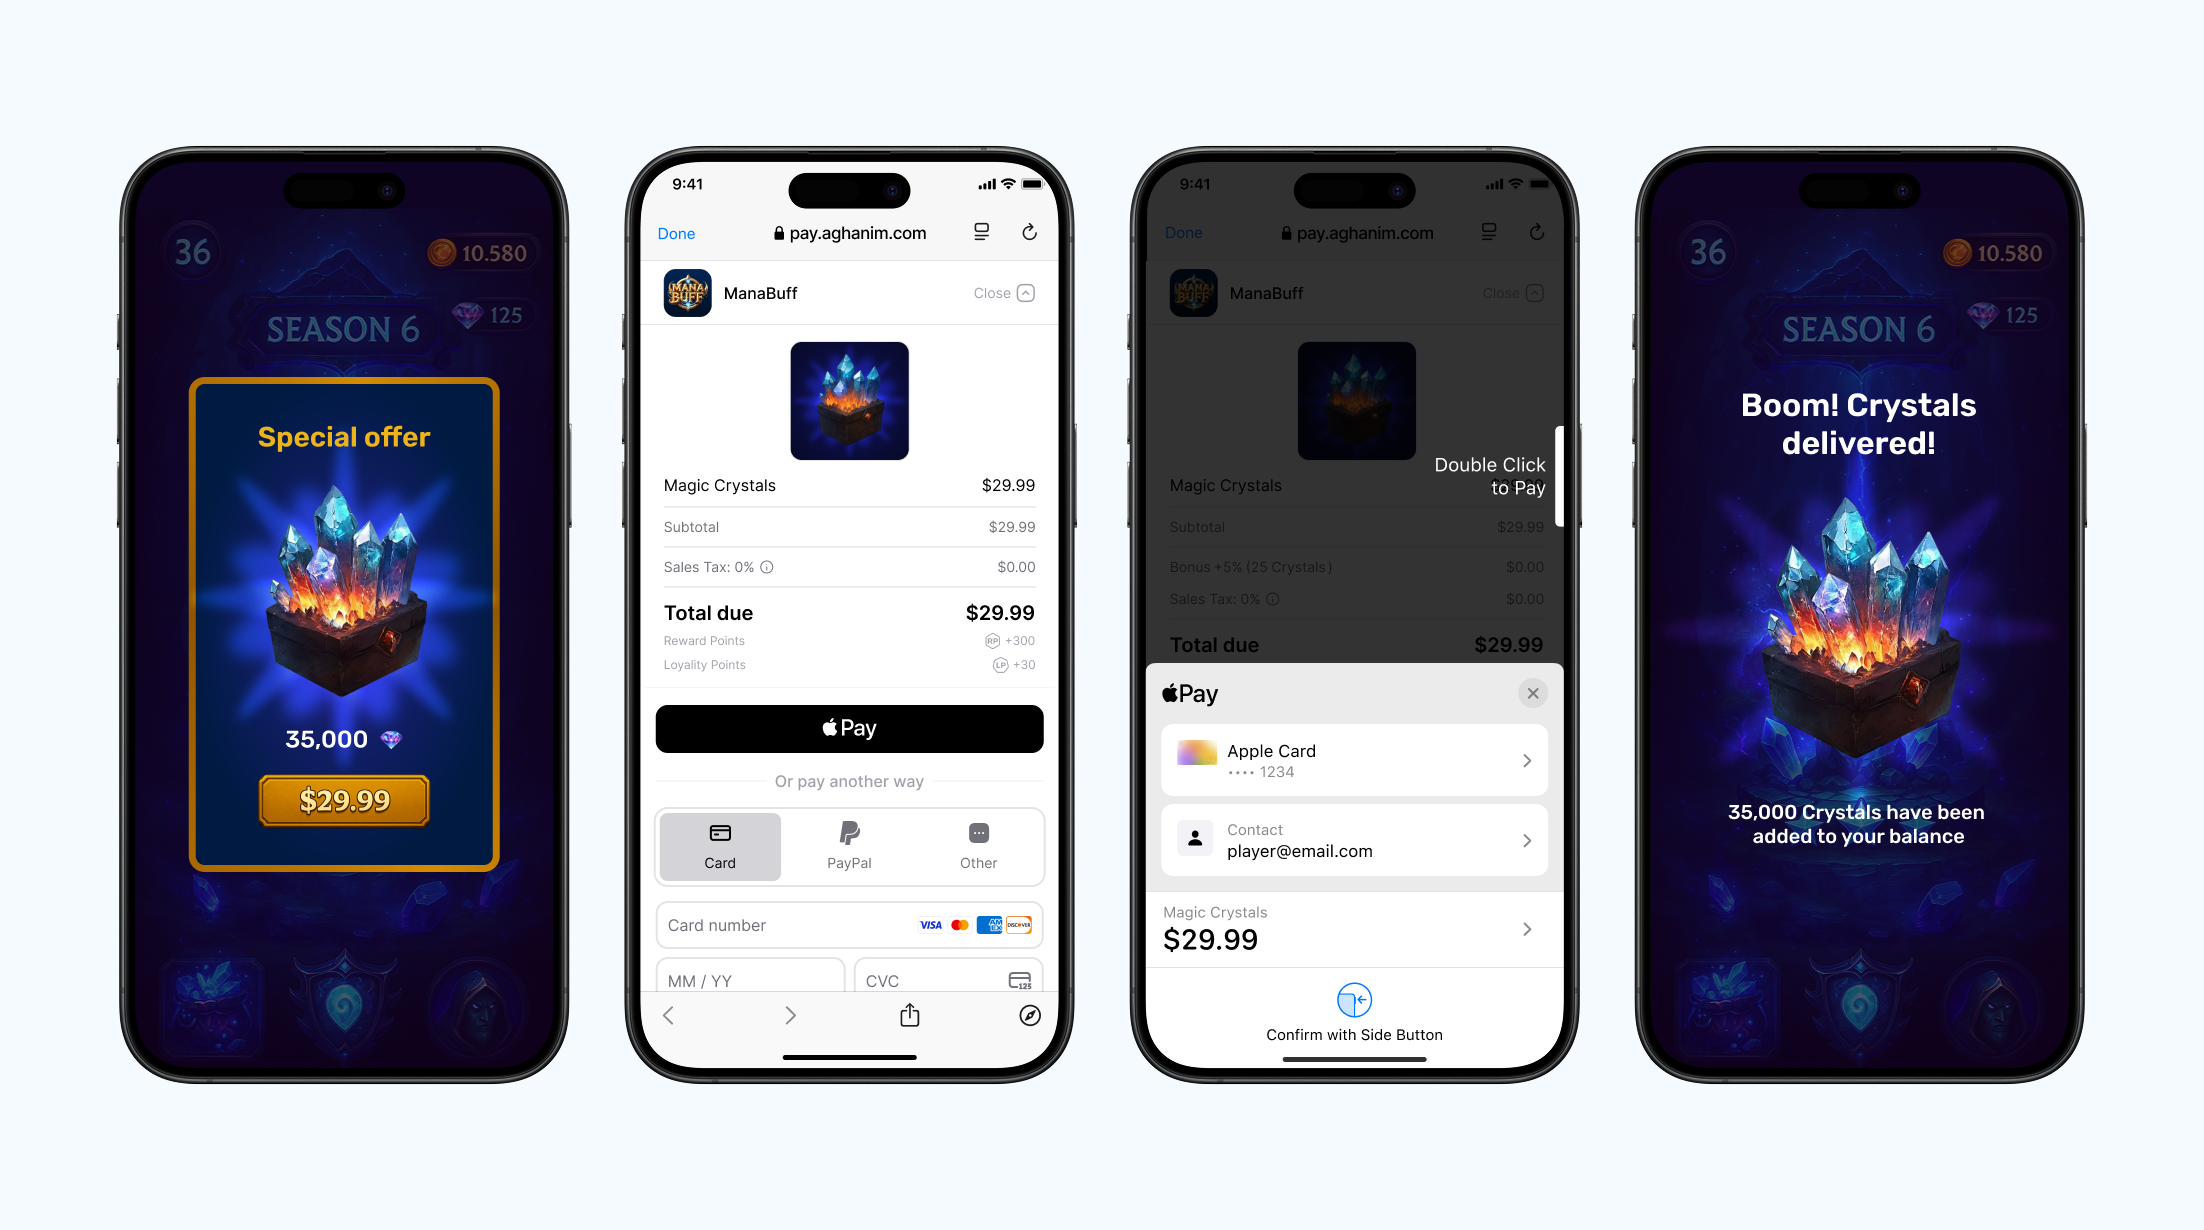
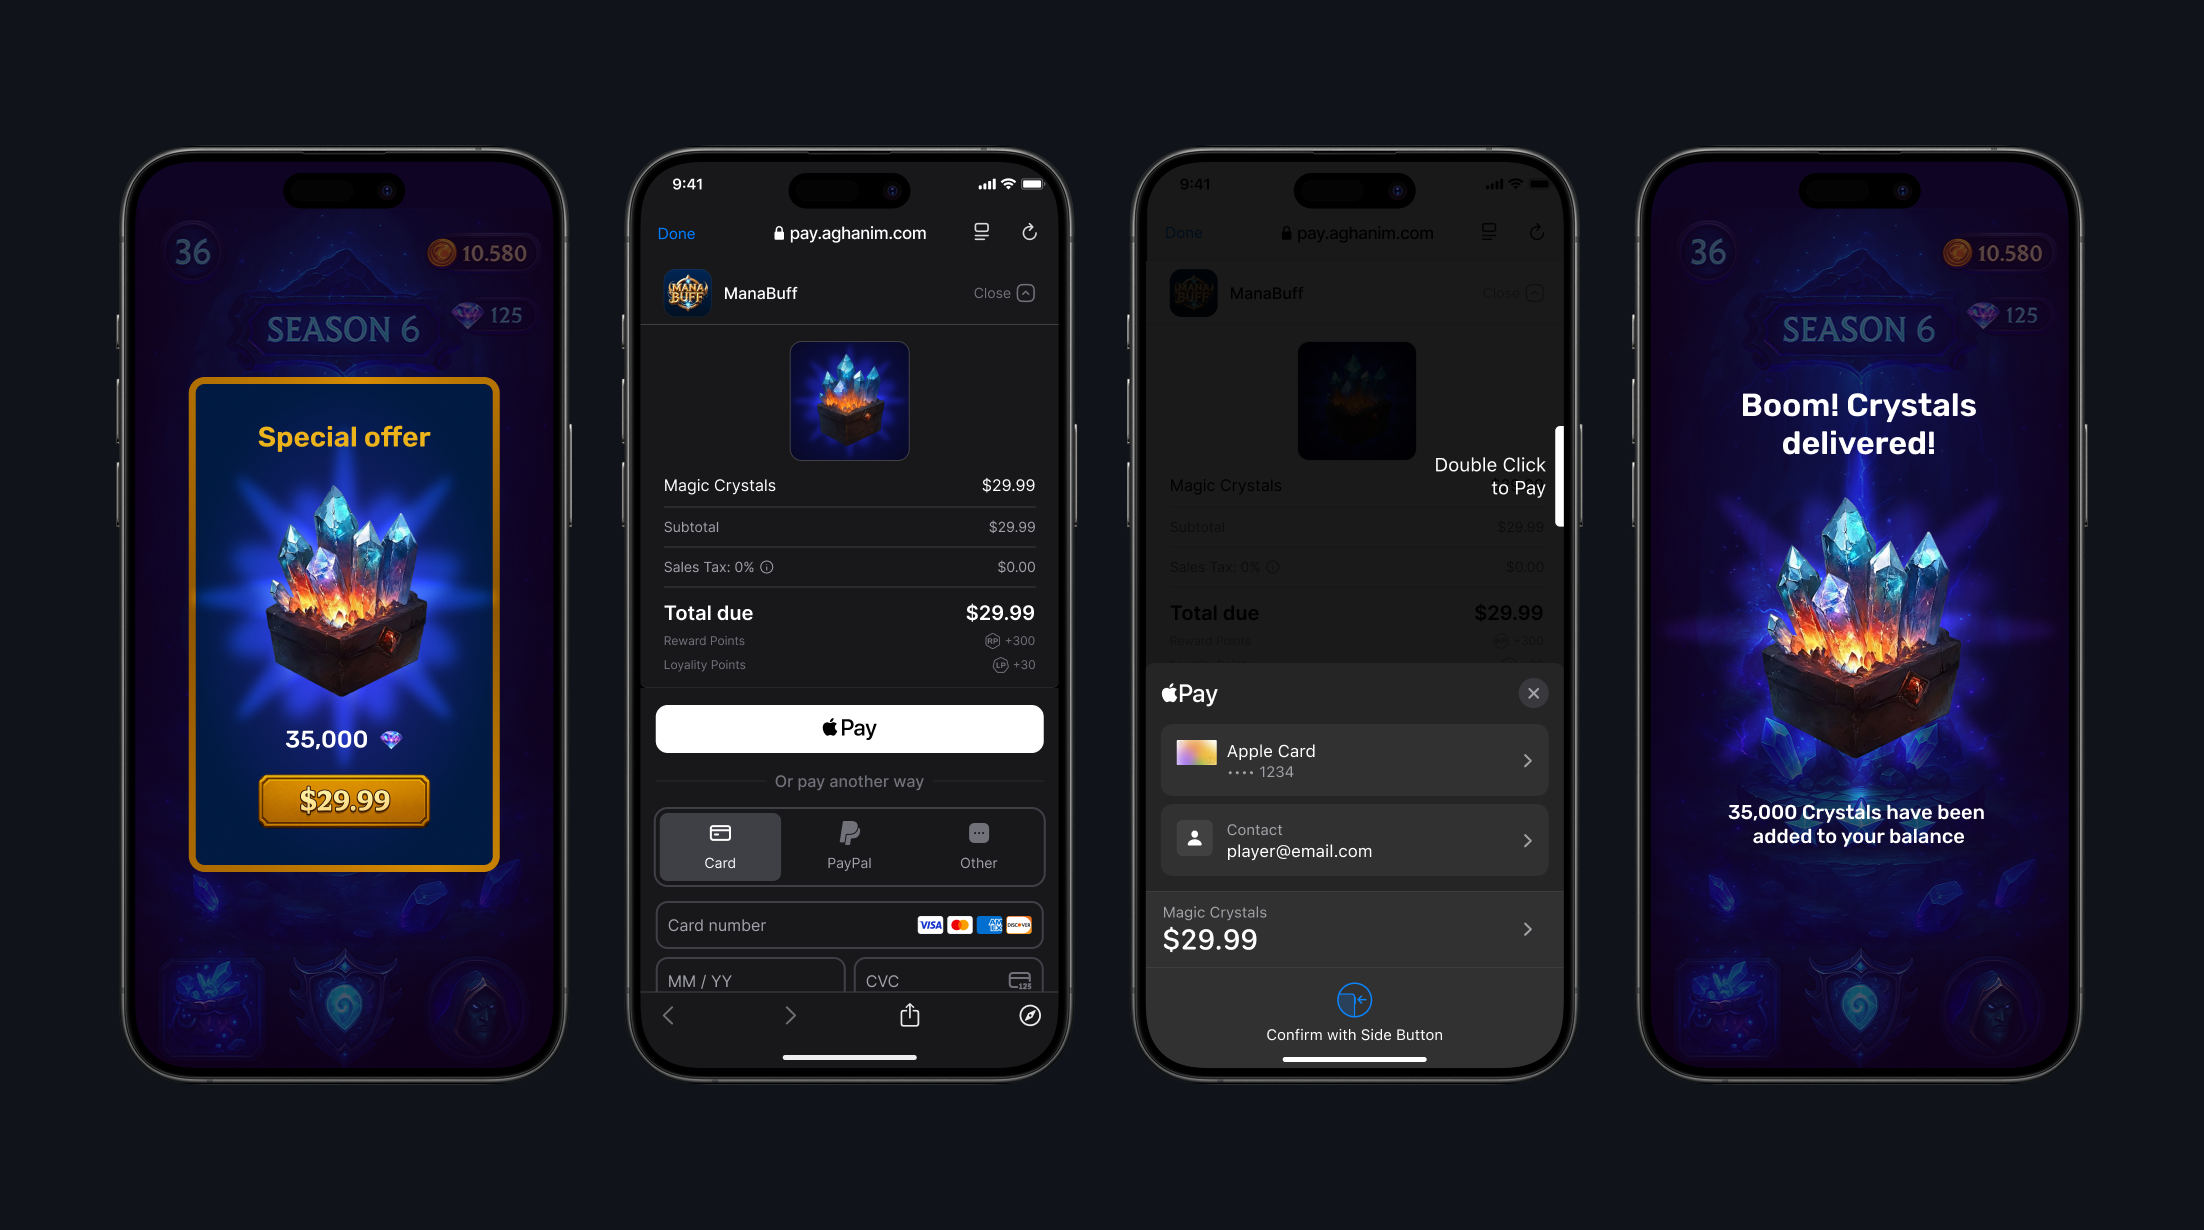
Register with Aghanim and link your game
First, register for an Aghanim account. At the end of registration, add the link to your mobile game. It should be published in Apple App Store or Google Play Store.
Set up environment
If you want to make real payments, you are all set as the live mode is used as default. Otherwise, use a sandbox, an isolated test environment, to simulate the Aghanim events to test payments without real money movement. To turn on the sandbox mode, set the Sandbox toggle to the active position.
Sandbox supports card payments only. Alternative methods (PayPal, wallets, local payment methods) appear only in live. See Test payments for the test cards.
While integrating, you will need an SDK key to authenticate requests to the Aghanim. Keep in mind that the sandbox and live modes have different keys. Find the SDK key in Integration → API keys.
Configure game client-side
Configure your game client to work with the Checkout by setting up the SDK and implementing the necessary code to process its methods.
Install SDK
To install the Swift SDK, download the latest XCFramework bundle from the Aghanim Artifact Registry, verify its checksum, and embed the frameworks in your Xcode project.
- XCFramework
VERSION="1.2.0"
BUNDLE="swift-sdk-v${VERSION}-xcframeworks.zip"
EXPECTED_SHA256="152ec7da96abf098aee5301a6515d9502694deb629d134b4cc188c4c13f1cb21"

# Download the XCFramework bundle.
curl -L -o "${BUNDLE}" \
  "https://artifactregistry.googleapis.com/v1/projects/ag-registry/locations/us-central1/repositories/swift-sdk/files/swift-sdk:v${VERSION}:${BUNDLE}:download?alt=media"

# Verify the SHA-256 against the value published in the release notes.
ACTUAL_SHA256=$(shasum -a 256 "${BUNDLE}" | awk '{print $1}')
if [ "${ACTUAL_SHA256}" != "${EXPECTED_SHA256}" ]; then
  echo "Checksum mismatch — aborting." >&2
  exit 1
fi

# Unzip alongside your Xcode project.
unzip -q "${BUNDLE}" -d swift-sdk
The bundle contains seven XCFrameworks. Drag every .xcframework directory into your Xcode project, then in General → Frameworks, Libraries, and Embedded Content set each one to Embed & Sign.
| Framework | Role |
|---|---|
AghanimCheckout.xcframework | Umbrella entry point. Re-exports the modules below so you can import AghanimCheckout. |
AghanimCheckoutDefaultBrowser.xcframework | Default-browser launch mode (external Safari via UIApplication.open). |
AghanimCheckoutInAppBrowser.xcframework | In-app browser launch mode (SFSafariViewController). |
AghanimCheckoutWebView.xcframework | WebView launch mode (WKWebView in an SDK-owned bottom sheet). |
AghanimCheckoutCore.xcframework | Shared checkout types: CheckoutParams, CheckoutItem, AghanimPresenter, and the handleRedirect(_:) method. |
AghanimCore.xcframework | Aghanim actor, AghanimConfig, ApiKey, ApiError, OrdersAPI, ItemsAPI, PricePointsAPI, and the Order, Item and PricePoint models. |
AghanimLogging.xcframework | Logger protocol, OSLogLogger, LogLevel. |
Each framework ships ad-hoc signed; Embed & Sign re-signs them with your team identity at build time.
If you ship release-mode builds and want symbolicated crash reports, also download swift-sdk-v1.2.0-dSYMs.zip from the same Artifact Registry repository and add the .dSYM directories to your crash-reporter pipeline. They are not needed for development.
Initialize SDK
Build an AghanimConfig with your API key, then construct the Aghanim actor and hold it for the lifetime of the process. The SDK is designed to be instantiated once at app launch.
ApiKey(_:) is failable and rejects a blank key, so unwrap it before building the config.
- SwiftUI
- UIKit
- Swift
import SwiftUI
import AghanimCheckout

@main
struct MyGameApp: App {
    @StateObject private var session = GameSession(aghanim: Self.makeAghanim())

    var body: some Scene {
        WindowGroup {
            RootView()
                .environmentObject(session)
                .aghanimCheckoutPresenter()
        }
    }

    private static func makeAghanim() -> Aghanim {
        guard let apiKey = ApiKey("YOUR_API_KEY") else {
            fatalError("API key cannot be blank.")
        }
        let config = AghanimConfig.builder(apiKey: apiKey)
            .with(logLevel: .debug)
            .build()
        return Aghanim(config: config)
    }
}

@MainActor
final class GameSession: ObservableObject {
    let aghanim: Aghanim

    init(aghanim: Aghanim) {
        self.aghanim = aghanim
    }
}
- Swift
import UIKit
import AghanimCheckout

@main
final class AppDelegate: UIResponder, UIApplicationDelegate {

    static let aghanim: Aghanim = makeAghanim()
    static let presenter = KeyWindowPresenter()

    func application(
        _ application: UIApplication,
        didFinishLaunchingWithOptions launchOptions: [UIApplication.LaunchOptionsKey: Any]?
    ) -> Bool {
        true
    }

    private static func makeAghanim() -> Aghanim {
        guard let apiKey = ApiKey("YOUR_API_KEY") else {
            fatalError("API key cannot be blank.")
        }
        let config = AghanimConfig.builder(apiKey: apiKey)
            .with(logLevel: .debug)
            .build()
        return Aghanim(config: config)
    }
}
AghanimConfig.builder(apiKey:) defaults to LogLevel.warning and OSLogLogger(). Call .with(logLevel: .debug) during development to see SDK lifecycle and network activity in the console.
With the SDK, you can read its logs from one of the supported levels. By default the SDK writes them through OSLogLogger, which routes into the unified logging system you already read in Console and Xcode.
- Simple
- Advanced
The simple usage of the SDK log messages means setting the log level you are interested in the most:
.debug: detailed debug information on almost every event..info: general information on the SDK instance state and its events..warning: warnings and recoverable errors. Used by default..error: critical and fatal errors..none: no logging.
- Swift
let config = AghanimConfig.builder(apiKey: apiKey)
    .with(logLevel: .debug)
    .build()
You can reroute the SDK logs to the system you have chosen for logging. Implement the Logger protocol and pass it to .with(logger:). The level filter still applies, so a message below the configured level never reaches your logger.
- Swift
import AghanimCheckout
import AghanimLogging

struct GameLogger: AghanimLogging.Logger {
    func d(_ message: String, error: (any Error)?) {
        // TODO: Send debug messages to your logging system
    }

    func i(_ message: String, error: (any Error)?) {
        // TODO: Send info messages to your logging system
    }

    func w(_ message: String, error: (any Error)?) {
        // TODO: Send warning messages to your logging system
    }

    func e(_ message: String, error: (any Error)?) {
        // TODO: Send error messages to your logging system
    }
}

func makeConfig(apiKey: ApiKey) -> AghanimConfig {
    AghanimConfig.builder(apiKey: apiKey)
        .with(logger: GameLogger())
        .with(logLevel: .debug)
        .build()
}
The SDK marks its log values as private, so the unified logging system redacts them. A custom Logger receives the message already interpolated, so whatever you forward to a third-party service leaves the device unredacted.
Configure player ID
Since a mobile game has one instance per device, the SDK allows to set the player ID once to use it in all following method calls.
When your game client has the player ID, set it for the current SDK instance. The call is async throws. Surrounding whitespace is trimmed, and a blank or whitespace-only ID is rejected with ApiError.invalidArgument. When the player signs out, call clearPlayerId() so the SDK stops attaching the previous identity to API requests.
- SwiftUI
- UIKit
- Swift
import SwiftUI
import AghanimCheckout

struct SignInView: View {
    @EnvironmentObject private var session: GameSession

    var body: some View {
        Button("Sign in") {
            Task {
                let playerId = await authenticatePlayer()
                do {
                    try await session.aghanim.setPlayerId(playerId)
                } catch {
                    // Surface to the user as a sign-in error.
                }
            }
        }
    }

    private func signOut() {
        Task {
            await session.aghanim.clearPlayerId()
        }
    }
}
- Swift
import UIKit
import AghanimCheckout

final class SignInViewController: UIViewController {

    private func signIn() {
        Task {
            let playerId = await authenticatePlayer()
            do {
                try await AppDelegate.aghanim.setPlayerId(playerId)
            } catch {
                // Surface to the user as a sign-in error.
            }
        }
    }

    private func signOut() {
        Task {
            await AppDelegate.aghanim.clearPlayerId()
        }
    }
}
Every call that needs a player throws ApiError.playerIdNotSet without one: aghanim.orders.getUnconsumed(), aghanim.orders.consume(orderId:), and all three startCheckout launch modes. Set the player ID immediately after authentication. aghanim.orders.get(id:) and presentCheckout do not need one.
Create item
The integration needs the items to be added to the Dashboard. When creating items, each should have its SKU, a unique identifier for the item within your game backend. You can add their prices, currency, sale configuration, and more.
To add an item to the Dashboard:
- Go to SKU Management → Items.
- Click Add Item. The site will open the Add Item page.
- Enter the item name New item.
- Enter the item SKU items.new.ba68a028-2d51-46b4-a854-68fc16af328a.
- In the Price block:
- Select the Fiat price type for a real money item.
- Enter the price 1.99.
- Click Add item.
For integration purposes, we have shortened an item setup. Before going live, use every suitable feature while adding items to the Dashboard.
Get items with localized prices
The SDK retrieves items created in the Dashboard with prices localized to the player's region. Use it to show accurate prices in your in-game store before the player proceeds to the Checkout.
- Swift
let items = try await aghanim.items.get(skus: [
    "items.new.ba68a028-2d51-46b4-a854-68fc16af328a",
    "items.new.1f2c4d16-9b83-4b52-9e0d-72f3a1c5d904",
])

for storeItem in items {
    // Use name, price.display and imageUrl to populate your store.
    print("\(storeItem.name): \(storeItem.price.display)")
}
Ask for as many SKUs as your store needs: there is no SKU-count cap to work around. Duplicates are collapsed, items come back in the order you asked for them, and a SKU that is not in the catalog is left out of the result rather than failing the whole call. An empty array throws ApiError.invalidArgument.
Create Checkout item
Create a CheckoutItem value that references the SKU you added to the Dashboard. sku is the only required field; name, description, and imageUrl override the catalog entry for this Order.
- Swift
let item = CheckoutItem(sku: "items.new.ba68a028-2d51-46b4-a854-68fc16af328a")
Configure deep links
The In-app browser launches the Checkout inside an SFSafariViewController presented over your app. After payment, the SDK needs a deep link to know that the player has returned. Configure that deep link so iOS can route the post-payment URL into your app.
- Universal Links
- Custom URL schemes
With Universal Links, the player goes directly to the app without an OS confirmation dialog. Universal Links use standard HTTPS URLs that iOS validates against the Apple App Site Association (AASA) file hosted on your domain. This is the recommended approach for production.
Create a variable for the deep link URL. We will use it later.
- Swift
let backToGameUrl = "https://yourdomain.com/checkout/return"
Host an apple-app-site-association file at https://<YOUR_DOMAIN>/.well-known/apple-app-site-association. The file must be served over HTTPS with Content-Type: application/json, with no redirects.
- apple-app-site-association
{
  "applinks": {
    "details": [
      {
        "appIDs": ["ABCDE12345.com.yourcompany.yourgame"],
        "components": [
          {
            "/": "/checkout/return*"
          }
        ]
      }
    ]
  }
}
Add the Associated Domains capability to your target in Xcode and list the domain there.
- App.entitlements
<?xml version="1.0" encoding="UTF-8"?>
<!DOCTYPE plist PUBLIC "-//Apple//DTD PLIST 1.0//EN" "http://www.apple.com/DTDs/PropertyList-1.0.dtd">
<plist version="1.0">
<dict>
    <key>com.apple.developer.associated-domains</key>
    <array>
        <string>applinks:yourdomain.com</string>
    </array>
</dict>
</plist>
When the player returns via the Universal Link, iOS hands the URL to your app. Pass it to aghanim.handleRedirect(_:).
- SwiftUI
- UIKit
- Swift
import SwiftUI
import AghanimCheckout

struct RootView: View {
    @EnvironmentObject private var session: GameSession

    var body: some View {
        ContentView()
            .onOpenURL { url in
                Task {
                    let handled = await session.aghanim.handleRedirect(url)
                    guard handled else { return }
                    // The player came back from a Checkout. Check unconsumed Orders to grant the purchase.
                }
            }
    }
}
- Swift
import UIKit
import AghanimCheckout

final class SceneDelegate: UIResponder, UIWindowSceneDelegate {
    func scene(
        _ scene: UIScene,
        continue userActivity: NSUserActivity
    ) {
        guard userActivity.activityType == NSUserActivityTypeBrowsingWeb,
              let url = userActivity.webpageURL else {
            return
        }
        Task {
            let handled = await AppDelegate.aghanim.handleRedirect(url)
            guard handled else { return }
            // The player came back from a Checkout. Check unconsumed Orders to grant the purchase.
        }
    }
}
Custom URL schemes may show a system dialog asking the player whether to open your app. They are easier to set up but don't provide the same security level as Universal Links, which makes them suitable for development and testing environments.
Create a variable for the deep link. We will use it later.
- Swift
let backToGameUrl = "yourgame://checkout/return"
Register the scheme in your app's Info.plist under CFBundleURLTypes. iOS will route any URL with this scheme to your app.
- Info.plist
<key>CFBundleURLTypes</key>
<array>
    <dict>
        <key>CFBundleTypeRole</key>
        <string>Editor</string>
        <key>CFBundleURLName</key>
        <string>com.yourcompany.yourgame.checkout</string>
        <key>CFBundleURLSchemes</key>
        <array>
            <string>yourgame</string>
        </array>
    </dict>
</array>
When the player returns via the custom scheme, iOS hands the URL to your app. Pass it to aghanim.handleRedirect(_:).
- SwiftUI
- UIKit
- Swift
import SwiftUI
import AghanimCheckout

struct RootView: View {
    @EnvironmentObject private var session: GameSession

    var body: some View {
        ContentView()
            .onOpenURL { url in
                Task {
                    let handled = await session.aghanim.handleRedirect(url)
                    guard handled else { return }
                    // The player came back from a Checkout. Check unconsumed Orders to grant the purchase.
                }
            }
    }
}
- Swift
import UIKit
import AghanimCheckout

final class SceneDelegate: UIResponder, UIWindowSceneDelegate {
    func scene(
        _ scene: UIScene,
        openURLContexts URLContexts: Set<UIOpenURLContext>
    ) {
        guard let url = URLContexts.first?.url else { return }
        Task {
            let handled = await AppDelegate.aghanim.handleRedirect(url)
            guard handled else { return }
            // The player came back from a Checkout. Check unconsumed Orders to grant the purchase.
        }
    }
}
Create Checkout params
When all data variables are ready, create another one that represents Checkout params. Checkout params are the programmatic representation of what the player sees when they are on the payment form. Checkout params are associated with a player and items, they are crucial for the Checkout to work. Pass the backToGameUrl you defined earlier so the SDK can dismiss the in-app browser when the player returns.
- Swift
let params = CheckoutParams(
    items: [item],
    backToGameUrl: backToGameUrl
)
You can attach custom metadata to the Checkout for item tracking purposes. You can access it through webhooks and in API responses from the Aghanim. Metadata has a structure of "key-value" pairs.
- Swift
let params = CheckoutParams(
    items: [item],
    metadata: [
        "campaign": "summer_sale",
        "ab_variant": "B"
    ],
    backToGameUrl: backToGameUrl
)
You can choose the behavior of redirecting the player after they have completed the payment successfully. The difference in the provided by the SDK modes is a delay before redirecting or absence of redirecting.
- Immediate
- Delayed
- No redirect
When the player has completed the payment, the SDK redirects them immediately to the deep link from backToGameUrl.
- Swift
let params = CheckoutParams(
    items: [item],
    backToGameUrl: backToGameUrl,
    redirectSettings: RedirectSettings(mode: .immediate)
)
When the player has completed the payment, the SDK shows the screen for the successful payment for the given number of seconds and then redirects the player to the deep link from backToGameUrl.
- Swift
let params = CheckoutParams(
    items: [item],
    backToGameUrl: backToGameUrl,
    redirectSettings: RedirectSettings(mode: .delayed, delaySeconds: 5)
)
When the player has completed the payment, they stay on the screen for the successful payment. To exit it, they manually close it or navigate away. After, you should redirect them to the deep link from backToGameUrl by yourself.
- Swift
let params = CheckoutParams(
    items: [item],
    backToGameUrl: backToGameUrl,
    redirectSettings: RedirectSettings(mode: .noRedirect)
)
You can set the appearance mode for the Checkout UI. The SDK supports automatic detection based on the system setting, or you can force a specific mode.
- Auto
- Dark
- Light
The SDK automatically detects and applies the appropriate appearance mode based on the system setting.
- Swift
let params = CheckoutParams(
    items: [item],
    backToGameUrl: backToGameUrl,
    uiSettings: CheckoutUiSettings(mode: .auto)
)
The SDK forces dark mode appearance for the Checkout UI.
- Swift
let params = CheckoutParams(
    items: [item],
    backToGameUrl: backToGameUrl,
    uiSettings: CheckoutUiSettings(mode: .dark)
)
The SDK forces light mode appearance for the Checkout UI.
- Swift
let params = CheckoutParams(
    items: [item],
    backToGameUrl: backToGameUrl,
    uiSettings: CheckoutUiSettings(mode: .light)
)
Launch Checkout
Add a checkout button to your game client that launches the payment form. The SDK creates an order from the provided checkout params and opens the Checkout inside an in-app Safari browser presented over your app. On success, you receive the Order ID to track the order. On failure, startCheckout throws an ApiError with debug information for troubleshooting.
The In-app browser mode takes an AghanimPresenter that tells the SDK which view controller to present from. In SwiftUI, the .aghanimCheckoutPresenter() modifier you applied to the root view publishes a presenter into the environment — read it with @Environment(\.aghanimCheckoutPresenter). In UIKit, instantiate KeyWindowPresenter() or implement your own AghanimPresenter.
Implement InAppBrowserCheckoutDelegate to be notified when the in-app browser closes — whether the player swiped down to dismiss it or the redirect returned them to your app.
- SwiftUI
- UIKit
- Swift
import SwiftUI
import AghanimCheckout

struct CheckoutButton: View {
    @EnvironmentObject private var session: GameSession
    @Environment(\.aghanimCheckoutPresenter) private var presenter
    let params: CheckoutParams

    var body: some View {
        Button("Buy") {
            Task {
                do {
                    let orderId = try await session.aghanim.startCheckout(
                        params,
                        mode: .inAppBrowser(presenter: presenter, delegate: CheckoutDelegate.shared)
                    )
                    // Track the order ID so you can reconcile the purchase after the player returns.
                    print("Aghanim checkout started for order \(orderId)")
                } catch {
                    // Log debug information for troubleshooting.
                    print("Aghanim checkout failed: \(error)")
                    // TODO: Surface the failure to the player.
                }
            }
        }
    }
}

@MainActor
final class CheckoutDelegate: InAppBrowserCheckoutDelegate {
    static let shared = CheckoutDelegate()
    func didCloseCheckout(orderId: String) {
        // The in-app Safari closed. Check unconsumed orders to see if the player paid.
    }
}
- Swift
import UIKit
import AghanimCheckout

final class CheckoutViewController: UIViewController, InAppBrowserCheckoutDelegate {

    private func launchCheckout(params: CheckoutParams) {
        Task {
            do {
                let orderId = try await AppDelegate.aghanim.startCheckout(
                    params,
                    mode: .inAppBrowser(presenter: AppDelegate.presenter, delegate: self)
                )
                // Track the order ID so you can reconcile the purchase after the player returns.
                print("Aghanim checkout started for order \(orderId)")
            } catch {
                // Log debug information for troubleshooting.
                print("Aghanim checkout failed: \(error)")
                // TODO: Surface the failure to the player.
            }
        }
    }

    func didCloseCheckout(orderId: String) {
        // The in-app Safari closed. Check unconsumed Orders to see if the player paid.
    }
}
Throwing SDK methods fail with an ApiError. Match on the case to decide what the player sees.
- Swift
do {
    let orderId = try await aghanim.startCheckout(params, mode: launchMode)
    print("Aghanim checkout started for order \(orderId)")
} catch let error as ApiError {
    switch error {
    case .playerIdNotSet:
        // Set the player ID after sign-in, then let the player retry.
        break
    case .invalidArgument(.presenter, _, _):
        // No window to present over: the app is backgrounded, or several scenes are
        // foreground-active. The Order was already created and its ID is not returned, so
        // check the presenter before launching rather than calling startCheckout again.
        break
    case let .invalidArgument(name, reason, _):
        // The SDK rejected an argument before the call reached the network.
        print("Aghanim rejected \(name): \(reason)")
        // TODO: Fix the value you passed.
    case let .validation(_, details):
        for detail in details {
            print("\(detail.location.joined(separator: ".")): \(detail.message)")
        }
    case .network, .timeout, .serverUnavailable:
        // Transient. Offer the player a retry.
        break
    case .rateLimitExceeded:
        // Back off before retrying.
        break
    case .notAuthenticated, .notAuthorized:
        // The API key is missing, wrong, or not permitted for this call. A retry will not help.
        break
    case .disposed:
        // This instance was disposed. Build a new one before calling again.
        break
    default:
        // Log debug information for troubleshooting.
        print("Aghanim checkout failed: \(error)")
    }
} catch is CancellationError {
    print("Aghanim checkout cancelled")
} catch {
    // Log debug information for troubleshooting.
    print("Aghanim checkout failed: \(error)")
}
ApiError.invalidArgument carries a typed name and reason so you can tell which argument the SDK rejected, and ApiError.validation carries one ValidationErrorDetail per field the server rejected. Cases that carry a payload include a debugMessage meant for your logs, not for the player.
Find the full list of cases in the Swift SDK reference.
Check unconsumed Orders
After the Checkout has launched and you have an Order ID, the player can step away from the payment form, complete the payment, or abandon it entirely. The launch call only confirms that the Order was created and the form opened — it does not tell you whether the player paid. To know which Orders the player has actually paid for and should be granted to them, ask the SDK for the list of unconsumed paid Orders.
- Swift
let unconsumedOrderIds = try await aghanim.orders.getUnconsumed()

for orderId in unconsumedOrderIds {
    do {
        try await aghanim.orders.consume(orderId: orderId)
    } catch {
        print("Aghanim could not consume order \(orderId): \(error)")
        continue
    }

    grantItems(forOrder: orderId) // TODO: Grant the items to the player
}
Consume paid Orders
Consume the Order the player has paid for, then grant its items once the consume succeeds. Consuming the same Order twice fails, so the grant runs only once.
- Swift
try await aghanim.orders.consume(orderId: orderId)
Full implementation code
- SwiftUI
- UIKit
- Swift
import SwiftUI
import AghanimCheckout

@main
struct MyGameApp: App {
    @StateObject private var session = GameSession(aghanim: Self.makeAghanim())

    var body: some Scene {
        WindowGroup {
            RootView()
                .environmentObject(session)
                .aghanimCheckoutPresenter()
                .onOpenURL { url in
                    Task {
                        let handled = await session.aghanim.handleRedirect(url)
                        guard handled else { return }
                        // The player came back from a Checkout. Check unconsumed Orders to grant the purchase.
                    }
                }
        }
    }

    private static func makeAghanim() -> Aghanim {
        guard let apiKey = ApiKey("YOUR_API_KEY") else {
            fatalError("API key cannot be blank.")
        }
        let config = AghanimConfig.builder(apiKey: apiKey)
            .with(logLevel: .debug)
            .build()
        return Aghanim(config: config)
    }
}

@MainActor
final class GameSession: ObservableObject {
    let aghanim: Aghanim
    init(aghanim: Aghanim) { self.aghanim = aghanim }
}

struct RootView: View {
    @EnvironmentObject private var session: GameSession
    @Environment(\.aghanimCheckoutPresenter) private var presenter

    var body: some View {
        Button("Buy") {
            Task { await buy() }
        }
    }

    private func buy() async {
        do {
            try await session.aghanim.setPlayerId("player_42")
            let item = CheckoutItem(sku: "items.new.ba68a028-2d51-46b4-a854-68fc16af328a")
            let params = CheckoutParams(
                items: [item],
                backToGameUrl: "https://yourdomain.com/checkout/return"
            )
            let orderId = try await session.aghanim.startCheckout(
                params,
                mode: .inAppBrowser(presenter: presenter, delegate: CheckoutDelegate.shared)
            )
            // Track the order ID so you can reconcile the purchase after the player returns.
            print("Aghanim checkout started for order \(orderId)")
        } catch {
            // Log debug information for troubleshooting.
            print("Aghanim checkout failed: \(error)")
            // TODO: Surface the failure to the player.
        }
    }
}

@MainActor
final class CheckoutDelegate: InAppBrowserCheckoutDelegate {
    static let shared = CheckoutDelegate()
    func didCloseCheckout(orderId: String) {
        // The in-app Safari closed. Check unconsumed orders to see if the player paid.
    }
}
- Swift
import UIKit
import AghanimCheckout

@main
final class AppDelegate: UIResponder, UIApplicationDelegate {

    static let aghanim: Aghanim = {
        guard let apiKey = ApiKey("YOUR_API_KEY") else {
            fatalError("API key cannot be blank.")
        }
        let config = AghanimConfig.builder(apiKey: apiKey)
            .with(logLevel: .debug)
            .build()
        return Aghanim(config: config)
    }()

    static let presenter = KeyWindowPresenter()
}

final class SceneDelegate: UIResponder, UIWindowSceneDelegate {

    // Universal Links.
    func scene(
        _ scene: UIScene,
        continue userActivity: NSUserActivity
    ) {
        guard userActivity.activityType == NSUserActivityTypeBrowsingWeb,
              let url = userActivity.webpageURL else { return }
        handle(url)
    }

    // Custom URL schemes.
    func scene(
        _ scene: UIScene,
        openURLContexts URLContexts: Set<UIOpenURLContext>
    ) {
        for context in URLContexts {
            handle(context.url)
        }
    }

    private func handle(_ url: URL) {
        Task {
            let handled = await AppDelegate.aghanim.handleRedirect(url)
            guard handled else { return }
            // The player came back from a Checkout. Check unconsumed Orders to grant the purchase.
        }
    }
}

final class CheckoutViewController: UIViewController, InAppBrowserCheckoutDelegate {

    @IBAction private func buyTapped() {
        Task { await buy() }
    }

    private func buy() async {
        do {
            try await AppDelegate.aghanim.setPlayerId("player_42")
            let item = CheckoutItem(sku: "items.new.ba68a028-2d51-46b4-a854-68fc16af328a")
            let params = CheckoutParams(
                items: [item],
                backToGameUrl: "https://yourdomain.com/checkout/return"
            )
            let orderId = try await AppDelegate.aghanim.startCheckout(
                params,
                mode: .inAppBrowser(presenter: AppDelegate.presenter, delegate: self)
            )
            // Track the order ID so you can reconcile the purchase after the player returns.
            print("Aghanim checkout started for order \(orderId)")
        } catch {
            // Log debug information for troubleshooting.
            print("Aghanim checkout failed: \(error)")
            // TODO: Surface the failure to the player.
        }
    }

    func didCloseCheckout(orderId: String) {
        // The in-app Safari closed. Check unconsumed Orders to see if the player paid.
    }
}
Make payment
Make a payment. If you have set the sandbox mode, use the test card below. In the sandbox, you can make payments only with the test cards — alternative methods like PayPal, wallets, and local payment methods appear only in the live environment. The test cards accept any digits as CVV and any future date as expiry date. Don’t forget to fill in an email address to check the receipt is sent and any postal code as a billing address.
Successful payments
After you complete the payment, you will receive a receipt sent to the specified email address and a transaction record in Aghanim Dashboard → Transactions.
| Card Brand | Card Number | CVV | Expiry date | Country |
|---|---|---|---|---|
| VISA (credit) | 4242 4242 4242 4242 | Any 3 digits | Any future date | GB |
Unsuccessful payments
Make an unsuccessful payment just in case you are curious. You will see the transaction in Aghanim Dashboard → Transactions as well.
| Number | CVV | Expiry date | Response code | Description |
|---|---|---|---|---|
4832 2850 6160 9015 | Any 3 digits | Any future date | 16 | Payment declined |
For the live mode, you can find all supported payment methods in Company settings → Payment methods. Turn on or off those you see suitable. Some payment methods are available globally by default. You can’t disable Credit cards, Apple Pay, Google Pay, and PayPal.
In Checkout, the Aghanim evaluates the currency and any restrictions, then dynamically presents only the payment methods available to the player based on evaluation.
When you use the live mode, the payment form shows to the player a setting to save their payment method so they can make a one-click payment in the future.
Handle post-payment events on game server-side
To complete the Checkout, handle items’ granting and chargebacks on your game backend. To do so, implement a webhook system that accepts the item.add and item.remove webhooks. See the code example with the implementation.
Comply with the Aghanim requirements for these webhooks:
- Use HTTPS schema for the single POST webhook endpoint.
- Check that webhooks are generated and signed by the Aghanim.
- Handle the
idempotency_keyfield in the webhook payload to prevent processing duplicate webhooks. - Respond with the HTTP status codes:
2xxfor successfully processed webhooks.4xxand5xxfor errors.
Grant items to player
The Aghanim sends the item.add webhook to let you know about the purchased items and ask for your permission to grant them to the player.
When the Aghanim has your 2xx answer, it can complete the checkout logic and redirect the player to a deep link if provided.
Support refunds and chargebacks
The Aghanim sends the item.remove webhook when a bank or payment system reverses the transaction, or you have requested refund in Aghanim Dashboard → Transactions. Partial refunds are not supported.
The suggested implementation handles the webhooks mentioned before:
item.addfor granting items. You need it for integration.item.removefor refunds and chargebacks. You might need it for integration.
- Python
- Ruby
- Node.js
- Go
# 통합에서 웹훅 이벤트를 처리하기 위해 이 샘플 코드를 사용하세요.
#
# 1. 이 코드를 `server.py`라는 새 파일에 붙여 넣으세요.
#
# 2. 의존성 설치:
#    python -m pip install fastapi[all]
#
# 3. http://localhost:8000에서 서버를 실행합니다
#    python server.py

import fastapi, hashlib, hmac, json, typing
from fastapi.responses import JSONResponse

app = fastapi.FastAPI()

@app.post("/webhook")
async def webhook(request: fastapi.Request) -> dict[str, typing.Any]:
    secret_key = "<YOUR_S2S_KEY>"  # 실제 웹훅 비밀 키로 교체하세요

    raw_payload = await request.body()
    payload = raw_payload.decode()
    timestamp = request.headers["x-aghanim-signature-timestamp"]
    received_signature = request.headers["x-aghanim-signature"]

    if not verify_signature(secret_key, payload, timestamp, received_signature):
        raise fastapi.HTTPException(status_code=403, detail="Invalid signature")

    data = json.loads(payload)
    event_type = data["event_type"]
    event_data = data["event_data"]

    if event_type == "item.add":
        add_item(event_data)
        return {"status": "ok"}

    if event_type == "item.remove":
        remove_item(event_data)
        return {"status": "ok"}

    raise fastapi.HTTPException(status_code=400, detail="Unknown event type")

def verify_signature(secret_key: str, payload: str, timestamp: str, received_signature: str) -> bool:
    signature_data = f"{timestamp}.{payload}"
    computed_hash = hmac.new(secret_key.encode(), signature_data.encode(), hashlib.sha256)
    computed_signature = computed_hash.hexdigest()
    return hmac.compare_digest(computed_signature, received_signature)

def add_item(event_data: dict[str, typing.Any]) -> None:
    # 이벤트를 처리하고 항목을 추가하기 위한 플레이스홀더 로직입니다.
    # 실제 애플리케이션에서는 이 함수가 데이터베이스나 인벤토리 시스템과 상호작용합니다.
    player_id = event_data["player_id"]
    for item in event_data["items"]:
      sku = item["sku"]
      print(f"Item {sku} has been credited to player's {player_id} account.")

def remove_item(event_data: dict[str, typing.Any]) -> None:
    # 이벤트를 처리하고 항목을 제거하기 위한 플레이스홀더 로직입니다.
    # 실제 애플리케이션에서는 이 함수가 데이터베이스나 인벤토리 시스템과 상호작용합니다.
    player_id = event_data["player_id"]
    for item in event_data["items"]:
      sku = item["sku"]
      print(f"Item {sku} has been removed from player's {player_id} account.")

if __name__ == "__main__":
    import uvicorn
    uvicorn.run(app, host="0.0.0.0", port=8000)
# 통합에서 웹훅 이벤트를 처리하기 위해 이 샘플 코드를 사용하세요.
#
# 1. 이 코드를 `server.rb`라는 새 파일에 붙여 넣으세요.
#
# 2. 의존성 설치:
#    gem install sinatra json hmac
#
# 3. http://localhost:8000에서 서버를 실행합니다
#    ruby server.rb

require 'sinatra'
require 'json'
require 'openssl'

post '/webhook' do
  secret_key = "<YOUR_S2S_KEY>"  # 실제 웹훅 비밀 키로 교체하세요

  payload = request.body.read
  timestamp = request.env["HTTP_X_AGHANIM_SIGNATURE_TIMESTAMP"]
  received_signature = request.env["HTTP_X_AGHANIM_SIGNATURE"]

  unless verify_signature(secret_key, payload, timestamp, received_signature)
    halt 403, "Invalid signature"
  end

  data = JSON.parse(payload)
  event_type = data["event_type"]
  event_data = data["event_data"]

  if event_type == "item.add"
    add_item(event_data)
    return { status: "ok" }.to_json
  end

  if event_type == "item.remove"
    remove_item(event_data)
    return { status: "ok" }.to_json
  end

  halt 400, "Unknown event type"
end

def verify_signature(secret_key, payload, timestamp, received_signature)
  signature_data = "#{timestamp}.#{payload}"
  computed_signature = OpenSSL::HMAC.hexdigest('sha256', secret_key, signature_data)
  OpenSSL.secure_compare(computed_signature, received_signature)
end

def add_item(event_data)
  # 이벤트를 처리하고 항목을 추가하기 위한 플레이스홀더 로직입니다.
  # 실제 애플리케이션에서는 이 함수가 데이터베이스나 인벤토리 시스템과 상호작용합니다.
  player_id = event_data["player_id"]
  for item in event_data["items"] do
    sku = item["sku"]
    puts "Item #{sku} has been credited to player's #{player_id} account."
  end
end

def remove_item(event_data)
  # 이벤트를 처리하고 항목을 제거하기 위한 플레이스홀더 로직입니다.
  # 실제 애플리케이션에서는 이 함수가 데이터베이스나 인벤토리 시스템과 상호작용합니다.
  player_id = event_data["player_id"]
  for item in event_data["items"] do
    sku = item["sku"]
    puts "Item #{sku} has been removed from player's #{player_id} account."
  end
end

if __FILE__ == $0
  require 'sinatra'
  set :bind, '0.0.0.0'
  set :port, 8000
end
// 통합에서 웹훅 이벤트를 처리하기 위해 이 샘플 코드를 사용하세요.
//
// 1. 이 코드를 새로운 파일 `server.js`에 붙여 넣으세요.
//
// 2. 의존성 설치:
//    npm install express
//
// 3. http://localhost:8000에서 서버를 실행합니다
//    node server.js

const express = require('express');
const crypto = require('crypto');

const app = express();

app.post('/webhook', express.raw({ type: "*/*" }), async (req, res) => {
  const secretKey = '<YOUR_S2S_KEY>'; // 실제 웹훅 비밀 키로 교체하세요

  const rawPayload = req.body;
  const timestamp = req.headers['x-aghanim-signature-timestamp'];
  const receivedSignature = req.headers['x-aghanim-signature'];

  if (!verifySignature(secretKey, rawPayload, timestamp, receivedSignature)) {
    return res.status(403).send('Invalid signature');
  }

  const payload = JSON.parse(req.body);
  const { event_type, event_data } = payload;

  if (event_type === 'item.add') {
    addItem(event_data);
    return res.json({ status: 'ok' });
  }

  if (event_type === 'item.remove') {
    removeItem(event_data);
    return res.json({ status: 'ok' });
  }

  return res.status(400).send('Unknown event type');
});

function verifySignature(secretKey, payload, timestamp, receivedSignature) {
  const signatureData = `${timestamp}.${payload}`;
  const computedSignature = crypto
    .createHmac('sha256', secretKey)
    .update(signatureData)
    .digest('hex');
  return crypto.timingSafeEqual(Buffer.from(computedSignature), Buffer.from(receivedSignature));
}

function addItem(event_data) {
  // 이벤트를 처리하고 항목을 추가하기 위한 플레이스홀더 로직입니다.
  // 실제 애플리케이션에서는 이 함수가 데이터베이스나 인벤토리 시스템과 상호작용합니다.
  const playerId = event_data.player_id;
  for (const item of event_data.items) {
    const sku = item.sku;
    console.log(`Item ${item.sku} has been credited to player's ${playerId} account.`);
 }
}

function removeItem(event_data) {
  // 이벤트 처리 및 항목 제거를 위한 플레이스홀더 로직입니다.
  // 실제 애플리케이션에서는 이 함수가 데이터베이스나 인벤토리 시스템과 상호작용합니다.
  const playerId = event_data.player_id;
  for (const item of event_data.items) {
    const sku = item.sku;
    console.log(`Item ${item.sku} has been removed from player's ${playerId} account.`);
 }
}

app.listen(8000, () => {
  console.log('Server is running on http://localhost:8000');
});
// 통합에서 웹훅 이벤트를 처리하기 위한 샘플 코드입니다.
//
// 1. 이 코드를 새로운 파일 `server.go`에 붙여넣으세요.
//
// 2. http://localhost:8000에서 서버를 실행하세요
//    go run server.go

package main

import (
  "crypto/hmac"
  "crypto/sha256"
  "encoding/hex"
  "encoding/json"
  "fmt"
  "io/ioutil"
  "net/http"
)

func webhookHandler(w http.ResponseWriter, r *http.Request) {
  secretKey := "<YOUR_S2S_KEY>"  // 실제 웹훅 비밀 키로 교체하세요

  rawPayload, _ := ioutil.ReadAll(r.Body)
  payload := string(rawPayload)
  timestamp := r.Header.Get("X-Aghanim-Signature-Timestamp")
  receivedSignature := r.Header.Get("X-Aghanim-Signature")

  if !verifySignature(secretKey, payload, timestamp, receivedSignature) {
    http.Error(w, "Invalid signature", http.StatusForbidden)
    return
  }

  var data map[string]interface{}
  if err := json.Unmarshal(rawPayload, &data); err != nil {
    http.Error(w, "Invalid payload", http.StatusBadRequest)
    return
  }

  eventType := data["event_type"].(string)
  eventData := data["event_data"].(map[string]interface{})

  if eventType == "item.add" {
    addItem(eventData)
    w.WriteHeader(http.StatusOK)
    json.NewEncoder(w).Encode(map[string]string{"status": "ok"})
    return
  }

  if eventType == "item.remove" {
    removeItem(eventData)
    w.WriteHeader(http.StatusOK)
    json.NewEncoder(w).Encode(map[string]string{"status": "ok"})
    return
  }

  http.Error(w, "Unknown event type", http.StatusBadRequest)
}

func verifySignature(secretKey, payload, timestamp, receivedSignature string) bool {
  signatureData := fmt.Sprintf("%s.%s", timestamp, payload)
  mac := hmac.New(sha256.New, []byte(secretKey))
  mac.Write([]byte(signatureData))
  computedSignature := hex.EncodeToString(mac.Sum(nil))
  return hmac.Equal([]byte(computedSignature), []byte(receivedSignature))
}

func addItem(eventData map[string]interface{}) {
  // 이벤트를 처리하고 항목을 추가하기 위한 플레이스홀더 로직입니다.
  // 실제 애플리케이션에서는 이 함수가 데이터베이스나 인벤토리 시스템과 상호작용합니다.
  playerID := eventData["player_id"].(string)
  items := eventData["items"].([]interface{})
  for _, item := range items {
    itemMap := item.(map[string]interface{})
    sku := itemMap["sku"].(string)
    fmt.Printf("Item %s has been credited to player's %s account.\\n", sku, playerID)
  }
}

func removeItem(eventData map[string]interface{}) {
  // 이벤트 처리 및 항목 제거를 위한 플레이스홀더 로직입니다.
  // 실제 애플리케이션에서는 이 함수가 데이터베이스나 인벤토리 시스템과 상호작용합니다.
  playerID := eventData["player_id"].(string)
  items := eventData["items"].([]interface{})
  for _, item := range items {
    itemMap := item.(map[string]interface{})
    sku := itemMap["sku"].(string)
    fmt.Printf("Item %s has been removed from player's %s account.\\n", sku, playerID)
  }
}

func main() {
  http.HandleFunc("/webhook", webhookHandler)
  fmt.Println("Server is running on http://localhost:8000")
  http.ListenAndServe(":8000", nil)
}
Add webhook endpoint to Aghanim
When the webhook handling is ready, add the endpoint to the account so the Aghanim could start sending the events.
- Dashboard
- API
- Go to Integration → Webhooks.
- Click Add webhook. The site will open the Create webhook window.
- Copy and paste the URL
https://<YOUR_DOMAIN>/webhook. - Click Select events. The site will open the Select events to send window.
- Expand the Main class and select the Item add, Item remove checkboxes.
- Click Apply.
- Click Add. The site will redirect you to the webhook page.
- Click Back.
- cURL
- Python
- Ruby
- Node.js
- Go
curl -X POST https://api.aghanim.com/s2s/v1/webhooks \
  -H 'Content-Type: application/json' \
  -H 'Authorization: Bearer <YOUR_S2S_KEY>' \
  -d '{
    "events": [
      "item.add",
      "item.remove"
    ],
    "url": "https://<YOUR_DOMAIN>/webhook",
    "description": "The endpoint for all webhooks",
    "method": "POST",
    "enabled": true,
    "enabled_logs": true,
    "player_context_enabled": true
  }'
import requests

def create_webhook():
    payload = {
        "events": ["item.add", "item.remove"],
        "url": "https://<YOUR_DOMAIN>/webhook",
        "description": "The endpoint for all webhooks",
        "method": "POST",
        "enabled": True,
        "enabled_logs": True,
        "player_context_enabled": True
    }

    headers = {"Authorization": "Bearer <YOUR_S2S_KEY>", "Content-Type": "application/json"}
    resp = requests.post("https://api.aghanim.com/s2s/v1/webhooks", json=payload, headers=headers)
    return resp.json()
require 'net/http'
require 'json'
require 'uri'

def create_webhook
  uri = URI("https://api.aghanim.com/s2s/v1/webhooks")
  req = Net::HTTP::Post.new(uri, 'Content-Type' => 'application/json', 'Authorization' => 'Bearer <YOUR_S2S_KEY>')
  req.body = {
    events: ["item.add", "item.remove"],
    url: "https://<YOUR_DOMAIN>/webhook",
    description: "The endpoint for all webhooks",
    method: "POST",
    enabled: true,
    enabled_logs: true,
    player_context_enabled: true
  }.to_json

  res = Net::HTTP.start(uri.hostname, uri.port, use_ssl: true) { |http| http.request(req) }
  JSON.parse(res.body)
end
const axios = require('axios');

async function createWebhook() {
  const payload = {
    events: ["item.add", "item.remove"],
    url: "https://<YOUR_DOMAIN>/webhook",
    description: "The endpoint for all webhooks",
    method: "POST",
    enabled: true,
    enabled_logs: true,
    player_context_enabled: true
  };

  const res = await axios.post('https://api.aghanim.com/s2s/v1/webhooks', payload, {
    headers: { 'Authorization': 'Bearer <YOUR_S2S_KEY>', 'Content-Type': 'application/json' }
  });
  return res.data;
}
package main

import (
	"bytes"
	"encoding/json"
	"net/http"
)

func createWebhook() map[string]interface{} {
	payload := map[string]interface{}{
		"events":                 []string{"item.add", "item.remove"},
		"url":                    "https://<YOUR_DOMAIN>/webhook",
		"description":            "The endpoint for all webhooks",
		"method":                 "POST",
		"enabled":                true,
		"enabled_logs":           true,
		"player_context_enabled": true,
	}
	data, _ := json.Marshal(payload)

	req, _ := http.NewRequest("POST", "https://api.aghanim.com/s2s/v1/webhooks", bytes.NewBuffer(data))
	req.Header.Set("Authorization", "Bearer <YOUR_S2S_KEY>")
	req.Header.Set("Content-Type", "application/json")

	client := &http.Client{}
	resp, _ := client.Do(req)
	defer resp.Body.Close()

	var webhook map[string]interface{}
	json.NewDecoder(resp.Body).Decode(&webhook)
	return webhook
}
Test your integration
After you have handled the webhooks, check that the purchased items are in your inventory. That’s all.
Next steps
- See Currency codes and minor units to learn how the Aghanim represents monetary amounts.
- See Payment Webhook to learn about the payment progress when the player visits the payment form.
FAQ
The Swift SDK targets iOS 13.0 and higher. It supports both physical devices (arm64) and the iOS Simulator (arm64 + x86_64). macOS, Mac Catalyst, tvOS, watchOS, and visionOS are not supported.
The AghanimPresenter protocol decouples the SDK from how your app composes its window hierarchy. The bundled KeyWindowPresenter works well for single-scene apps; in SwiftUI you can also read the presenter from the environment via .aghanimCheckoutPresenter() applied to a view inside a specific scene.
For apps that connect more than one foreground scene at the same time (multi-window iPad apps, multitasking-aware apps, Catalyst-style layouts), implement your own AghanimPresenter that returns the view controller of the scene you want to present from, then pass that instance to startCheckout(_:mode:) for that scene's checkout calls.
Both flows are supported and you can mix them.
Server-driven (recommended for games with a backend): Configure the item.add webhook in the Aghanim Dashboard. Aghanim calls your server when an order is paid; your server grants the items to the player. The client SDK is only responsible for launching the Checkout and routing the redirect.
Client-driven (for games without a dedicated server): Use aghanim.orders.getUnconsumed() on app launch and after the player returns from checkout to find paid orders the player hasn't been credited for yet, call aghanim.orders.consume(orderId:) for each one, and grant the items once the consume succeeds.
Pick server-driven when you can — webhooks survive the player closing your app mid-flow and don't require the player to re-open it before the grant happens.
The Checkout integration mode that opens the payment form in a WKWebView inside an SDK-owned bottom sheet over your app. Use when you want the player to stay inside your app without an external browser.
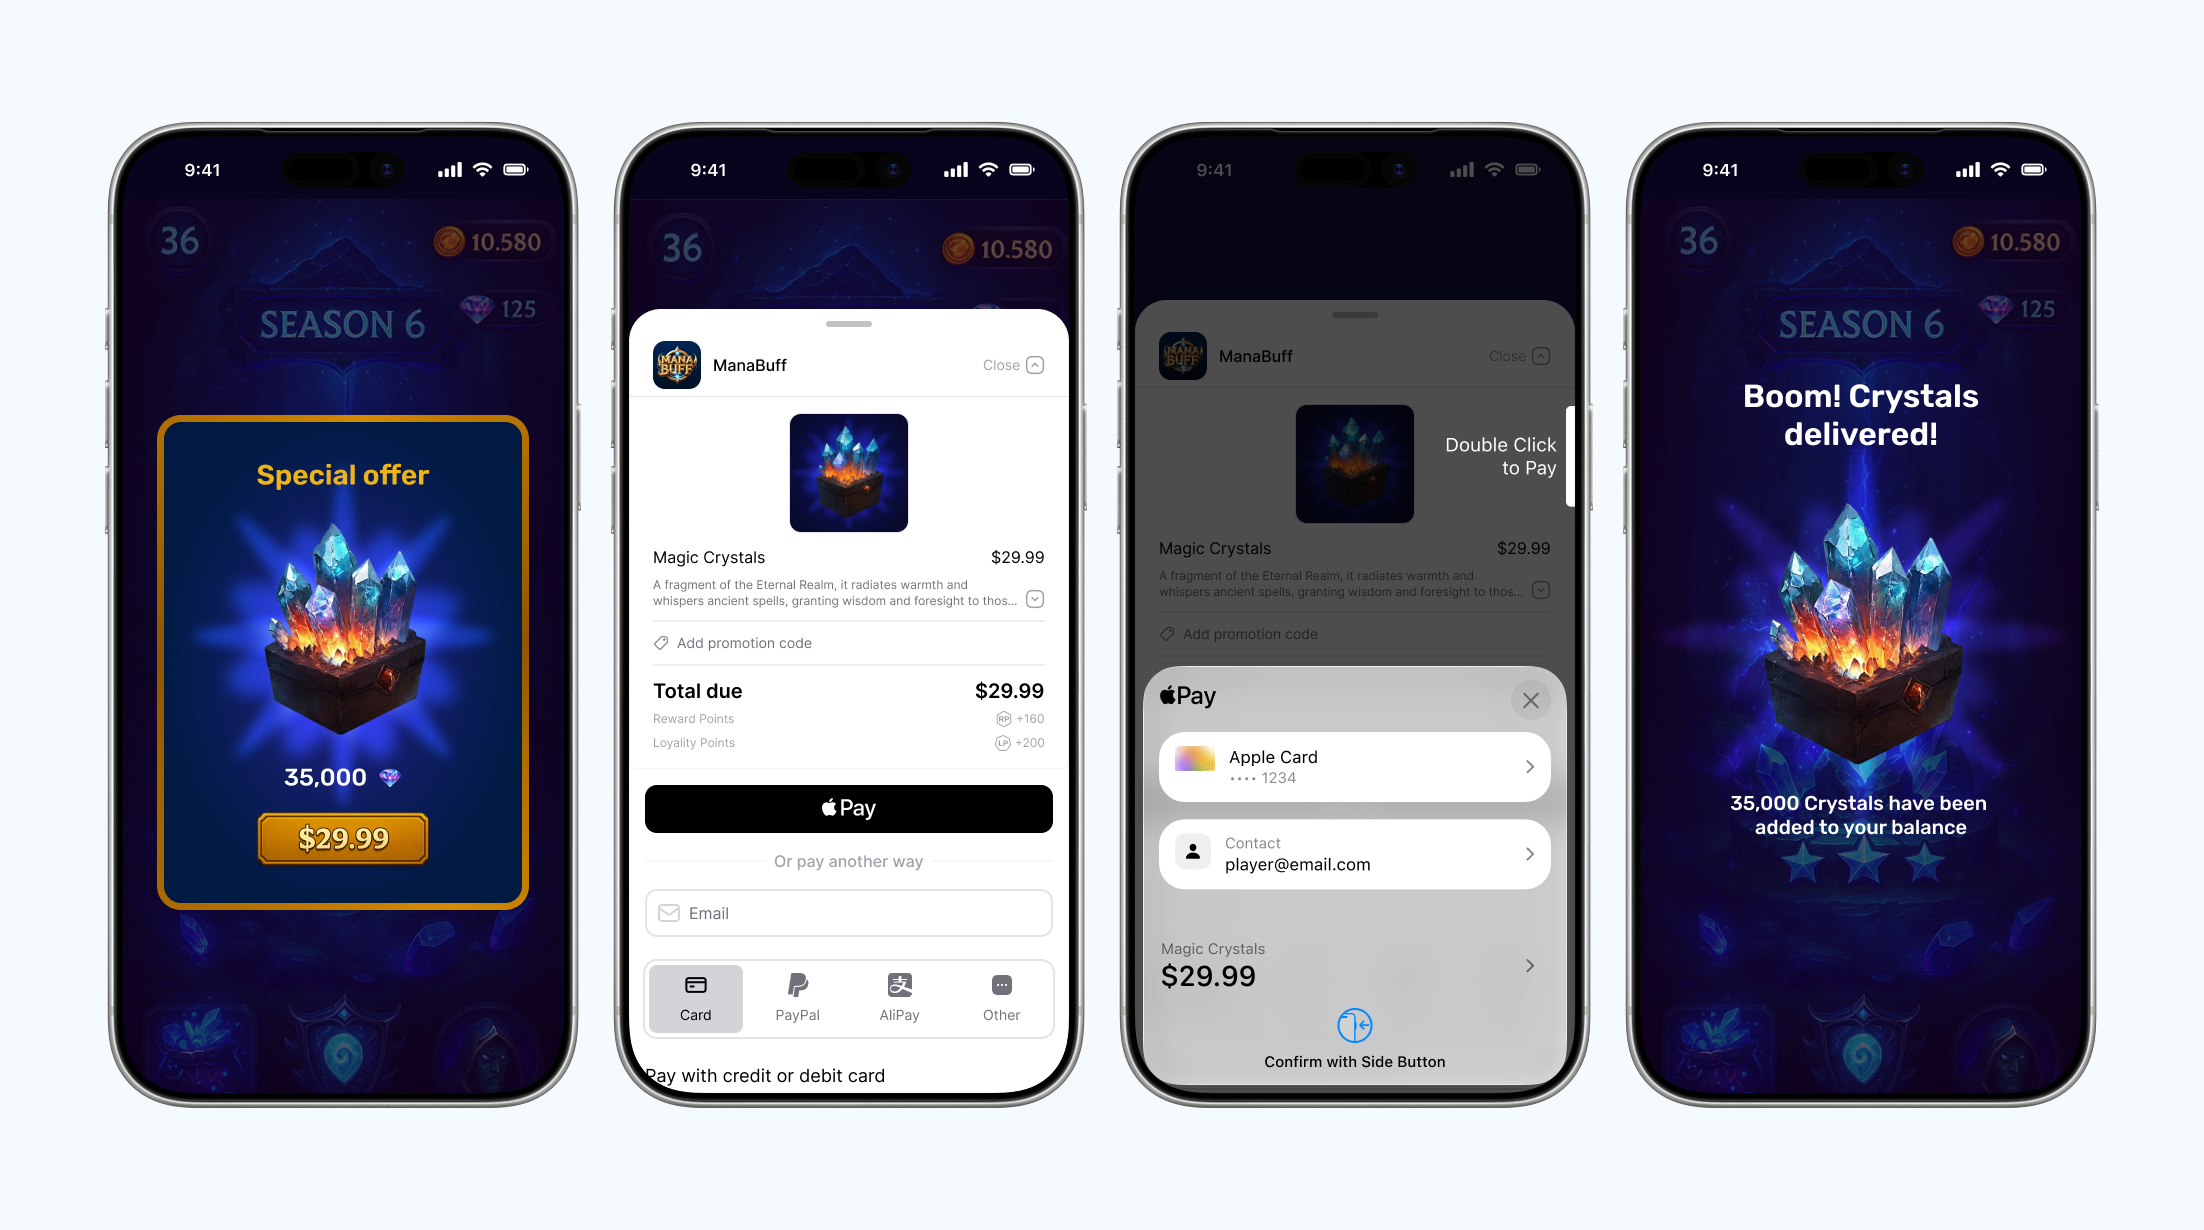
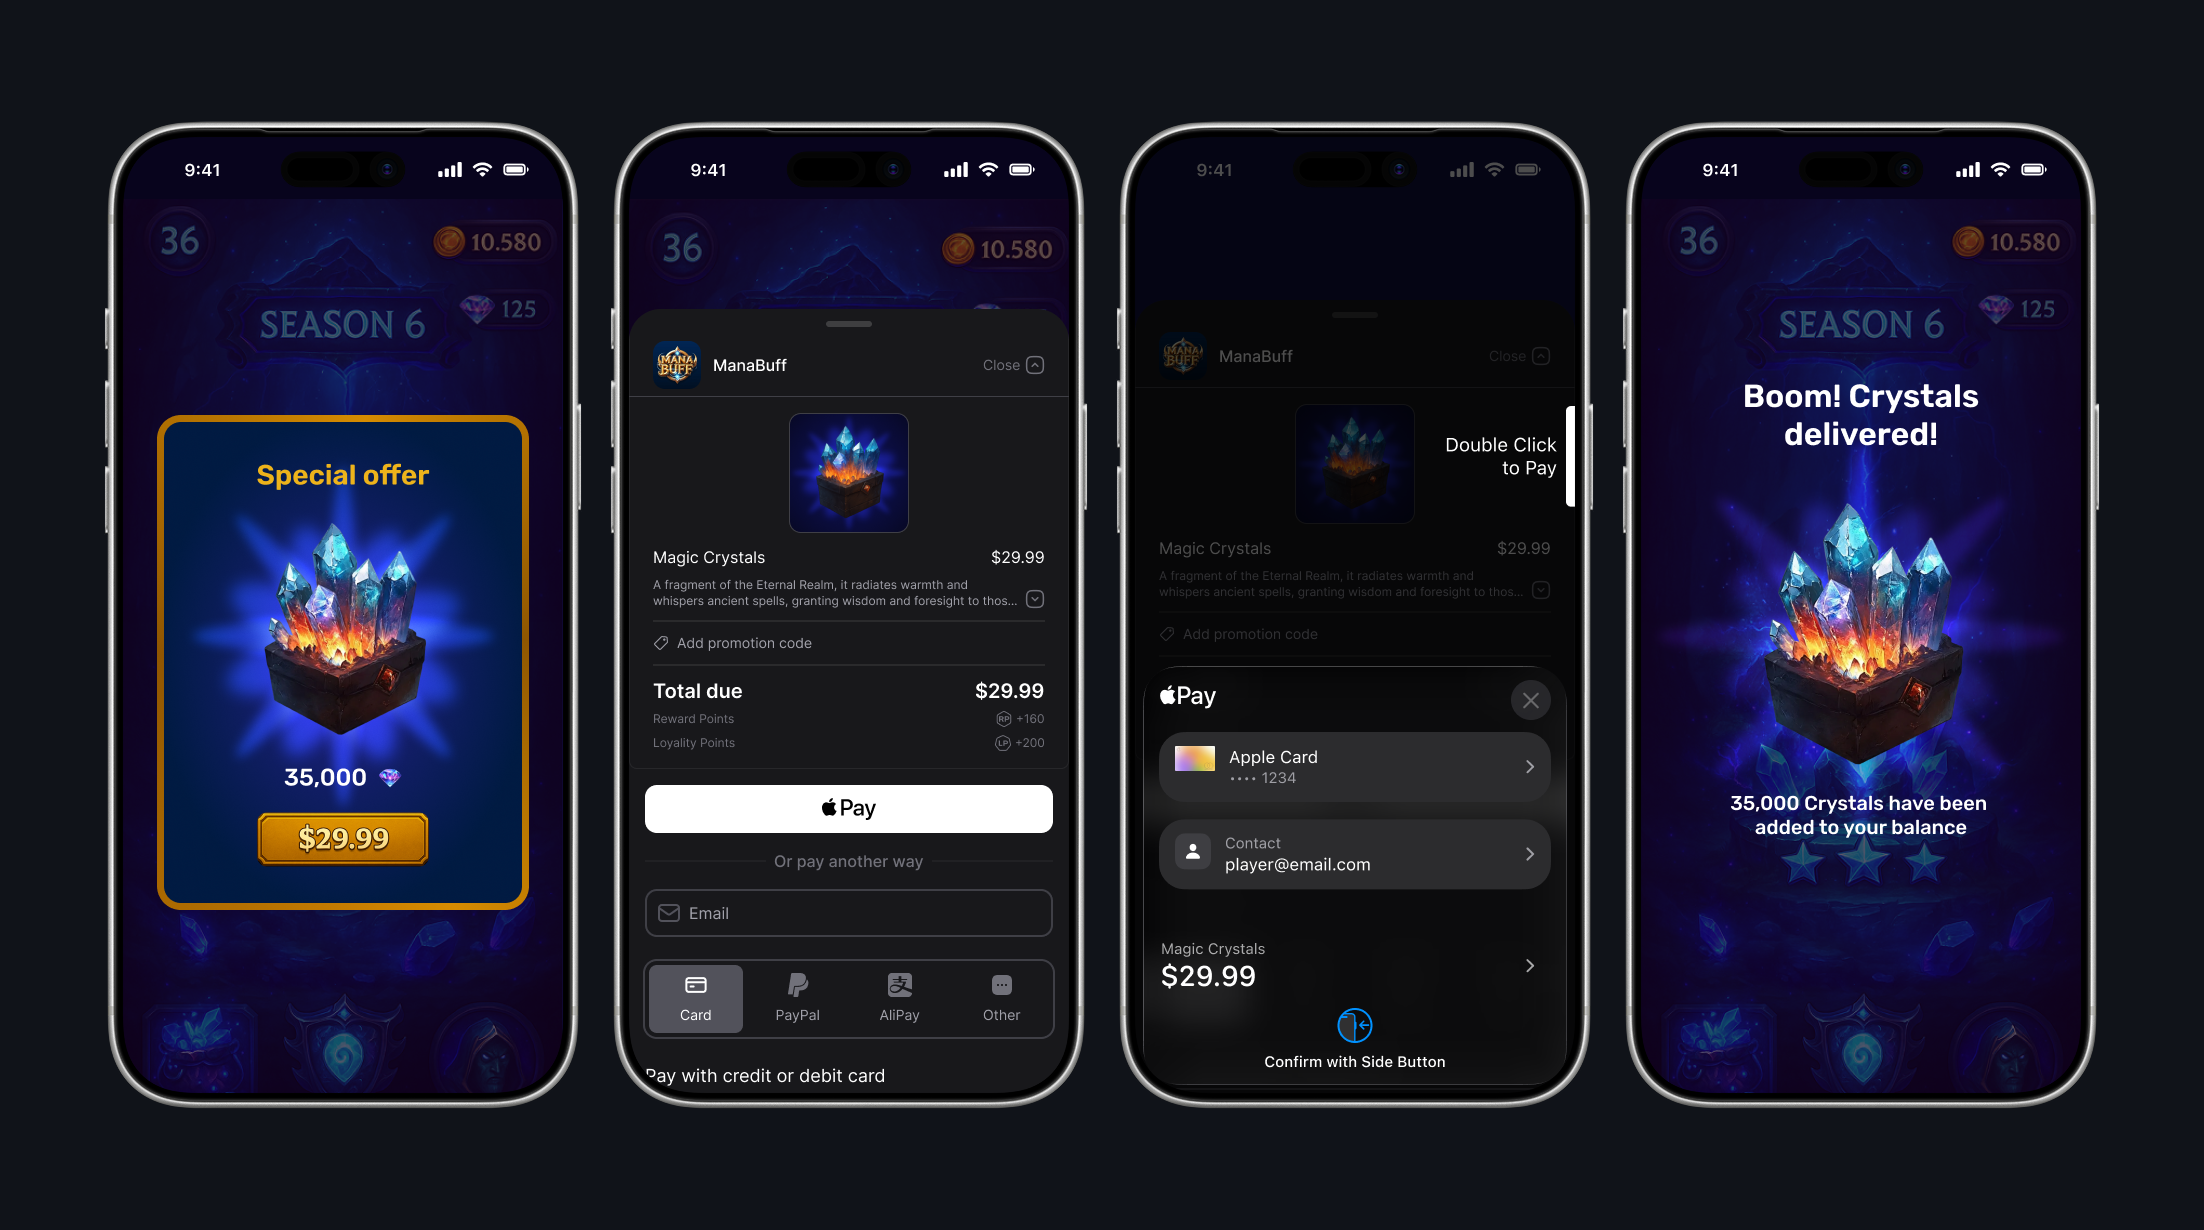
Register with Aghanim and link your game
First, register for an Aghanim account. At the end of registration, add the link to your mobile game. It should be published in Apple App Store or Google Play Store.
Set up environment
If you want to make real payments, you are all set as the live mode is used as default. Otherwise, use a sandbox, an isolated test environment, to simulate the Aghanim events to test payments without real money movement. To turn on the sandbox mode, set the Sandbox toggle to the active position.
Sandbox supports card payments only. Alternative methods (PayPal, wallets, local payment methods) appear only in live. See Test payments for the test cards.
While integrating, you will need an SDK key to authenticate requests to the Aghanim. Keep in mind that the sandbox and live modes have different keys. Find the SDK key in Integration → API keys.
Configure game client-side
Configure your game client to work with the Checkout by setting up the SDK and implementing the necessary code to process its methods.
Install SDK
To install the Swift SDK, download the latest XCFramework bundle from the Aghanim Artifact Registry, verify its checksum, and embed the frameworks in your Xcode project.
- XCFramework
VERSION="1.2.0"
BUNDLE="swift-sdk-v${VERSION}-xcframeworks.zip"
EXPECTED_SHA256="152ec7da96abf098aee5301a6515d9502694deb629d134b4cc188c4c13f1cb21"

# Download the XCFramework bundle.
curl -L -o "${BUNDLE}" \
  "https://artifactregistry.googleapis.com/v1/projects/ag-registry/locations/us-central1/repositories/swift-sdk/files/swift-sdk:v${VERSION}:${BUNDLE}:download?alt=media"

# Verify the SHA-256 against the value published in the release notes.
ACTUAL_SHA256=$(shasum -a 256 "${BUNDLE}" | awk '{print $1}')
if [ "${ACTUAL_SHA256}" != "${EXPECTED_SHA256}" ]; then
  echo "Checksum mismatch — aborting." >&2
  exit 1
fi

# Unzip alongside your Xcode project.
unzip -q "${BUNDLE}" -d swift-sdk
The bundle contains seven XCFrameworks. Drag every .xcframework directory into your Xcode project, then in General → Frameworks, Libraries, and Embedded Content set each one to Embed & Sign.
| Framework | Role |
|---|---|
AghanimCheckout.xcframework | Umbrella entry point. Re-exports the modules below so you can import AghanimCheckout. |
AghanimCheckoutDefaultBrowser.xcframework | Default-browser launch mode (external Safari via UIApplication.open). |
AghanimCheckoutInAppBrowser.xcframework | In-app browser launch mode (SFSafariViewController). |
AghanimCheckoutWebView.xcframework | WebView launch mode (WKWebView in an SDK-owned bottom sheet). |
AghanimCheckoutCore.xcframework | Shared checkout types: CheckoutParams, CheckoutItem, AghanimPresenter, and the handleRedirect(_:) method. |
AghanimCore.xcframework | Aghanim actor, AghanimConfig, ApiKey, ApiError, OrdersAPI, ItemsAPI, PricePointsAPI, and the Order, Item and PricePoint models. |
AghanimLogging.xcframework | Logger protocol, OSLogLogger, LogLevel. |
Each framework ships ad-hoc signed; Embed & Sign re-signs them with your team identity at build time.
If you ship release-mode builds and want symbolicated crash reports, also download swift-sdk-v1.2.0-dSYMs.zip from the same Artifact Registry repository and add the .dSYM directories to your crash-reporter pipeline. They are not needed for development.
Initialize SDK
Build an AghanimConfig with your API key, then construct the Aghanim actor and hold it for the lifetime of the process. The SDK is designed to be instantiated once at app launch.
ApiKey(_:) is failable and rejects a blank key, so unwrap it before building the config.
- SwiftUI
- UIKit
- Swift
import SwiftUI
import AghanimCheckout

@main
struct MyGameApp: App {
    @StateObject private var session = GameSession(aghanim: Self.makeAghanim())

    var body: some Scene {
        WindowGroup {
            RootView()
                .environmentObject(session)
                .aghanimCheckoutPresenter()
        }
    }

    private static func makeAghanim() -> Aghanim {
        guard let apiKey = ApiKey("YOUR_API_KEY") else {
            fatalError("API key cannot be blank.")
        }
        let config = AghanimConfig.builder(apiKey: apiKey)
            .with(logLevel: .debug)
            .build()
        return Aghanim(config: config)
    }
}

@MainActor
final class GameSession: ObservableObject {
    let aghanim: Aghanim

    init(aghanim: Aghanim) {
        self.aghanim = aghanim
    }
}
- Swift
import UIKit
import AghanimCheckout

@main
final class AppDelegate: UIResponder, UIApplicationDelegate {

    static let aghanim: Aghanim = makeAghanim()
    static let presenter = KeyWindowPresenter()

    func application(
        _ application: UIApplication,
        didFinishLaunchingWithOptions launchOptions: [UIApplication.LaunchOptionsKey: Any]?
    ) -> Bool {
        true
    }

    private static func makeAghanim() -> Aghanim {
        guard let apiKey = ApiKey("YOUR_API_KEY") else {
            fatalError("API key cannot be blank.")
        }
        let config = AghanimConfig.builder(apiKey: apiKey)
            .with(logLevel: .debug)
            .build()
        return Aghanim(config: config)
    }
}
AghanimConfig.builder(apiKey:) defaults to LogLevel.warning and OSLogLogger(). Call .with(logLevel: .debug) during development to see SDK lifecycle and network activity in the console.
With the SDK, you can read its logs from one of the supported levels. By default the SDK writes them through OSLogLogger, which routes into the unified logging system you already read in Console and Xcode.
- Simple
- Advanced
The simple usage of the SDK log messages means setting the log level you are interested in the most:
.debug: detailed debug information on almost every event..info: general information on the SDK instance state and its events..warning: warnings and recoverable errors. Used by default..error: critical and fatal errors..none: no logging.
- Swift
let config = AghanimConfig.builder(apiKey: apiKey)
    .with(logLevel: .debug)
    .build()
You can reroute the SDK logs to the system you have chosen for logging. Implement the Logger protocol and pass it to .with(logger:). The level filter still applies, so a message below the configured level never reaches your logger.
- Swift
import AghanimCheckout
import AghanimLogging

struct GameLogger: AghanimLogging.Logger {
    func d(_ message: String, error: (any Error)?) {
        // TODO: Send debug messages to your logging system
    }

    func i(_ message: String, error: (any Error)?) {
        // TODO: Send info messages to your logging system
    }

    func w(_ message: String, error: (any Error)?) {
        // TODO: Send warning messages to your logging system
    }

    func e(_ message: String, error: (any Error)?) {
        // TODO: Send error messages to your logging system
    }
}

func makeConfig(apiKey: ApiKey) -> AghanimConfig {
    AghanimConfig.builder(apiKey: apiKey)
        .with(logger: GameLogger())
        .with(logLevel: .debug)
        .build()
}
The SDK marks its log values as private, so the unified logging system redacts them. A custom Logger receives the message already interpolated, so whatever you forward to a third-party service leaves the device unredacted.
Configure player ID
Since a mobile game has one instance per device, the SDK allows to set the player ID once to use it in all following method calls.
When your game client has the player ID, set it for the current SDK instance. The call is async throws. Surrounding whitespace is trimmed, and a blank or whitespace-only ID is rejected with ApiError.invalidArgument. When the player signs out, call clearPlayerId() so the SDK stops attaching the previous identity to API requests.
- SwiftUI
- UIKit
- Swift
import SwiftUI
import AghanimCheckout

struct SignInView: View {
    @EnvironmentObject private var session: GameSession

    var body: some View {
        Button("Sign in") {
            Task {
                let playerId = await authenticatePlayer()
                do {
                    try await session.aghanim.setPlayerId(playerId)
                } catch {
                    // Surface to the user as a sign-in error.
                }
            }
        }
    }

    private func signOut() {
        Task {
            await session.aghanim.clearPlayerId()
        }
    }
}
- Swift
import UIKit
import AghanimCheckout

final class SignInViewController: UIViewController {

    private func signIn() {
        Task {
            let playerId = await authenticatePlayer()
            do {
                try await AppDelegate.aghanim.setPlayerId(playerId)
            } catch {
                // Surface to the user as a sign-in error.
            }
        }
    }

    private func signOut() {
        Task {
            await AppDelegate.aghanim.clearPlayerId()
        }
    }
}
Every call that needs a player throws ApiError.playerIdNotSet without one: aghanim.orders.getUnconsumed(), aghanim.orders.consume(orderId:), and all three startCheckout launch modes. Set the player ID immediately after authentication. aghanim.orders.get(id:) and presentCheckout do not need one.
Create item
The integration needs the items to be added to the Dashboard. When creating items, each should have its SKU, a unique identifier for the item within your game backend. You can add their prices, currency, sale configuration, and more.
To add an item to the Dashboard:
- Go to SKU Management → Items.
- Click Add Item. The site will open the Add Item page.
- Enter the item name New item.
- Enter the item SKU items.new.ba68a028-2d51-46b4-a854-68fc16af328a.
- In the Price block:
- Select the Fiat price type for a real money item.
- Enter the price 1.99.
- Click Add item.
For integration purposes, we have shortened an item setup. Before going live, use every suitable feature while adding items to the Dashboard.
Get items with localized prices
The SDK retrieves items created in the Dashboard with prices localized to the player's region. Use it to show accurate prices in your in-game store before the player proceeds to the Checkout.
- Swift
let items = try await aghanim.items.get(skus: [
    "items.new.ba68a028-2d51-46b4-a854-68fc16af328a",
    "items.new.1f2c4d16-9b83-4b52-9e0d-72f3a1c5d904",
])

for storeItem in items {
    // Use name, price.display and imageUrl to populate your store.
    print("\(storeItem.name): \(storeItem.price.display)")
}
Ask for as many SKUs as your store needs: there is no SKU-count cap to work around. Duplicates are collapsed, items come back in the order you asked for them, and a SKU that is not in the catalog is left out of the result rather than failing the whole call. An empty array throws ApiError.invalidArgument.
Create Checkout item
Create a CheckoutItem value that references the SKU you added to the Dashboard. sku is the only required field; name, description, and imageUrl override the catalog entry for this Order.
- Swift
let item = CheckoutItem(sku: "items.new.ba68a028-2d51-46b4-a854-68fc16af328a")
Configure deep links
The WebView launch mode opens the Checkout inside a WKWebView presented over your app. After payment, the SDK needs a deep link to detect that the player has returned, and to handle payment flows that delegate to external apps (Apple Pay, banking apps, 3DS pop-outs). Configure that deep link so iOS can route the post-payment URL into your app.
- Universal Links
- Custom URL schemes
With Universal Links, the player goes directly to the app without an OS confirmation dialog. Universal Links use standard HTTPS URLs that iOS validates against the Apple App Site Association (AASA) file hosted on your domain. This is the recommended approach for production.
Create a variable for the deep link URL. We will use it later.
- Swift
let backToGameUrl = "https://yourdomain.com/checkout/return"
Host an apple-app-site-association file at https://<YOUR_DOMAIN>/.well-known/apple-app-site-association. The file must be served over HTTPS with Content-Type: application/json, with no redirects.
- apple-app-site-association
{
  "applinks": {
    "details": [
      {
        "appIDs": ["ABCDE12345.com.yourcompany.yourgame"],
        "components": [
          {
            "/": "/checkout/return*"
          }
        ]
      }
    ]
  }
}
Add the Associated Domains capability to your target in Xcode and list the domain there.
- App.entitlements
<?xml version="1.0" encoding="UTF-8"?>
<!DOCTYPE plist PUBLIC "-//Apple//DTD PLIST 1.0//EN" "http://www.apple.com/DTDs/PropertyList-1.0.dtd">
<plist version="1.0">
<dict>
    <key>com.apple.developer.associated-domains</key>
    <array>
        <string>applinks:yourdomain.com</string>
    </array>
</dict>
</plist>
When the player returns via the Universal Link, iOS hands the URL to your app. Pass it to aghanim.handleRedirect(_:).
- SwiftUI
- UIKit
- Swift
import SwiftUI
import AghanimCheckout

struct RootView: View {
    @EnvironmentObject private var session: GameSession

    var body: some View {
        ContentView()
            .onOpenURL { url in
                Task {
                    let handled = await session.aghanim.handleRedirect(url)
                    guard handled else { return }
                    // The player came back from a Checkout. Check unconsumed Orders to grant the purchase.
                }
            }
    }
}
- Swift
import UIKit
import AghanimCheckout

final class SceneDelegate: UIResponder, UIWindowSceneDelegate {
    func scene(
        _ scene: UIScene,
        continue userActivity: NSUserActivity
    ) {
        guard userActivity.activityType == NSUserActivityTypeBrowsingWeb,
              let url = userActivity.webpageURL else {
            return
        }
        Task {
            let handled = await AppDelegate.aghanim.handleRedirect(url)
            guard handled else { return }
            // The player came back from a Checkout. Check unconsumed Orders to grant the purchase.
        }
    }
}
Custom URL schemes may show a system dialog asking the player whether to open your app. They are easier to set up but don't provide the same security level as Universal Links, which makes them suitable for development and testing environments.
Create a variable for the deep link. We will use it later.
- Swift
let backToGameUrl = "yourgame://checkout/return"
Register the scheme in your app's Info.plist under CFBundleURLTypes. iOS will route any URL with this scheme to your app.
- Info.plist
<key>CFBundleURLTypes</key>
<array>
    <dict>
        <key>CFBundleTypeRole</key>
        <string>Editor</string>
        <key>CFBundleURLName</key>
        <string>com.yourcompany.yourgame.checkout</string>
        <key>CFBundleURLSchemes</key>
        <array>
            <string>yourgame</string>
        </array>
    </dict>
</array>
When the player returns via the custom scheme, iOS hands the URL to your app. Pass it to aghanim.handleRedirect(_:).
- SwiftUI
- UIKit
- Swift
import SwiftUI
import AghanimCheckout

struct RootView: View {
    @EnvironmentObject private var session: GameSession

    var body: some View {
        ContentView()
            .onOpenURL { url in
                Task {
                    let handled = await session.aghanim.handleRedirect(url)
                    guard handled else { return }
                    // The player came back from a Checkout. Check unconsumed Orders to grant the purchase.
                }
            }
    }
}
- Swift
import UIKit
import AghanimCheckout

final class SceneDelegate: UIResponder, UIWindowSceneDelegate {
    func scene(
        _ scene: UIScene,
        openURLContexts URLContexts: Set<UIOpenURLContext>
    ) {
        guard let url = URLContexts.first?.url else { return }
        Task {
            let handled = await AppDelegate.aghanim.handleRedirect(url)
            guard handled else { return }
            // The player came back from a Checkout. Check unconsumed Orders to grant the purchase.
        }
    }
}
Create Checkout params
When all data variables are ready, create another one that represents Checkout params. Checkout params are the programmatic representation of what the player sees when they are on the payment form. Checkout params are associated with a player and items, they are crucial for the Checkout to work. Pass the backToGameUrl you defined earlier so the SDK can close the WebView and bring the player back to your game after the payment.
- Swift
let params = CheckoutParams(
    items: [item],
    backToGameUrl: backToGameUrl
)
You can attach custom metadata to the Checkout for item tracking purposes. You can access it through webhooks and in API responses from the Aghanim. Metadata has a structure of "key-value" pairs.
- Swift
let params = CheckoutParams(
    items: [item],
    metadata: [
        "campaign": "summer_sale",
        "ab_variant": "B"
    ],
    backToGameUrl: backToGameUrl
)
You can choose the behavior of redirecting the player after they have completed the payment successfully. The difference in the provided by the SDK modes is a delay before redirecting or absence of redirecting.
- Immediate
- Delayed
- No redirect
When the player has completed the payment, the SDK redirects them immediately to the deep link from backToGameUrl.
- Swift
let params = CheckoutParams(
    items: [item],
    backToGameUrl: backToGameUrl,
    redirectSettings: RedirectSettings(mode: .immediate)
)
When the player has completed the payment, the SDK shows the screen for the successful payment for the given number of seconds and then redirects the player to the deep link from backToGameUrl.
- Swift
let params = CheckoutParams(
    items: [item],
    backToGameUrl: backToGameUrl,
    redirectSettings: RedirectSettings(mode: .delayed, delaySeconds: 5)
)
When the player has completed the payment, they stay on the screen for the successful payment. To exit it, they manually close it or navigate away. After, you should redirect them to the deep link from backToGameUrl by yourself.
- Swift
let params = CheckoutParams(
    items: [item],
    backToGameUrl: backToGameUrl,
    redirectSettings: RedirectSettings(mode: .noRedirect)
)
You can set the appearance mode for the Checkout UI. The SDK supports automatic detection based on the system setting, or you can force a specific mode.
- Auto
- Dark
- Light
The SDK automatically detects and applies the appropriate appearance mode based on the system setting.
- Swift
let params = CheckoutParams(
    items: [item],
    backToGameUrl: backToGameUrl,
    uiSettings: CheckoutUiSettings(mode: .auto)
)
The SDK forces dark mode appearance for the Checkout UI.
- Swift
let params = CheckoutParams(
    items: [item],
    backToGameUrl: backToGameUrl,
    uiSettings: CheckoutUiSettings(mode: .dark)
)
The SDK forces light mode appearance for the Checkout UI.
- Swift
let params = CheckoutParams(
    items: [item],
    backToGameUrl: backToGameUrl,
    uiSettings: CheckoutUiSettings(mode: .light)
)
Launch Checkout
Add a checkout button to your game client that launches the payment form. The WebView mode opens the Checkout in a WKWebView inside an SDK-owned bottom sheet presented over your app. On success, you receive the Order ID to track the order. On failure, startCheckout throws an ApiError with debug information for troubleshooting.
The WebView mode takes an AghanimPresenter that tells the SDK which view controller to present from, a WebViewConfig, and an optional WebViewCheckoutDelegate that is notified when the sheet closes. WebViewConfig has one option, allowsBackForwardNavigation, which is off by default. In SwiftUI, read the presenter from the environment with @Environment(\.aghanimCheckoutPresenter). In UIKit, instantiate KeyWindowPresenter() or implement your own AghanimPresenter.
- SwiftUI
- UIKit
- Swift
import SwiftUI
import AghanimCheckout

struct CheckoutButton: View {
    @EnvironmentObject private var session: GameSession
    @Environment(\.aghanimCheckoutPresenter) private var presenter
    let params: CheckoutParams

    var body: some View {
        Button("Buy") {
            Task {
                do {
                    let orderId = try await session.aghanim.startCheckout(
                        params,
                        mode: .webView(
                            presenter: presenter,
                            config: WebViewConfig(),
                            delegate: CheckoutDelegate.shared
                        )
                    )
                    // Track the order ID so you can reconcile the purchase after the player returns.
                    print("Aghanim checkout started for order \(orderId)")
                } catch {
                    // Log debug information for troubleshooting.
                    print("Aghanim checkout failed: \(error)")
                    // TODO: Surface the failure to the player.
                }
            }
        }
    }
}

@MainActor
final class CheckoutDelegate: WebViewCheckoutDelegate {
    static let shared = CheckoutDelegate()
    func didCloseCheckout(orderId: String) {
        // The WebView sheet closed. Check unconsumed orders to see if the player paid.
    }
}
- Swift
import UIKit
import AghanimCheckout

final class CheckoutViewController: UIViewController, WebViewCheckoutDelegate {

    private func launchCheckout(params: CheckoutParams) {
        Task {
            do {
                let orderId = try await AppDelegate.aghanim.startCheckout(
                    params,
                    mode: .webView(
                        presenter: AppDelegate.presenter,
                        config: WebViewConfig(),
                        delegate: self
                    )
                )
                // Track the order ID so you can reconcile the purchase after the player returns.
                print("Aghanim checkout started for order \(orderId)")
            } catch {
                // Log debug information for troubleshooting.
                print("Aghanim checkout failed: \(error)")
                // TODO: Surface the failure to the player.
            }
        }
    }

    func didCloseCheckout(orderId: String) {
        // The WebView sheet closed. Check unconsumed Orders to see if the player paid.
    }
}
Throwing SDK methods fail with an ApiError. Match on the case to decide what the player sees.
- Swift
do {
    let orderId = try await aghanim.startCheckout(params, mode: launchMode)
    print("Aghanim checkout started for order \(orderId)")
} catch let error as ApiError {
    switch error {
    case .playerIdNotSet:
        // Set the player ID after sign-in, then let the player retry.
        break
    case .invalidArgument(.presenter, _, _):
        // No window to present over: the app is backgrounded, or several scenes are
        // foreground-active. The Order was already created and its ID is not returned, so
        // check the presenter before launching rather than calling startCheckout again.
        break
    case let .invalidArgument(name, reason, _):
        // The SDK rejected an argument before the call reached the network.
        print("Aghanim rejected \(name): \(reason)")
        // TODO: Fix the value you passed.
    case let .validation(_, details):
        for detail in details {
            print("\(detail.location.joined(separator: ".")): \(detail.message)")
        }
    case .network, .timeout, .serverUnavailable:
        // Transient. Offer the player a retry.
        break
    case .rateLimitExceeded:
        // Back off before retrying.
        break
    case .notAuthenticated, .notAuthorized:
        // The API key is missing, wrong, or not permitted for this call. A retry will not help.
        break
    case .disposed:
        // This instance was disposed. Build a new one before calling again.
        break
    default:
        // Log debug information for troubleshooting.
        print("Aghanim checkout failed: \(error)")
    }
} catch is CancellationError {
    print("Aghanim checkout cancelled")
} catch {
    // Log debug information for troubleshooting.
    print("Aghanim checkout failed: \(error)")
}
ApiError.invalidArgument carries a typed name and reason so you can tell which argument the SDK rejected, and ApiError.validation carries one ValidationErrorDetail per field the server rejected. Cases that carry a payload include a debugMessage meant for your logs, not for the player.
Find the full list of cases in the Swift SDK reference.
Check unconsumed Orders
After the Checkout has launched and you have an Order ID, the player can step away from the payment form, complete the payment, or abandon it entirely. The launch call only confirms that the Order was created and the form opened — it does not tell you whether the player paid. To know which Orders the player has actually paid for and should be granted to them, ask the SDK for the list of unconsumed paid Orders.
- Swift
let unconsumedOrderIds = try await aghanim.orders.getUnconsumed()

for orderId in unconsumedOrderIds {
    do {
        try await aghanim.orders.consume(orderId: orderId)
    } catch {
        print("Aghanim could not consume order \(orderId): \(error)")
        continue
    }

    grantItems(forOrder: orderId) // TODO: Grant the items to the player
}
Consume paid Orders
Consume the Order the player has paid for, then grant its items once the consume succeeds. Consuming the same Order twice fails, so the grant runs only once.
- Swift
try await aghanim.orders.consume(orderId: orderId)
Full implementation code
- SwiftUI
- UIKit
- Swift
import SwiftUI
import AghanimCheckout

@main
struct MyGameApp: App {
    @StateObject private var session = GameSession(aghanim: Self.makeAghanim())

    var body: some Scene {
        WindowGroup {
            RootView()
                .environmentObject(session)
                .aghanimCheckoutPresenter()
                .onOpenURL { url in
                    Task {
                        let handled = await session.aghanim.handleRedirect(url)
                        guard handled else { return }
                        // The player came back from a Checkout. Check unconsumed Orders to grant the purchase.
                    }
                }
        }
    }

    private static func makeAghanim() -> Aghanim {
        guard let apiKey = ApiKey("YOUR_API_KEY") else {
            fatalError("API key cannot be blank.")
        }
        let config = AghanimConfig.builder(apiKey: apiKey)
            .with(logLevel: .debug)
            .build()
        return Aghanim(config: config)
    }
}

@MainActor
final class GameSession: ObservableObject {
    let aghanim: Aghanim
    init(aghanim: Aghanim) { self.aghanim = aghanim }
}

struct RootView: View {
    @EnvironmentObject private var session: GameSession
    @Environment(\.aghanimCheckoutPresenter) private var presenter

    var body: some View {
        Button("Buy") {
            Task { await buy() }
        }
    }

    private func buy() async {
        do {
            try await session.aghanim.setPlayerId("player_42")
            let item = CheckoutItem(sku: "items.new.ba68a028-2d51-46b4-a854-68fc16af328a")
            let params = CheckoutParams(
                items: [item],
                backToGameUrl: "https://yourdomain.com/checkout/return"
            )
            let orderId = try await session.aghanim.startCheckout(
                params,
                mode: .webView(
                    presenter: presenter,
                    config: WebViewConfig(),
                    delegate: CheckoutDelegate.shared
                )
            )
            // Track the order ID so you can reconcile the purchase after the player returns.
            print("Aghanim checkout started for order \(orderId)")
        } catch {
            // Log debug information for troubleshooting.
            print("Aghanim checkout failed: \(error)")
            // TODO: Surface the failure to the player.
        }
    }
}

@MainActor
final class CheckoutDelegate: WebViewCheckoutDelegate {
    static let shared = CheckoutDelegate()
    func didCloseCheckout(orderId: String) {
        // The WebView sheet closed. Check unconsumed orders to see if the player paid.
    }
}
- Swift
import UIKit
import AghanimCheckout

@main
final class AppDelegate: UIResponder, UIApplicationDelegate {

    static let aghanim: Aghanim = {
        guard let apiKey = ApiKey("YOUR_API_KEY") else {
            fatalError("API key cannot be blank.")
        }
        let config = AghanimConfig.builder(apiKey: apiKey)
            .with(logLevel: .debug)
            .build()
        return Aghanim(config: config)
    }()

    static let presenter = KeyWindowPresenter()
}

final class SceneDelegate: UIResponder, UIWindowSceneDelegate {

    // Universal Links.
    func scene(
        _ scene: UIScene,
        continue userActivity: NSUserActivity
    ) {
        guard userActivity.activityType == NSUserActivityTypeBrowsingWeb,
              let url = userActivity.webpageURL else { return }
        handle(url)
    }

    // Custom URL schemes.
    func scene(
        _ scene: UIScene,
        openURLContexts URLContexts: Set<UIOpenURLContext>
    ) {
        for context in URLContexts {
            handle(context.url)
        }
    }

    private func handle(_ url: URL) {
        Task {
            let handled = await AppDelegate.aghanim.handleRedirect(url)
            guard handled else { return }
            // The player came back from a Checkout. Check unconsumed Orders to grant the purchase.
        }
    }
}

final class CheckoutViewController: UIViewController, WebViewCheckoutDelegate {

    @IBAction private func buyTapped() {
        Task { await buy() }
    }

    private func buy() async {
        do {
            try await AppDelegate.aghanim.setPlayerId("player_42")
            let item = CheckoutItem(sku: "items.new.ba68a028-2d51-46b4-a854-68fc16af328a")
            let params = CheckoutParams(
                items: [item],
                backToGameUrl: "https://yourdomain.com/checkout/return"
            )
            let orderId = try await AppDelegate.aghanim.startCheckout(
                params,
                mode: .webView(
                    presenter: AppDelegate.presenter,
                    config: WebViewConfig(),
                    delegate: self
                )
            )
            // Track the order ID so you can reconcile the purchase after the player returns.
            print("Aghanim checkout started for order \(orderId)")
        } catch {
            // Log debug information for troubleshooting.
            print("Aghanim checkout failed: \(error)")
            // TODO: Surface the failure to the player.
        }
    }

    func didCloseCheckout(orderId: String) {
        // The WebView sheet closed. Check unconsumed Orders to see if the player paid.
    }
}
Make payment
Make a payment. If you have set the sandbox mode, use the test card below. In the sandbox, you can make payments only with the test cards — alternative methods like PayPal, wallets, and local payment methods appear only in the live environment. The test cards accept any digits as CVV and any future date as expiry date. Don’t forget to fill in an email address to check the receipt is sent and any postal code as a billing address.
Successful payments
After you complete the payment, you will receive a receipt sent to the specified email address and a transaction record in Aghanim Dashboard → Transactions.
| Card Brand | Card Number | CVV | Expiry date | Country |
|---|---|---|---|---|
| VISA (credit) | 4242 4242 4242 4242 | Any 3 digits | Any future date | GB |
Unsuccessful payments
Make an unsuccessful payment just in case you are curious. You will see the transaction in Aghanim Dashboard → Transactions as well.
| Number | CVV | Expiry date | Response code | Description |
|---|---|---|---|---|
4832 2850 6160 9015 | Any 3 digits | Any future date | 16 | Payment declined |
For the live mode, you can find all supported payment methods in Company settings → Payment methods. Turn on or off those you see suitable. Some payment methods are available globally by default. You can’t disable Credit cards, Apple Pay, Google Pay, and PayPal.
In Checkout, the Aghanim evaluates the currency and any restrictions, then dynamically presents only the payment methods available to the player based on evaluation.
When you use the live mode, the payment form shows to the player a setting to save their payment method so they can make a one-click payment in the future.
Handle post-payment events on game server-side
To complete the Checkout, handle items’ granting and chargebacks on your game backend. To do so, implement a webhook system that accepts the item.add and item.remove webhooks. See the code example with the implementation.
Comply with the Aghanim requirements for these webhooks:
- Use HTTPS schema for the single POST webhook endpoint.
- Check that webhooks are generated and signed by the Aghanim.
- Handle the
idempotency_keyfield in the webhook payload to prevent processing duplicate webhooks. - Respond with the HTTP status codes:
2xxfor successfully processed webhooks.4xxand5xxfor errors.
Grant items to player
The Aghanim sends the item.add webhook to let you know about the purchased items and ask for your permission to grant them to the player.
When the Aghanim has your 2xx answer, it can complete the checkout logic and redirect the player to a deep link if provided.
Support refunds and chargebacks
The Aghanim sends the item.remove webhook when a bank or payment system reverses the transaction, or you have requested refund in Aghanim Dashboard → Transactions. Partial refunds are not supported.
The suggested implementation handles the webhooks mentioned before:
item.addfor granting items. You need it for integration.item.removefor refunds and chargebacks. You might need it for integration.
- Python
- Ruby
- Node.js
- Go
# 통합에서 웹훅 이벤트를 처리하기 위해 이 샘플 코드를 사용하세요.
#
# 1. 이 코드를 `server.py`라는 새 파일에 붙여 넣으세요.
#
# 2. 의존성 설치:
#    python -m pip install fastapi[all]
#
# 3. http://localhost:8000에서 서버를 실행합니다
#    python server.py

import fastapi, hashlib, hmac, json, typing
from fastapi.responses import JSONResponse

app = fastapi.FastAPI()

@app.post("/webhook")
async def webhook(request: fastapi.Request) -> dict[str, typing.Any]:
    secret_key = "<YOUR_S2S_KEY>"  # 실제 웹훅 비밀 키로 교체하세요

    raw_payload = await request.body()
    payload = raw_payload.decode()
    timestamp = request.headers["x-aghanim-signature-timestamp"]
    received_signature = request.headers["x-aghanim-signature"]

    if not verify_signature(secret_key, payload, timestamp, received_signature):
        raise fastapi.HTTPException(status_code=403, detail="Invalid signature")

    data = json.loads(payload)
    event_type = data["event_type"]
    event_data = data["event_data"]

    if event_type == "item.add":
        add_item(event_data)
        return {"status": "ok"}

    if event_type == "item.remove":
        remove_item(event_data)
        return {"status": "ok"}

    raise fastapi.HTTPException(status_code=400, detail="Unknown event type")

def verify_signature(secret_key: str, payload: str, timestamp: str, received_signature: str) -> bool:
    signature_data = f"{timestamp}.{payload}"
    computed_hash = hmac.new(secret_key.encode(), signature_data.encode(), hashlib.sha256)
    computed_signature = computed_hash.hexdigest()
    return hmac.compare_digest(computed_signature, received_signature)

def add_item(event_data: dict[str, typing.Any]) -> None:
    # 이벤트를 처리하고 항목을 추가하기 위한 플레이스홀더 로직입니다.
    # 실제 애플리케이션에서는 이 함수가 데이터베이스나 인벤토리 시스템과 상호작용합니다.
    player_id = event_data["player_id"]
    for item in event_data["items"]:
      sku = item["sku"]
      print(f"Item {sku} has been credited to player's {player_id} account.")

def remove_item(event_data: dict[str, typing.Any]) -> None:
    # 이벤트를 처리하고 항목을 제거하기 위한 플레이스홀더 로직입니다.
    # 실제 애플리케이션에서는 이 함수가 데이터베이스나 인벤토리 시스템과 상호작용합니다.
    player_id = event_data["player_id"]
    for item in event_data["items"]:
      sku = item["sku"]
      print(f"Item {sku} has been removed from player's {player_id} account.")

if __name__ == "__main__":
    import uvicorn
    uvicorn.run(app, host="0.0.0.0", port=8000)
# 통합에서 웹훅 이벤트를 처리하기 위해 이 샘플 코드를 사용하세요.
#
# 1. 이 코드를 `server.rb`라는 새 파일에 붙여 넣으세요.
#
# 2. 의존성 설치:
#    gem install sinatra json hmac
#
# 3. http://localhost:8000에서 서버를 실행합니다
#    ruby server.rb

require 'sinatra'
require 'json'
require 'openssl'

post '/webhook' do
  secret_key = "<YOUR_S2S_KEY>"  # 실제 웹훅 비밀 키로 교체하세요

  payload = request.body.read
  timestamp = request.env["HTTP_X_AGHANIM_SIGNATURE_TIMESTAMP"]
  received_signature = request.env["HTTP_X_AGHANIM_SIGNATURE"]

  unless verify_signature(secret_key, payload, timestamp, received_signature)
    halt 403, "Invalid signature"
  end

  data = JSON.parse(payload)
  event_type = data["event_type"]
  event_data = data["event_data"]

  if event_type == "item.add"
    add_item(event_data)
    return { status: "ok" }.to_json
  end

  if event_type == "item.remove"
    remove_item(event_data)
    return { status: "ok" }.to_json
  end

  halt 400, "Unknown event type"
end

def verify_signature(secret_key, payload, timestamp, received_signature)
  signature_data = "#{timestamp}.#{payload}"
  computed_signature = OpenSSL::HMAC.hexdigest('sha256', secret_key, signature_data)
  OpenSSL.secure_compare(computed_signature, received_signature)
end

def add_item(event_data)
  # 이벤트를 처리하고 항목을 추가하기 위한 플레이스홀더 로직입니다.
  # 실제 애플리케이션에서는 이 함수가 데이터베이스나 인벤토리 시스템과 상호작용합니다.
  player_id = event_data["player_id"]
  for item in event_data["items"] do
    sku = item["sku"]
    puts "Item #{sku} has been credited to player's #{player_id} account."
  end
end

def remove_item(event_data)
  # 이벤트를 처리하고 항목을 제거하기 위한 플레이스홀더 로직입니다.
  # 실제 애플리케이션에서는 이 함수가 데이터베이스나 인벤토리 시스템과 상호작용합니다.
  player_id = event_data["player_id"]
  for item in event_data["items"] do
    sku = item["sku"]
    puts "Item #{sku} has been removed from player's #{player_id} account."
  end
end

if __FILE__ == $0
  require 'sinatra'
  set :bind, '0.0.0.0'
  set :port, 8000
end
// 통합에서 웹훅 이벤트를 처리하기 위해 이 샘플 코드를 사용하세요.
//
// 1. 이 코드를 새로운 파일 `server.js`에 붙여 넣으세요.
//
// 2. 의존성 설치:
//    npm install express
//
// 3. http://localhost:8000에서 서버를 실행합니다
//    node server.js

const express = require('express');
const crypto = require('crypto');

const app = express();

app.post('/webhook', express.raw({ type: "*/*" }), async (req, res) => {
  const secretKey = '<YOUR_S2S_KEY>'; // 실제 웹훅 비밀 키로 교체하세요

  const rawPayload = req.body;
  const timestamp = req.headers['x-aghanim-signature-timestamp'];
  const receivedSignature = req.headers['x-aghanim-signature'];

  if (!verifySignature(secretKey, rawPayload, timestamp, receivedSignature)) {
    return res.status(403).send('Invalid signature');
  }

  const payload = JSON.parse(req.body);
  const { event_type, event_data } = payload;

  if (event_type === 'item.add') {
    addItem(event_data);
    return res.json({ status: 'ok' });
  }

  if (event_type === 'item.remove') {
    removeItem(event_data);
    return res.json({ status: 'ok' });
  }

  return res.status(400).send('Unknown event type');
});

function verifySignature(secretKey, payload, timestamp, receivedSignature) {
  const signatureData = `${timestamp}.${payload}`;
  const computedSignature = crypto
    .createHmac('sha256', secretKey)
    .update(signatureData)
    .digest('hex');
  return crypto.timingSafeEqual(Buffer.from(computedSignature), Buffer.from(receivedSignature));
}

function addItem(event_data) {
  // 이벤트를 처리하고 항목을 추가하기 위한 플레이스홀더 로직입니다.
  // 실제 애플리케이션에서는 이 함수가 데이터베이스나 인벤토리 시스템과 상호작용합니다.
  const playerId = event_data.player_id;
  for (const item of event_data.items) {
    const sku = item.sku;
    console.log(`Item ${item.sku} has been credited to player's ${playerId} account.`);
 }
}

function removeItem(event_data) {
  // 이벤트 처리 및 항목 제거를 위한 플레이스홀더 로직입니다.
  // 실제 애플리케이션에서는 이 함수가 데이터베이스나 인벤토리 시스템과 상호작용합니다.
  const playerId = event_data.player_id;
  for (const item of event_data.items) {
    const sku = item.sku;
    console.log(`Item ${item.sku} has been removed from player's ${playerId} account.`);
 }
}

app.listen(8000, () => {
  console.log('Server is running on http://localhost:8000');
});
// 통합에서 웹훅 이벤트를 처리하기 위한 샘플 코드입니다.
//
// 1. 이 코드를 새로운 파일 `server.go`에 붙여넣으세요.
//
// 2. http://localhost:8000에서 서버를 실행하세요
//    go run server.go

package main

import (
  "crypto/hmac"
  "crypto/sha256"
  "encoding/hex"
  "encoding/json"
  "fmt"
  "io/ioutil"
  "net/http"
)

func webhookHandler(w http.ResponseWriter, r *http.Request) {
  secretKey := "<YOUR_S2S_KEY>"  // 실제 웹훅 비밀 키로 교체하세요

  rawPayload, _ := ioutil.ReadAll(r.Body)
  payload := string(rawPayload)
  timestamp := r.Header.Get("X-Aghanim-Signature-Timestamp")
  receivedSignature := r.Header.Get("X-Aghanim-Signature")

  if !verifySignature(secretKey, payload, timestamp, receivedSignature) {
    http.Error(w, "Invalid signature", http.StatusForbidden)
    return
  }

  var data map[string]interface{}
  if err := json.Unmarshal(rawPayload, &data); err != nil {
    http.Error(w, "Invalid payload", http.StatusBadRequest)
    return
  }

  eventType := data["event_type"].(string)
  eventData := data["event_data"].(map[string]interface{})

  if eventType == "item.add" {
    addItem(eventData)
    w.WriteHeader(http.StatusOK)
    json.NewEncoder(w).Encode(map[string]string{"status": "ok"})
    return
  }

  if eventType == "item.remove" {
    removeItem(eventData)
    w.WriteHeader(http.StatusOK)
    json.NewEncoder(w).Encode(map[string]string{"status": "ok"})
    return
  }

  http.Error(w, "Unknown event type", http.StatusBadRequest)
}

func verifySignature(secretKey, payload, timestamp, receivedSignature string) bool {
  signatureData := fmt.Sprintf("%s.%s", timestamp, payload)
  mac := hmac.New(sha256.New, []byte(secretKey))
  mac.Write([]byte(signatureData))
  computedSignature := hex.EncodeToString(mac.Sum(nil))
  return hmac.Equal([]byte(computedSignature), []byte(receivedSignature))
}

func addItem(eventData map[string]interface{}) {
  // 이벤트를 처리하고 항목을 추가하기 위한 플레이스홀더 로직입니다.
  // 실제 애플리케이션에서는 이 함수가 데이터베이스나 인벤토리 시스템과 상호작용합니다.
  playerID := eventData["player_id"].(string)
  items := eventData["items"].([]interface{})
  for _, item := range items {
    itemMap := item.(map[string]interface{})
    sku := itemMap["sku"].(string)
    fmt.Printf("Item %s has been credited to player's %s account.\\n", sku, playerID)
  }
}

func removeItem(eventData map[string]interface{}) {
  // 이벤트 처리 및 항목 제거를 위한 플레이스홀더 로직입니다.
  // 실제 애플리케이션에서는 이 함수가 데이터베이스나 인벤토리 시스템과 상호작용합니다.
  playerID := eventData["player_id"].(string)
  items := eventData["items"].([]interface{})
  for _, item := range items {
    itemMap := item.(map[string]interface{})
    sku := itemMap["sku"].(string)
    fmt.Printf("Item %s has been removed from player's %s account.\\n", sku, playerID)
  }
}

func main() {
  http.HandleFunc("/webhook", webhookHandler)
  fmt.Println("Server is running on http://localhost:8000")
  http.ListenAndServe(":8000", nil)
}
Add webhook endpoint to Aghanim
When the webhook handling is ready, add the endpoint to the account so the Aghanim could start sending the events.
- Dashboard
- API
- Go to Integration → Webhooks.
- Click Add webhook. The site will open the Create webhook window.
- Copy and paste the URL
https://<YOUR_DOMAIN>/webhook. - Click Select events. The site will open the Select events to send window.
- Expand the Main class and select the Item add, Item remove checkboxes.
- Click Apply.
- Click Add. The site will redirect you to the webhook page.
- Click Back.
- cURL
- Python
- Ruby
- Node.js
- Go
curl -X POST https://api.aghanim.com/s2s/v1/webhooks \
  -H 'Content-Type: application/json' \
  -H 'Authorization: Bearer <YOUR_S2S_KEY>' \
  -d '{
    "events": [
      "item.add",
      "item.remove"
    ],
    "url": "https://<YOUR_DOMAIN>/webhook",
    "description": "The endpoint for all webhooks",
    "method": "POST",
    "enabled": true,
    "enabled_logs": true,
    "player_context_enabled": true
  }'
import requests

def create_webhook():
    payload = {
        "events": ["item.add", "item.remove"],
        "url": "https://<YOUR_DOMAIN>/webhook",
        "description": "The endpoint for all webhooks",
        "method": "POST",
        "enabled": True,
        "enabled_logs": True,
        "player_context_enabled": True
    }

    headers = {"Authorization": "Bearer <YOUR_S2S_KEY>", "Content-Type": "application/json"}
    resp = requests.post("https://api.aghanim.com/s2s/v1/webhooks", json=payload, headers=headers)
    return resp.json()
require 'net/http'
require 'json'
require 'uri'

def create_webhook
  uri = URI("https://api.aghanim.com/s2s/v1/webhooks")
  req = Net::HTTP::Post.new(uri, 'Content-Type' => 'application/json', 'Authorization' => 'Bearer <YOUR_S2S_KEY>')
  req.body = {
    events: ["item.add", "item.remove"],
    url: "https://<YOUR_DOMAIN>/webhook",
    description: "The endpoint for all webhooks",
    method: "POST",
    enabled: true,
    enabled_logs: true,
    player_context_enabled: true
  }.to_json

  res = Net::HTTP.start(uri.hostname, uri.port, use_ssl: true) { |http| http.request(req) }
  JSON.parse(res.body)
end
const axios = require('axios');

async function createWebhook() {
  const payload = {
    events: ["item.add", "item.remove"],
    url: "https://<YOUR_DOMAIN>/webhook",
    description: "The endpoint for all webhooks",
    method: "POST",
    enabled: true,
    enabled_logs: true,
    player_context_enabled: true
  };

  const res = await axios.post('https://api.aghanim.com/s2s/v1/webhooks', payload, {
    headers: { 'Authorization': 'Bearer <YOUR_S2S_KEY>', 'Content-Type': 'application/json' }
  });
  return res.data;
}
package main

import (
	"bytes"
	"encoding/json"
	"net/http"
)

func createWebhook() map[string]interface{} {
	payload := map[string]interface{}{
		"events":                 []string{"item.add", "item.remove"},
		"url":                    "https://<YOUR_DOMAIN>/webhook",
		"description":            "The endpoint for all webhooks",
		"method":                 "POST",
		"enabled":                true,
		"enabled_logs":           true,
		"player_context_enabled": true,
	}
	data, _ := json.Marshal(payload)

	req, _ := http.NewRequest("POST", "https://api.aghanim.com/s2s/v1/webhooks", bytes.NewBuffer(data))
	req.Header.Set("Authorization", "Bearer <YOUR_S2S_KEY>")
	req.Header.Set("Content-Type", "application/json")

	client := &http.Client{}
	resp, _ := client.Do(req)
	defer resp.Body.Close()

	var webhook map[string]interface{}
	json.NewDecoder(resp.Body).Decode(&webhook)
	return webhook
}
Test your integration
After you have handled the webhooks, check that the purchased items are in your inventory. That’s all.
Next steps
- See Currency codes and minor units to learn how the Aghanim represents monetary amounts.
- See Payment Webhook to learn about the payment progress when the player visits the payment form.
FAQ
The Swift SDK targets iOS 13.0 and higher. It supports both physical devices (arm64) and the iOS Simulator (arm64 + x86_64). macOS, Mac Catalyst, tvOS, watchOS, and visionOS are not supported.
The AghanimPresenter protocol decouples the SDK from how your app composes its window hierarchy. The bundled KeyWindowPresenter works well for single-scene apps; in SwiftUI you can also read the presenter from the environment via .aghanimCheckoutPresenter() applied to a view inside a specific scene.
For apps that connect more than one foreground scene at the same time (multi-window iPad apps, multitasking-aware apps, Catalyst-style layouts), implement your own AghanimPresenter that returns the view controller of the scene you want to present from, then pass that instance to startCheckout(_:mode:) for that scene's checkout calls.
Both flows are supported and you can mix them.
Server-driven (recommended for games with a backend): Configure the item.add webhook in the Aghanim Dashboard. Aghanim calls your server when an order is paid; your server grants the items to the player. The client SDK is only responsible for launching the Checkout and routing the redirect.
Client-driven (for games without a dedicated server): Use aghanim.orders.getUnconsumed() on app launch and after the player returns from checkout to find paid orders the player hasn't been credited for yet, call aghanim.orders.consume(orderId:) for each one, and grant the items once the consume succeeds.
Pick server-driven when you can — webhooks survive the player closing your app mid-flow and don't require the player to re-open it before the grant happens.
도움이 필요하세요?
통합팀에 문의하십시오 [email protected]