Unreal Engine
Integrate the Aghanim to start accepting payments for your game items online through a prebuilt checkout page. The Checkout on Unreal Engine uses our Unreal Engine SDK — a source plugin with a Blueprint- and C++-callable API that wraps Aghanim's native checkout on Android and iOS and talks to the Aghanim REST API directly on Windows, macOS, and Linux. For it to work properly, you need:
- Unreal Engine 5.8.
- A project able to compile C++ (the plugin is distributed as source): a C++ project, or a Blueprint project with a working compiler toolchain.
- Android: the NDK and SDK packages Unreal expects (installed by
Engine/Extras/Android/SetupAndroid), and network access to the Aghanim Maven registry when packaging. - iOS: an Xcode version matching your engine, and an Apple developer team for signing.
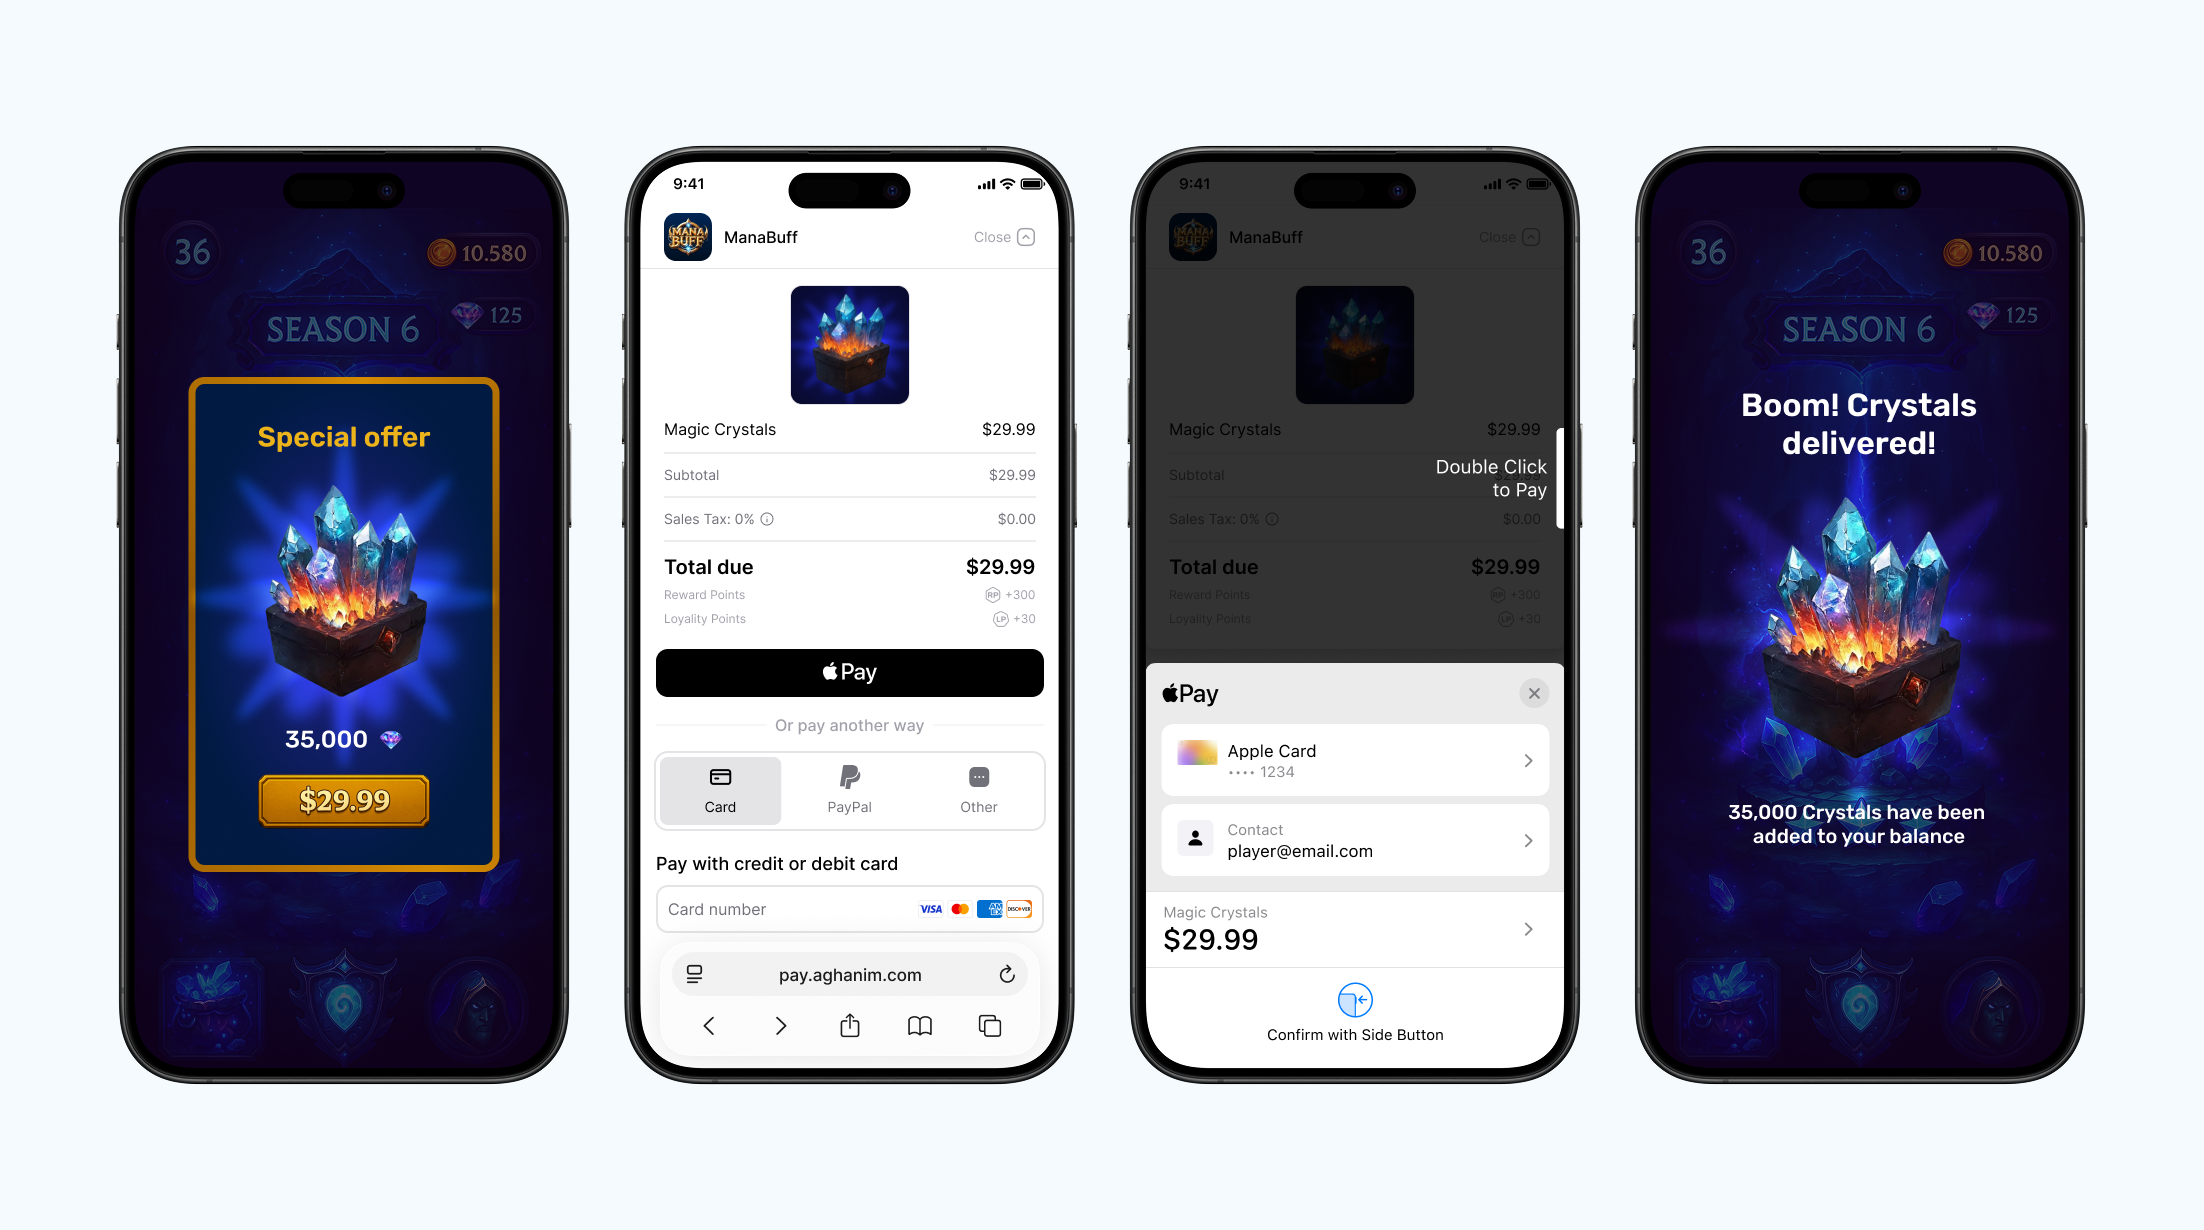
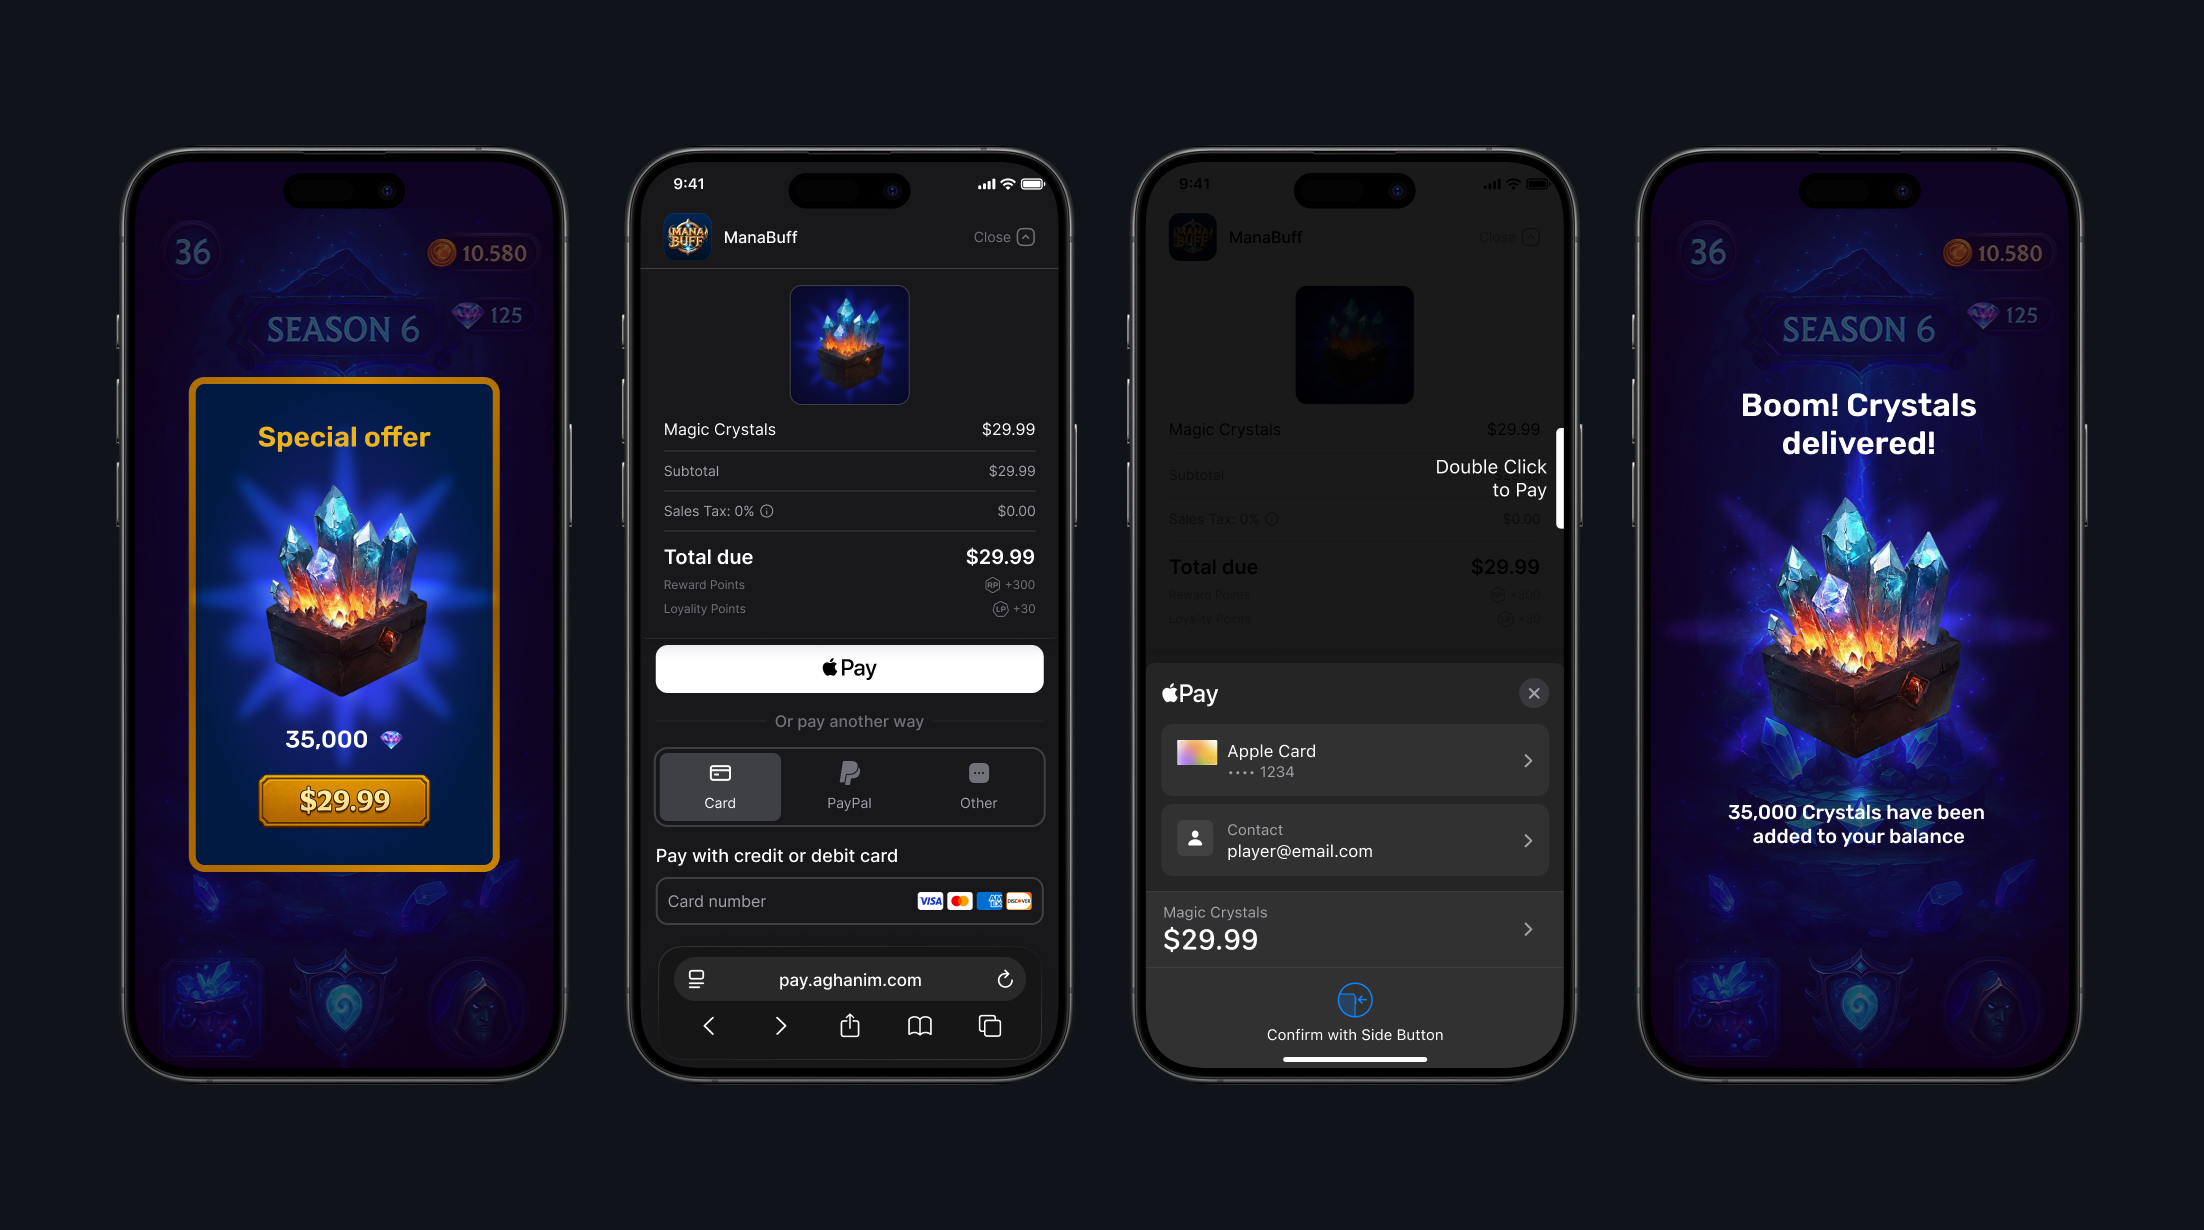
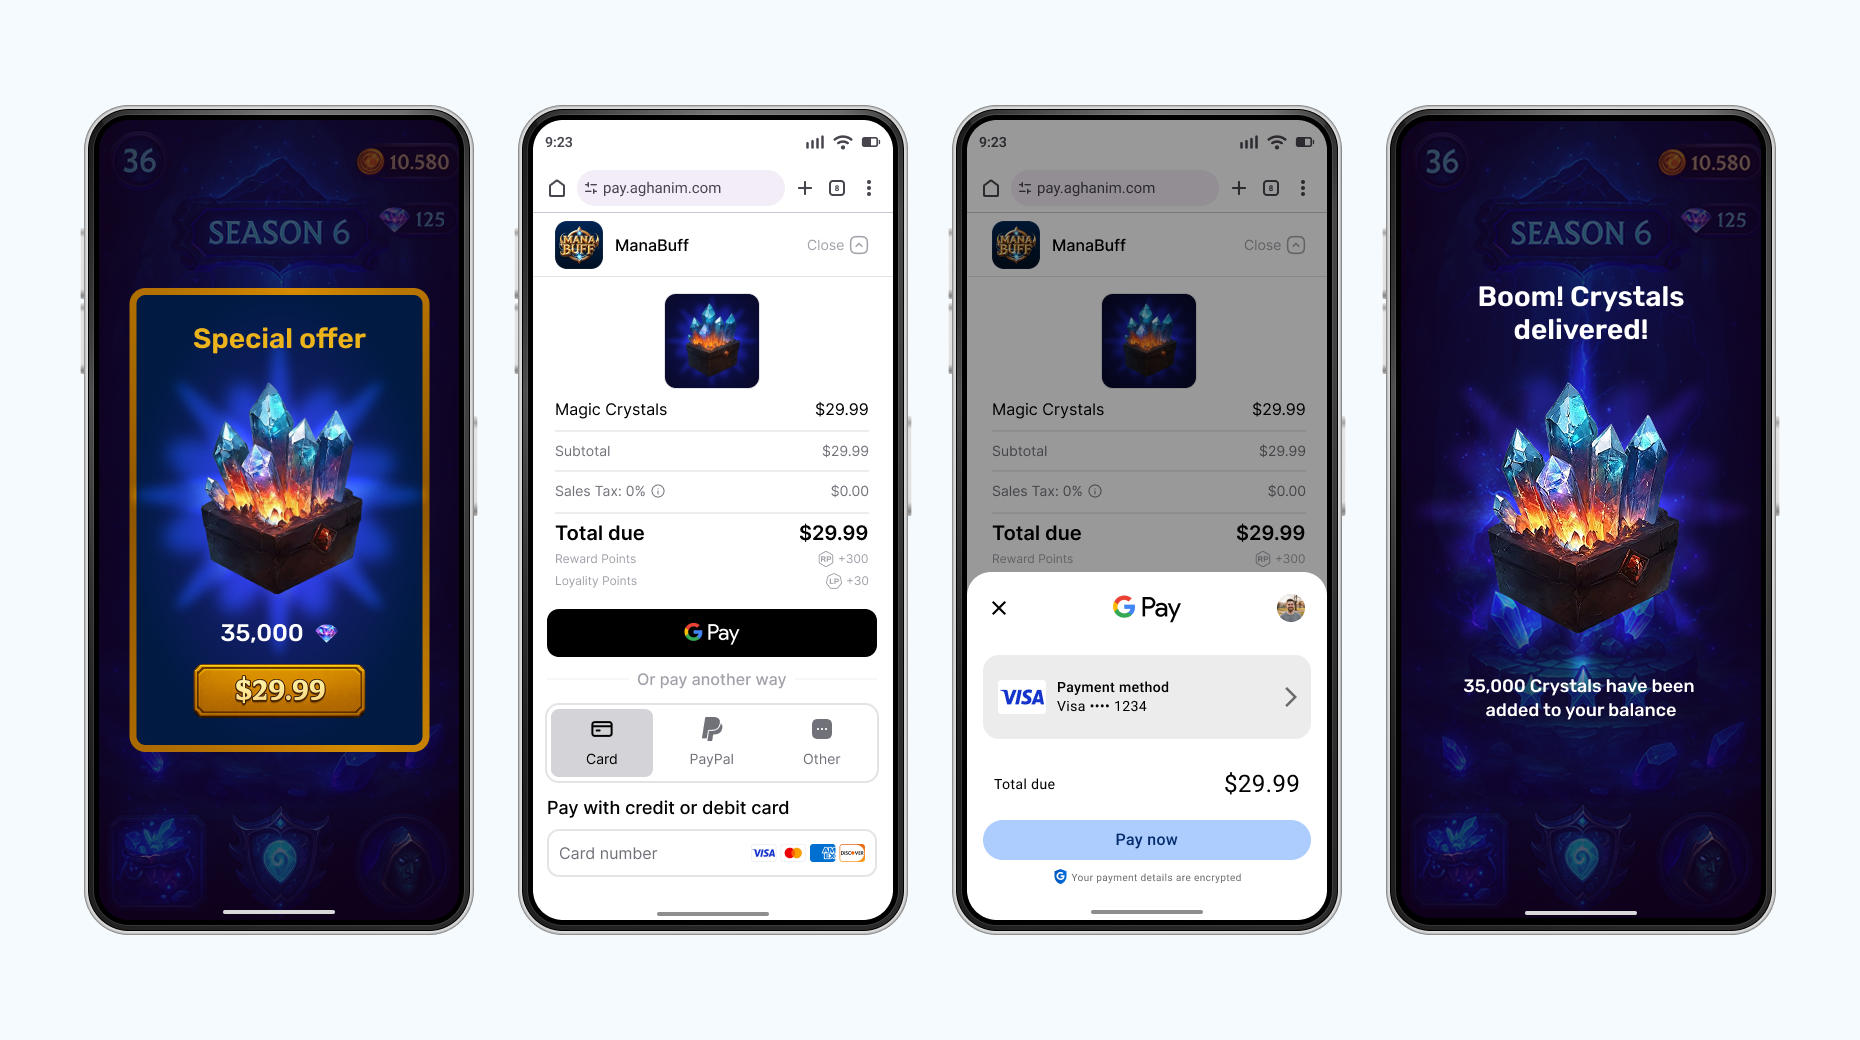
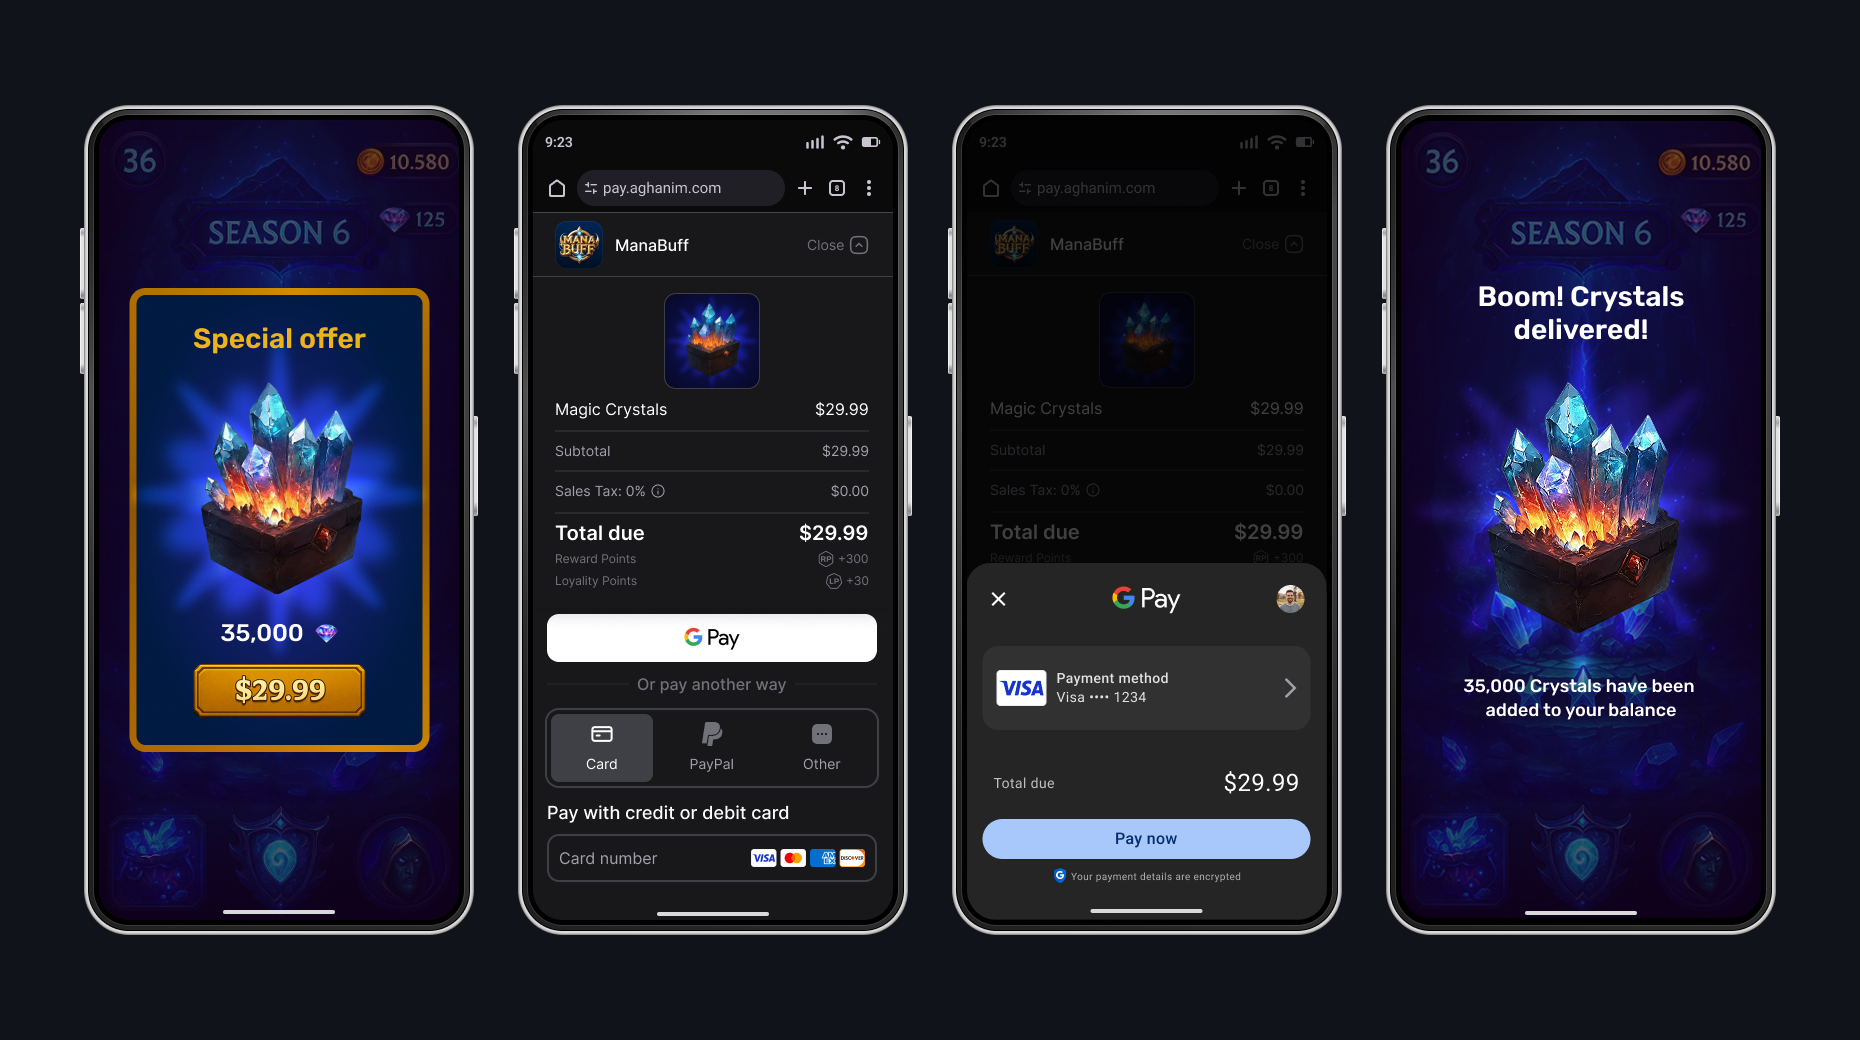
Android. Default browser
The Checkout integration mode that works in the player's default browser. Use when you want to redirect the players outside your game. This is the only mode available on desktop platforms (Windows, macOS, Linux) and in the editor.
Register with Aghanim and link your game
First, register for an Aghanim account. At the end of registration, add the link to your mobile game. It should be published in Apple App Store or Google Play Store.
Set up environment
If you want to make real payments, you are all set as the live mode is used as default. Otherwise, use a sandbox, an isolated test environment, to simulate the Aghanim events to test payments without real money movement. To turn on the sandbox mode, set the Sandbox toggle to the active position.
Sandbox supports card payments only. Alternative methods (PayPal, wallets, local payment methods) appear only in live. See Test payments for the test cards.
While integrating, you will need an SDK key to authenticate requests to the Aghanim. Keep in mind that the sandbox and live modes have different keys. Find the SDK key in Integration → API keys.
Configure game client-side
Configure your game client to work with the Checkout by setting up the SDK and implementing the necessary code to process its methods.
Install SDK
The Unreal Engine SDK is distributed as a source plugin: the release contains source that compiles with your engine, so there are no prebuilt binaries — instead each release is pinned to the engine it was tested on (currently Unreal Engine 5.8). Your project must be able to compile C++ — a C++ project, or a Blueprint project with a working compiler toolchain.
-
Download a release from Aghanim's public Artifact Registry and unzip it into your project's
Plugins/folder so that the descriptor lives atYourProject/Plugins/AghanimSDK/AghanimSDK.uplugin. The registry is public read, so this is a plain anonymous download — no credentials. ReplaceVERSION/ENGINEwith the release you want, andYourProjectwith the path to your Unreal project.- PowerShell (Windows)
- Bash (macOS/Linux)
$Version = "0.2.0"       # the plugin release to install
$Engine  = "5.8"         # the Unreal Engine version the release is pinned to
$Zip     = "AghanimSDK-v$Version-UE$Engine.zip"
$Base    = "https://artifactregistry.googleapis.com/v1/projects/ag-registry/locations/us-central1/repositories/unreal-engine-sdk/files/unreal-engine-sdk:v${Version}:${Zip}"

# Download the plugin zip and its checksum (public read — no credentials).
Invoke-WebRequest -Uri "${Base}:download?alt=media" -OutFile $Zip
Invoke-WebRequest -Uri "${Base}.sha256:download?alt=media" -OutFile "$Zip.sha256"

# Verify the SHA-256, then abort on mismatch.
$Expected = (Get-Content "$Zip.sha256").Split()[0]
$Actual   = (Get-FileHash $Zip -Algorithm SHA256).Hash.ToLower()
if ($Actual -ne $Expected) { throw "Checksum mismatch — aborting." }

# Unzip into your project's Plugins/ folder (replace YourProject with your
# project's path) — lands at YourProject\Plugins\AghanimSDK\AghanimSDK.uplugin.
Expand-Archive -Path $Zip -DestinationPath YourProject\Plugins\ -ForceVERSION="0.2.0" # the plugin release to install
ENGINE="5.8" # the Unreal Engine version the release is pinned to
ZIP="AghanimSDK-v${VERSION}-UE${ENGINE}.zip"
BASE="https://artifactregistry.googleapis.com/v1/projects/ag-registry/locations/us-central1/repositories/unreal-engine-sdk/files/unreal-engine-sdk:v${VERSION}:${ZIP}"
# Download the plugin zip and its checksum (public read — no credentials).
curl -fSL --retry 3 -o "${ZIP}" "${BASE}:download?alt=media"
curl -fSL --retry 3 -o "${ZIP}.sha256" "${BASE}.sha256:download?alt=media"
# Verify the SHA-256, then abort on mismatch.
shasum -a 256 -c "${ZIP}.sha256"
# Unzip into your project's Plugins/ folder (replace YourProject with your
# project's path) — lands at YourProject/Plugins/AghanimSDK/AghanimSDK.uplugin.
unzip -q "${ZIP}" -d YourProject/Plugins/Use a project plugin underPlugins/The plugin must live under your project's
Plugins/directory. A plugin referenced out-of-tree through the.uproject'sAdditionalPluginDirectoriesis not packaged into the iOS app and fails to load on device. -
Open your project. Unreal enables a plugin placed under
Plugins/automatically; if it is disabled, enable Aghanim SDK under Edit → Plugins (category SDK) and restart the editor. -
Let the editor compile the plugin (or build from your IDE). No further dependency setup is required on any platform:
- Android — the native Aghanim SDK is resolved automatically from Aghanim's public Maven registry when the APK/AAB is packaged, so the packaging machine needs network access to
https://us-central1-maven.pkg.dev/ag-registry/android-sdk. No manual Gradle edits are needed. - iOS — the native SDK ships inside the plugin as vendored frameworks; they are linked and embedded automatically.
- Windows / macOS / Linux (and the editor) — the plugin talks to the Aghanim REST API directly, so the project always compiles and runs in the editor.
- Android — the native Aghanim SDK is resolved automatically from Aghanim's public Maven registry when the APK/AAB is packaged, so the packaging machine needs network access to
Configure SDK API key
The API key is a project setting, read automatically when the game starts.
- Copy the SDK key from Integration → API keys.
- In the Unreal Editor, open Project Settings → Plugins → Aghanim SDK.
- Paste the key into the API Key field.
The value is persisted to your project's DefaultGame.ini, so it travels with the project and applies to packaged builds:
[/Script/AghanimSDK.AghanimSettings]
ApiKey=<YOUR_SDK_KEY>
Initialize SDK
You do not call an initializer manually. The plugin ships a game-instance subsystem, UAghanimSDKSubsystem, that owns the SDK lifetime: when the game instance starts, it reads the API Key from the project settings and, if a key is set, initializes the SDK once for the lifetime of the process.
Get the subsystem wherever you need the SDK:
- C++
// Anywhere you have a game instance (e.g. inside an AActor or UUserWidget):
UAghanimSDKSubsystem* SDK = GetGameInstance()->GetSubsystem<UAghanimSDKSubsystem>();
In Blueprints: use the Get Game Instance Subsystem node with the AghanimSDKSubsystem class, then call the Aghanim SDK nodes on the result.
If you obtain the key at runtime instead (for example, after the player signs in), leave the API Key project setting empty and initialize explicitly once:
- C++
// Only needed when the API Key project setting is left empty
// and you obtain the key at runtime instead:
SDK->InitializeWithApiKey(TEXT("<YOUR_SDK_KEY>"));
Blueprint node: Initialize With Api Key (Aghanim SDK category).
The SDK writes its own diagnostics through Unreal's LogAghanimSDK log category.
Set the verbosity in Project Settings → Plugins → Aghanim SDK → Log Level. Supported levels, each enabling that severity and everything above it: Debug, Info, Warning, Error, and None (the default, which disables SDK logging entirely). The value is applied when the SDK is initialized and persisted next to the API key:
[/Script/AghanimSDK.AghanimSettings]
ApiKey=<YOUR_SDK_KEY>
LogLevel=Info
Use Debug during development to see SDK lifecycle and network activity; switch back to None (or Error) for release builds.
Configure player ID
Since a game instance runs for one player at a time, the SDK allows to set the player ID once to use it in all following method calls. Orders are created on behalf of a player, so set the ID as soon as your game client knows who the player is — before any checkout.
Setting and clearing the ID are asynchronous, so the SDK only has the player once On Success fires. Chain the rest of your startup off that pin rather than off the call.
- C++
// As soon as your game client knows who the player is. Setting the ID is asynchronous,
// so wait for On Success before any checkout or order call.
UAghanimSetPlayerIdAction* SetAction =
    UAghanimSetPlayerIdAction::AghanimSetPlayerId(this, TEXT("player-123"));

SetAction->OnSuccess.AddDynamic(this, &UMyStore::HandlePlayerIdSet); // const FAghanimError& Error
SetAction->OnFailure.AddDynamic(this, &UMyStore::HandleError);       // const FAghanimError& Error
SetAction->Activate();

// Later, e.g. when the player signs out:
UAghanimClearPlayerIdAction* ClearAction =
    UAghanimClearPlayerIdAction::AghanimClearPlayerId(this);

ClearAction->OnSuccess.AddDynamic(this, &UMyStore::HandlePlayerIdCleared);
ClearAction->OnFailure.AddDynamic(this, &UMyStore::HandleError);
ClearAction->Activate();
Blueprint nodes: Aghanim Set Player Id and Aghanim Clear Player Id (Aghanim SDK → Player category; async, with On Success and On Failure pins that each carry an Error).
Calling operations that need a player (Aghanim Get Unconsumed Orders, Aghanim Consume Order, or a checkout) before Aghanim Set Player Id has succeeded fails with the PlayerIdNotSet error type. Set the player ID immediately after authentication and wait for On Success.
Create item
The integration needs the items to be added to the Dashboard. When creating items, each should have its SKU, a unique identifier for the item within your game backend. You can add their prices, currency, sale configuration, and more.
To add an item to the Dashboard:
- Go to SKU Management → Items.
- Click Add Item. The site will open the Add Item page.
- Enter the item name New item.
- Enter the item SKU items.new.ba68a028-2d51-46b4-a854-68fc16af328a.
- In the Price block:
- Select the Fiat price type for a real money item.
- Enter the price 1.99.
- Click Add item.
For integration purposes, we have shortened an item setup. Before going live, use every suitable feature while adding items to the Dashboard.
Create Checkout item
Create an FAghanimCheckoutItem value that references an existing dashboard SKU. The SKU is the only required field; the others let you override the dashboard configuration on a per-checkout basis.
- C++
FAghanimCheckoutItem Item;
Item.Sku      = TEXT("items.new.ba68a028-2d51-46b4-a854-68fc16af328a"); // required

// Optional display overrides:
// Item.Name, Item.Description, Item.ImageUrl
In Blueprints, FAghanimCheckoutItem is a Blueprint struct: fill it with a Make AghanimCheckoutItem node.
Configure deep links
When the Checkout opens outside your game's own UI, the player needs a way back after the payment. That takes two matching halves: a URL scheme your app is registered to handle, and a BackToGameUrl on the checkout params that uses it.
Registering the scheme is the half you can either hand to the plugin or keep for yourself:
- Let the plugin register it. Fill in one project setting and it writes the iOS and Android registration for you when the game is packaged. Take this route unless you have a reason not to.
- Register it yourself. Leave that setting empty and declare the scheme in your own
Info.plistand Android manifest additions. You need this if you already hand-manage those files, or if you bring the player back through verified App Links or Universal Links, which the setting does not cover.
The steps below follow the first route.
-
In the Unreal Editor, open Project Settings → Plugins → Aghanim SDK and set Back To Game URL Scheme to the scheme alone, with no
://. Useyourgamefor a link likeyourgame://checkout/return. It is persisted next to the API key:[/Script/AghanimSDK.AghanimSettings]
ApiKey=<YOUR_SDK_KEY>
BackToGameUrlScheme=yourgameThe plugin registers the scheme on iOS and Android when the game is packaged. Desktop platforms ignore it.
-
Set
BackToGameUrlon the checkout params to a link that uses the same scheme. The host and path are free-form, soyourgame://checkout/returnworks as well as anything else your app routes. You can configure the return link per game in the Dashboard instead of passing it on every checkout.
Your game needs no handler of its own for the incoming link. The plugin and the native SDK route it, and the player lands back in the game.
BackToGameUrl has no effect in the Native launch mode, which never leaves the app, and a desktop external-browser checkout cannot return automatically at all.
Fulfillment never depends on the redirect either way: the player may return through the app switcher, or the app may be killed mid-checkout. Verify purchases through unconsumed orders.
Create Checkout params
When all data variables are ready, create another one that represents Checkout params. Checkout params are the programmatic representation of what the player sees when they are on the payment form. Checkout params are associated with a player and items, they are crucial for the Checkout to work. Pass the BackToGameUrl you defined earlier so the Checkout can route the player back to your game after the payment.
Locale is the locale the Checkout is localized in. It is an EAghanimLocale, so the editor and Blueprint offer the supported values as a dropdown, and it defaults to En. See Checkout → Locales for the full list.
- C++
FAghanimCheckoutParams Params;
Params.Items.Add(Item); // required: at least one item

// All optional:
Params.Locale        = EAghanimLocale::En;
Params.BackToGameUrl = TEXT("yourgame://checkout/return");
In Blueprints, fill the params with a Make AghanimCheckoutParams node. See the field-by-field description in the method reference.
You can attach custom metadata to the Checkout for item tracking purposes. You can access it through webhooks and in API responses from the Aghanim. Metadata has a structure of "key-value" pairs.
- C++
Params.Metadata.Add(TEXT("campaign"), TEXT("summer_sale"));
Params.Metadata.Add(TEXT("source"),   TEXT("store_screen"));
You can choose the behavior of redirecting the player after they have completed the payment successfully with EAghanimRedirectMode. The difference in the provided by the SDK modes is a delay before redirecting or absence of redirecting.
- Immediate
- Delayed
- No redirect
When the player has completed the payment, the SDK redirects them immediately to the deep link from BackToGameUrl.
- C++
Params.RedirectSettings.Mode = EAghanimRedirectMode::Immediate;
When the player has completed the payment, the SDK shows the screen for the successful payment for the given number of seconds and then redirects the player to the deep link from BackToGameUrl.
- C++
Params.RedirectSettings.Mode         = EAghanimRedirectMode::Delayed;
Params.RedirectSettings.DelaySeconds = 5;
When the player has completed the payment, they stay on the screen for the successful payment. To exit it, they manually close it or navigate away. After, you should redirect them to the deep link from BackToGameUrl by yourself.
- C++
// The default: the player stays on the success screen and the
// redirectSettings block is omitted from the created order.
Params.RedirectSettings.Mode = EAghanimRedirectMode::NoRedirect;
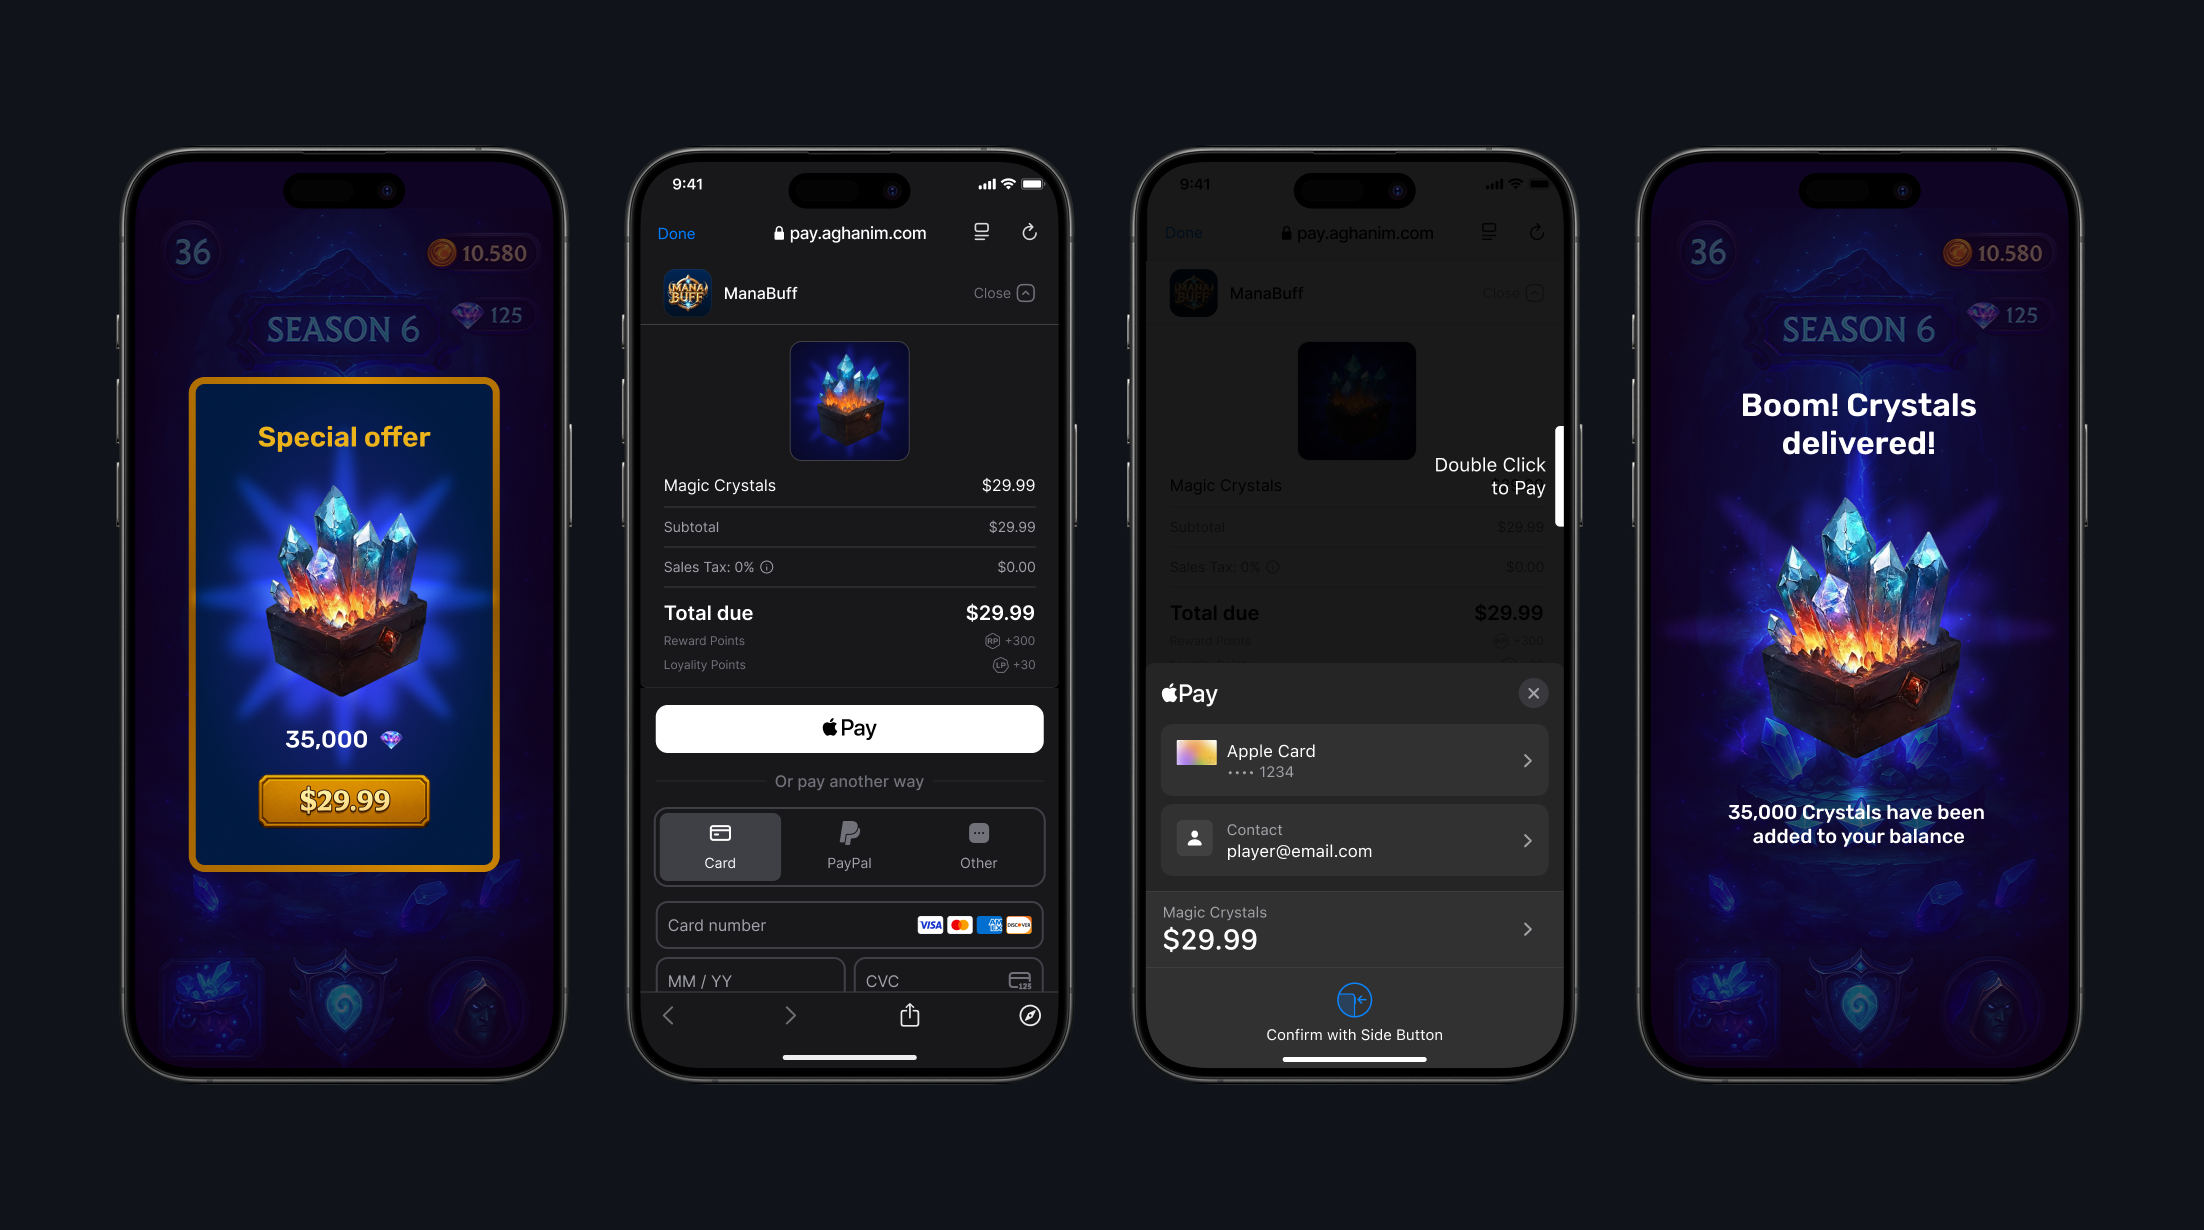
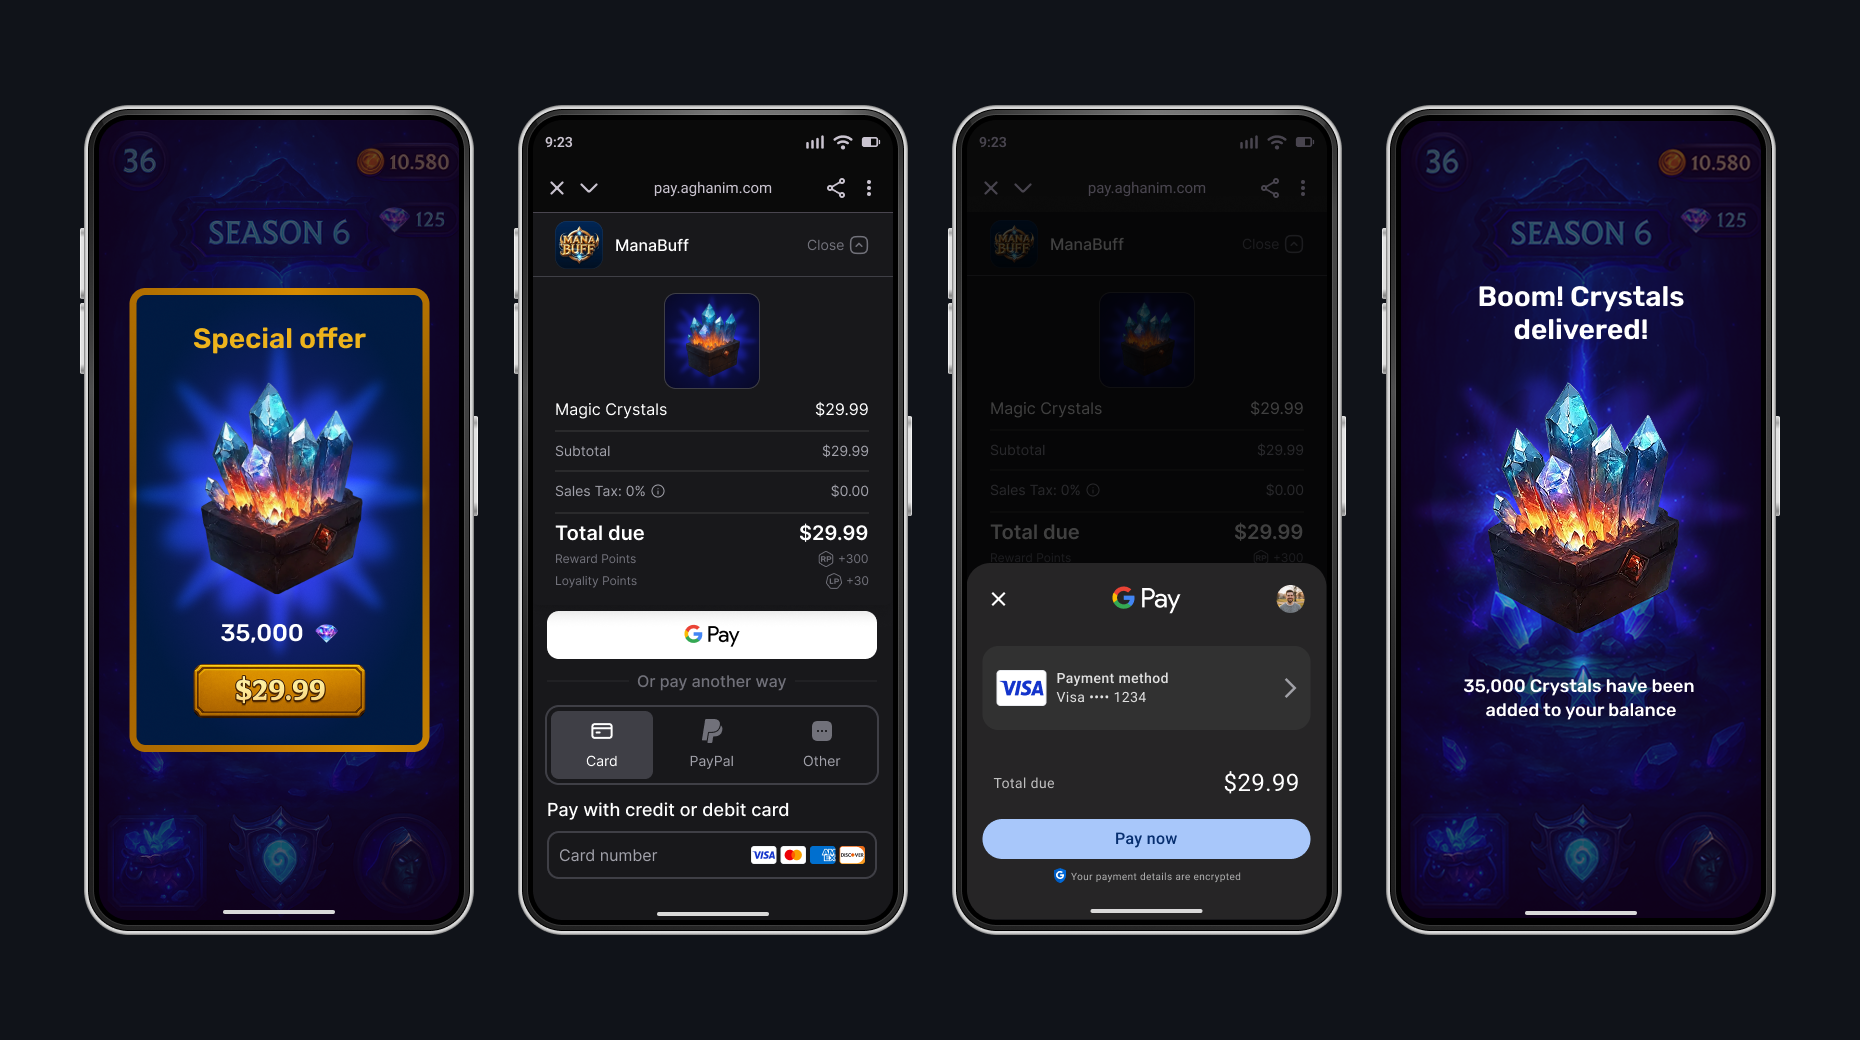
You can set the appearance mode for the Checkout UI with EAghanimUiMode. The SDK supports automatic detection based on the system setting, or you can force a specific mode.
- Auto
- Dark
- Light
The SDK automatically detects and applies the appropriate appearance mode based on the system setting.
- C++
// The default: follow the platform/device appearance.
Params.UiSettings.Mode = EAghanimUiMode::Auto;
The SDK forces dark mode appearance for the Checkout UI.
- C++
Params.UiSettings.Mode = EAghanimUiMode::Dark;
The SDK forces light mode appearance for the Checkout UI.
- C++
Params.UiSettings.Mode = EAghanimUiMode::Light;
Launch Checkout
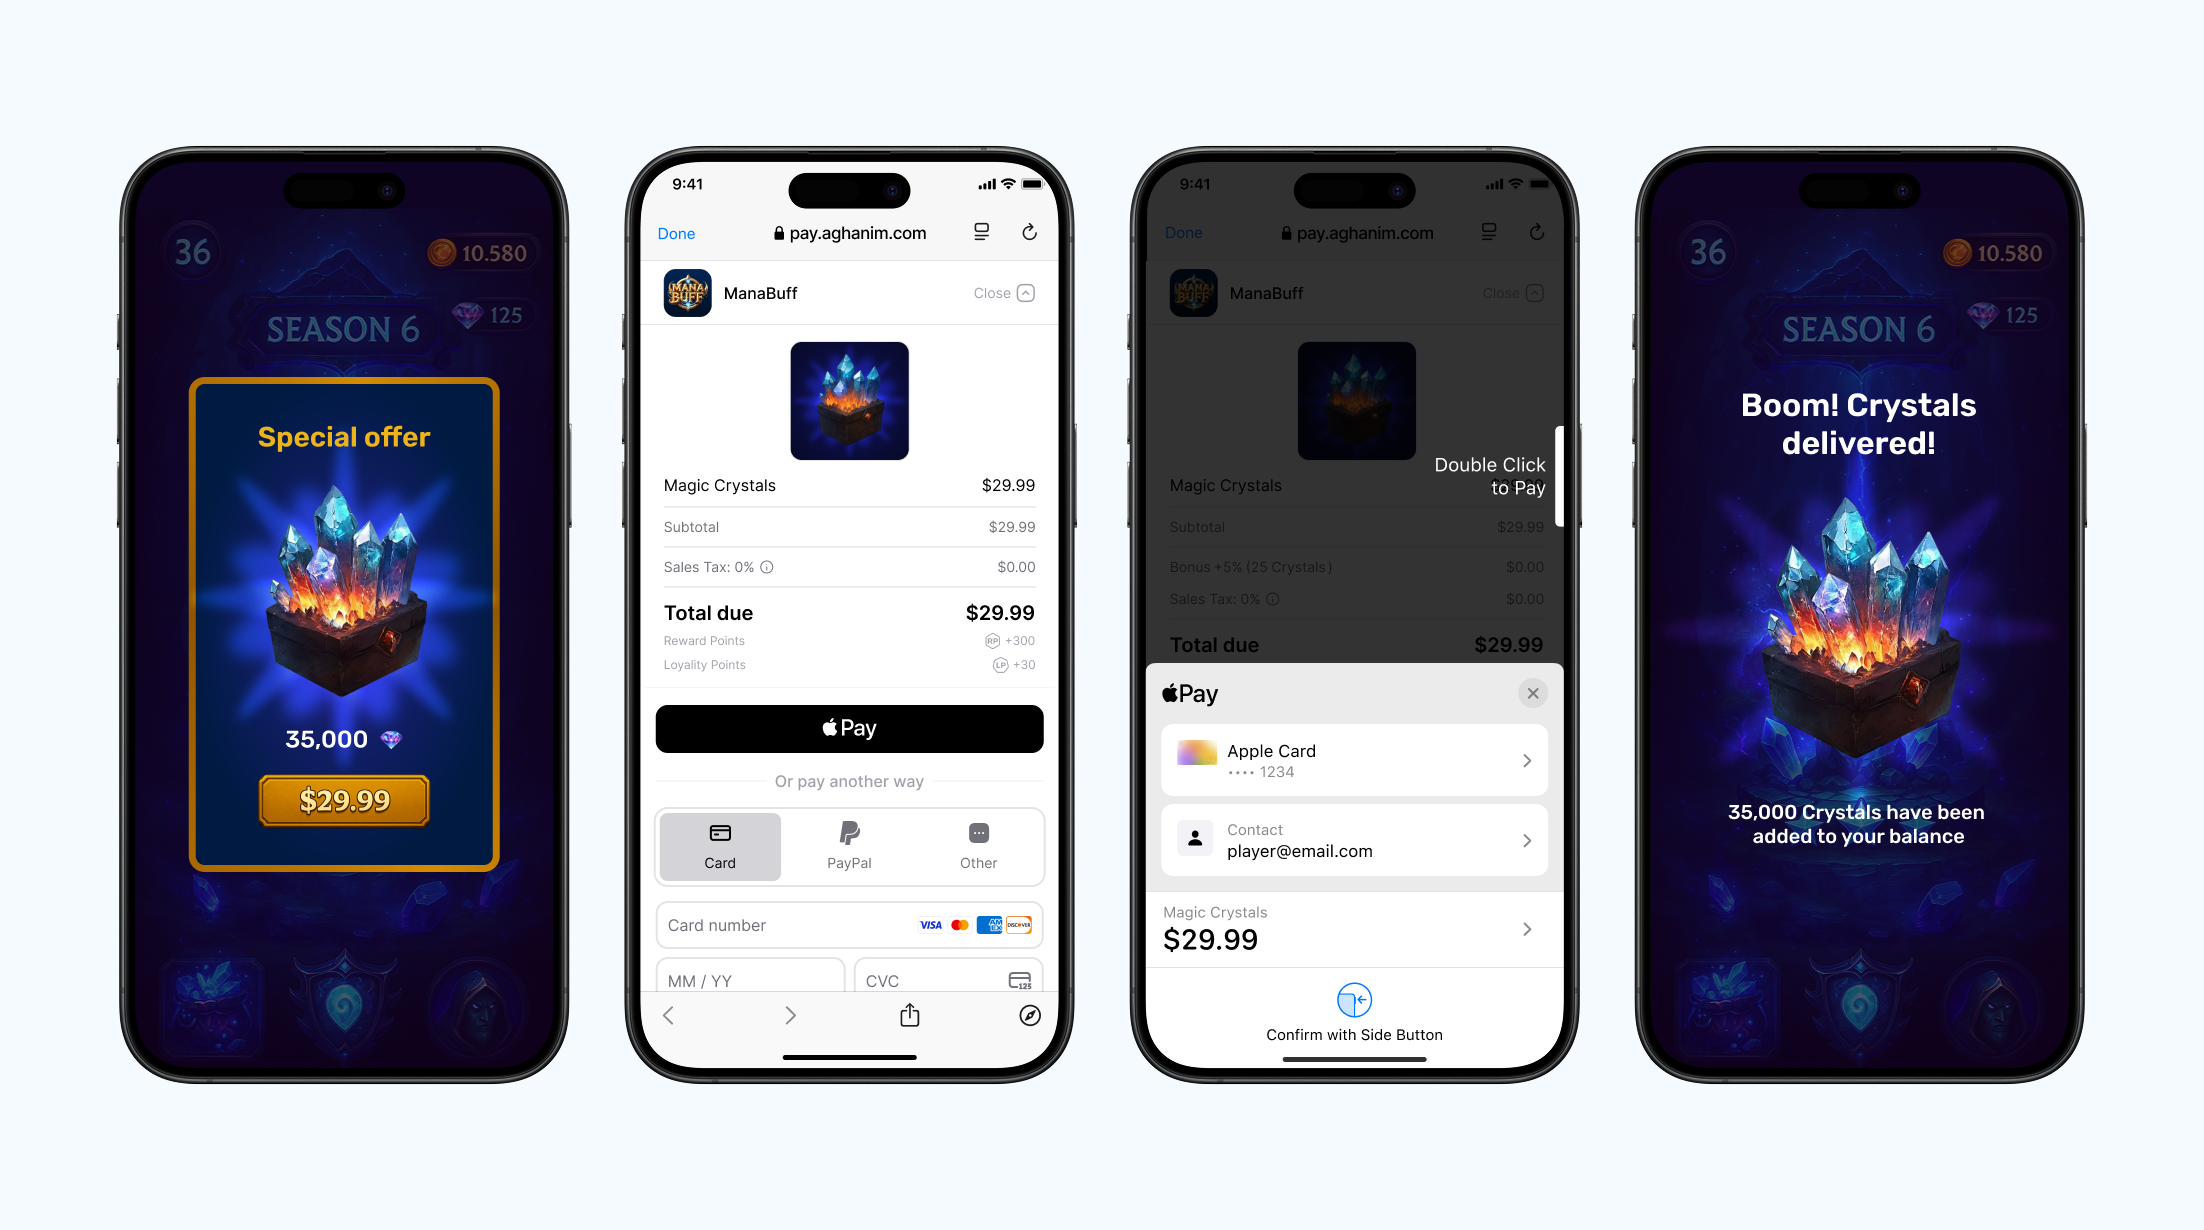
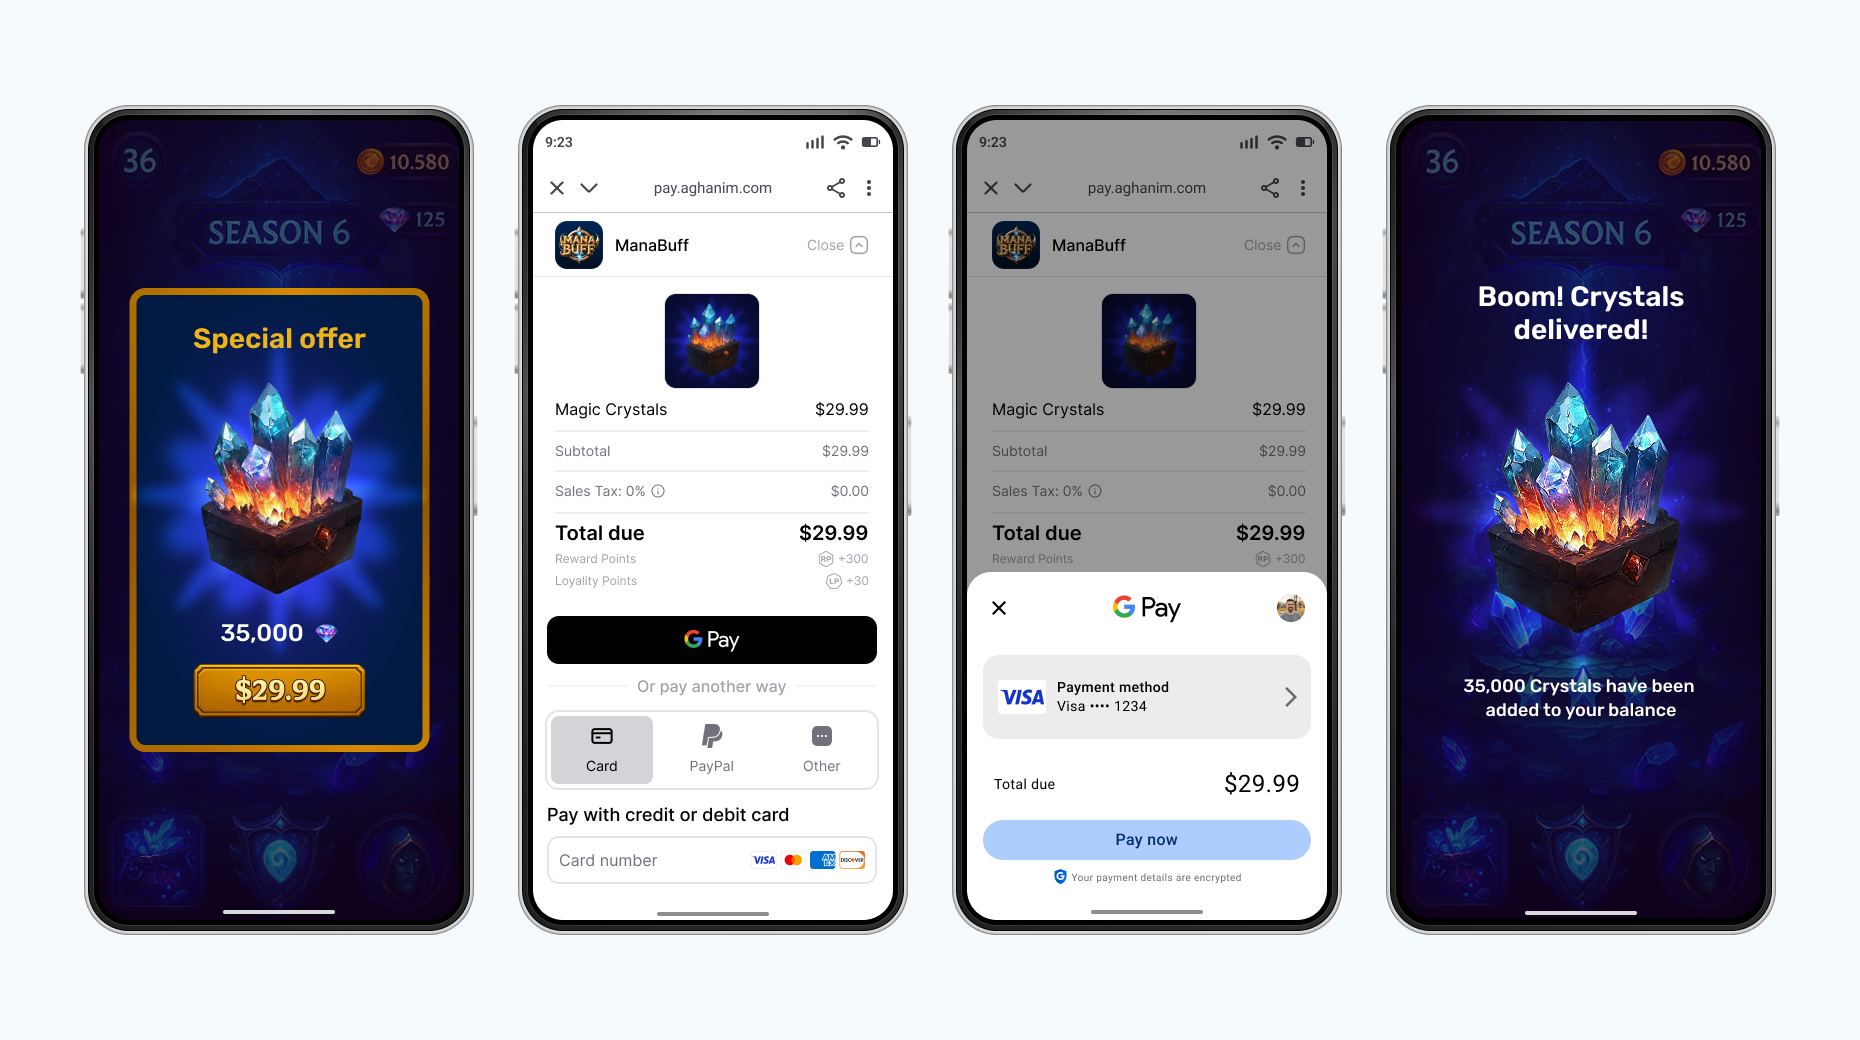
Add a checkout button to your game client that launches the payment form. The SDK creates an order from the provided checkout params and opens it in the player's default browser. On success, you receive the Order ID to track the order. On failure, you receive an FAghanimError with debug information for troubleshooting.
The Default browser mode is available on every supported platform — it is the only mode on Windows, macOS, and Linux, where the plugin creates the order through the REST API and opens the returned checkout URL in the OS default browser. Guard the call with IsCheckoutLaunchModeAvailable so shared game code runs unmodified everywhere.
- C++
const EAghanimCheckoutLaunchMode Mode = EAghanimCheckoutLaunchMode::DefaultBrowser;
if (SDK->IsCheckoutLaunchModeAvailable(Mode))
{
    UAghanimStartCheckoutAction* Action =
        UAghanimStartCheckoutAction::AghanimStartCheckout(this, Params, Mode);

    // Handlers take (FString OrderId, const FAghanimError& Error): the Order ID is set
    // only on On Launched, the error only on On Failed.
    Action->OnLaunched.AddDynamic(this, &UMyStore::HandleCheckoutLaunched);
    Action->OnFailed.AddDynamic(this, &UMyStore::HandleCheckoutFailed);
    Action->Activate();
}
Blueprint node: Aghanim Start Checkout (async; pins On Launched and On Failed, each carrying both Order Id and Error), guarded by Is Checkout Launch Mode Available. The ID is filled only on On Launched, the error only on On Failed.
The Default browser mode is designed for flows where the player leaves your game entirely. The SDK does not stay attached to the external browser: OnCheckoutClosed never fires in this mode, so always verify fulfillment through unconsumed orders.
Check unconsumed Orders
After the Checkout has launched and you have an Order ID, the player can step away from the payment form, complete the payment, or abandon it entirely. The launch call only confirms that the Order was created and the form opened — it does not tell you whether the player paid. To know which Orders the player has actually paid for and should be granted to them, ask the SDK for the list of unconsumed paid Orders.
Good moments to check are on startup, when your game regains focus after the player returns from the checkout, and when the subsystem's OnCheckoutClosed event fires. OnCheckoutClosed is best-effort: it only fires for on-screen checkouts (WebView / in-app browser), never for the external browser, and can be missed if the app is killed mid-checkout — treat it as a hint, not a guarantee.
- C++
UAghanimGetUnconsumedOrdersAction* Action =
    UAghanimGetUnconsumedOrdersAction::AghanimGetUnconsumedOrders(this);

// Handlers take (const TArray<FString>& OrderIds, const FAghanimError& Error).
Action->OnSuccess.AddDynamic(this, &UMyStore::HandleUnconsumedOrders);
Action->OnFailure.AddDynamic(this, &UMyStore::HandleUnconsumedOrdersFailed);
Action->Activate();

void UMyStore::HandleUnconsumedOrders(const TArray<FString>& OrderIds, const FAghanimError& Error)
{
    for (const FString& OrderId : OrderIds)
    {
        // Consume the order, then grant its items on the success pin.
    }
}
Blueprint node: Aghanim Get Unconsumed Orders (async; pins On Success and On Failure, each carrying both Order Ids and Error). The IDs are filled only on success, the error only on failure.
Consume paid Orders
Consume the Order the player has paid for, then grant its items once the consume succeeds. Consuming the same Order twice fails, so the grant runs only once. A consumed Order is not returned by the unconsumed-orders query again.
- C++
UAghanimConsumeOrderAction* Action =
    UAghanimConsumeOrderAction::AghanimConsumeOrder(this, OrderId);

// Handlers take (const FAghanimError& Error); the error is empty on success.
Action->OnSuccess.AddDynamic(this, &UMyStore::HandleOrderConsumed);
Action->OnFailure.AddDynamic(this, &UMyStore::HandleError);
Action->Activate();
Blueprint node: Aghanim Consume Order (async; pins On Success and On Failure, each carrying an Error that is empty on success).
The end-to-end loop is: Aghanim Get Unconsumed Orders → Aghanim Consume Order for a returned ID → the grant hangs off that node's On Success pin.
Unconsumed-order polling is meant for games without a dedicated server. If you have a game server, prefer the item.add webhook so your server controls granting.
Full implementation code
A complete client-side flow in one place: a game-instance subsystem that sets the player ID, launches a checkout with any available launch mode, and reconciles paid orders once the player ID is set and whenever a checkout closes.
- C++
// MyStoreSubsystem.h
#pragma once

#include "CoreMinimal.h"
#include "Subsystems/GameInstanceSubsystem.h"
#include "AghanimSDKSubsystem.h"
#include "AghanimAsyncActions.h"
#include "MyStoreSubsystem.generated.h"

UCLASS()
class UMyStoreSubsystem : public UGameInstanceSubsystem
{
    GENERATED_BODY()

public:
    virtual void Initialize(FSubsystemCollectionBase& Collection) override;

    /** Call once your game client knows who the player is. */
    UFUNCTION(BlueprintCallable, Category = "My Store")
    void ConfigurePlayer(const FString& PlayerId);

    /** Call from your store UI. Pick any launch mode that is available on the platform. */
    UFUNCTION(BlueprintCallable, Category = "My Store")
    void BuyItem(const FString& Sku, EAghanimCheckoutLaunchMode LaunchMode);

    /** Call once the player ID is set, and whenever the game regains focus. */
    UFUNCTION(BlueprintCallable, Category = "My Store")
    void ReconcilePaidOrders();

private:
    UFUNCTION() void HandlePlayerIdSet(const FAghanimError& Error);
    UFUNCTION() void HandleCheckoutLaunched(FString OrderId, const FAghanimError& Error);
    UFUNCTION() void HandleCheckoutFailed(FString OrderId, const FAghanimError& Error);
    UFUNCTION() void HandleCheckoutClosed(FString OrderId);
    UFUNCTION() void HandleUnconsumedOrders(const TArray<FString>& OrderIds, const FAghanimError& Error);
    UFUNCTION() void HandleUnconsumedOrdersFailed(const TArray<FString>& OrderIds, const FAghanimError& Error);
    UFUNCTION() void HandleError(const FAghanimError& Error);

    UAghanimSDKSubsystem* GetSdk() const;
};

// MyStoreSubsystem.cpp
void UMyStoreSubsystem::Initialize(FSubsystemCollectionBase& Collection)
{
    Super::Initialize(Collection);

    // Best-effort hint that an on-screen checkout closed (iOS WebView / in-app browser).
    GetSdk()->OnCheckoutClosed.AddDynamic(this, &UMyStoreSubsystem::HandleCheckoutClosed);
}

void UMyStoreSubsystem::ConfigurePlayer(const FString& PlayerId)
{
    // Orders are created on behalf of a player, and setting the ID is asynchronous.
    // Everything that needs a player waits for On Success.
    UAghanimSetPlayerIdAction* Action =
        UAghanimSetPlayerIdAction::AghanimSetPlayerId(this, PlayerId);
    Action->OnSuccess.AddDynamic(this, &UMyStoreSubsystem::HandlePlayerIdSet);
    Action->OnFailure.AddDynamic(this, &UMyStoreSubsystem::HandleError);
    Action->Activate();
}

void UMyStoreSubsystem::HandlePlayerIdSet(const FAghanimError& Error)
{
    ReconcilePaidOrders();
}

void UMyStoreSubsystem::BuyItem(const FString& Sku, EAghanimCheckoutLaunchMode LaunchMode)
{
    if (!GetSdk()->IsCheckoutLaunchModeAvailable(LaunchMode))
    {
        return; // Fall back to another mode or hide the button.
    }

    FAghanimCheckoutItem Item;
    Item.Sku = Sku;

    FAghanimCheckoutParams Params;
    Params.Items.Add(Item);
    Params.BackToGameUrl = TEXT("yourgame://checkout/return");

    UAghanimStartCheckoutAction* Action =
        UAghanimStartCheckoutAction::AghanimStartCheckout(this, Params, LaunchMode);
    Action->OnLaunched.AddDynamic(this, &UMyStoreSubsystem::HandleCheckoutLaunched);
    Action->OnFailed.AddDynamic(this, &UMyStoreSubsystem::HandleCheckoutFailed);
    Action->Activate();
}

void UMyStoreSubsystem::HandleCheckoutLaunched(FString OrderId, const FAghanimError& Error)
{
    // The checkout opened; the payment happens later, possibly outside the app.
    // Keep the OrderId if you want to look the order up with Aghanim Get Order.
}

void UMyStoreSubsystem::HandleCheckoutFailed(FString OrderId, const FAghanimError& Error)
{
    UE_LOG(LogTemp, Warning, TEXT("Checkout failed (%s): %s"), *Error.Type, *Error.DebugMessage);
}

void UMyStoreSubsystem::HandleCheckoutClosed(FString OrderId)
{
    ReconcilePaidOrders();
}

void UMyStoreSubsystem::ReconcilePaidOrders()
{
    UAghanimGetUnconsumedOrdersAction* Action =
        UAghanimGetUnconsumedOrdersAction::AghanimGetUnconsumedOrders(this);
    Action->OnSuccess.AddDynamic(this, &UMyStoreSubsystem::HandleUnconsumedOrders);
    Action->OnFailure.AddDynamic(this, &UMyStoreSubsystem::HandleUnconsumedOrdersFailed);
    Action->Activate();
}

void UMyStoreSubsystem::HandleUnconsumedOrders(const TArray<FString>& OrderIds, const FAghanimError& Error)
{
    for (const FString& OrderId : OrderIds)
    {
        // 1. Grant the order's items in your game logic.
        // 2. Acknowledge the grant so the order is not returned again.
        UAghanimConsumeOrderAction* Action =
            UAghanimConsumeOrderAction::AghanimConsumeOrder(this, OrderId);
        Action->OnFailure.AddDynamic(this, &UMyStoreSubsystem::HandleError);
        Action->Activate();
    }
}

void UMyStoreSubsystem::HandleUnconsumedOrdersFailed(const TArray<FString>& OrderIds, const FAghanimError& Error)
{
    HandleError(Error);
}

void UMyStoreSubsystem::HandleError(const FAghanimError& Error)
{
    UE_LOG(LogTemp, Warning, TEXT("Aghanim SDK error (%s): %s"), *Error.Type, *Error.DebugMessage);
}

UAghanimSDKSubsystem* UMyStoreSubsystem::GetSdk() const
{
    return GetGameInstance()->GetSubsystem<UAghanimSDKSubsystem>();
}
The same flow in Blueprints: Get Game Instance Subsystem (AghanimSDKSubsystem) → Aghanim Set Player Id → from its On Success pin, build the params with Make AghanimCheckoutItem / Make AghanimCheckoutParams → Aghanim Start Checkout; bind the subsystem's On Checkout Closed event and, from it and from On Success, run Aghanim Get Unconsumed Orders → grant the items → Aghanim Consume Order.
Make payment
Make a payment. If you have set the sandbox mode, use the test card below. In the sandbox, you can make payments only with the test cards — alternative methods like PayPal, wallets, and local payment methods appear only in the live environment. The test cards accept any digits as CVV and any future date as expiry date. Don’t forget to fill in an email address to check the receipt is sent and any postal code as a billing address.
Successful payments
After you complete the payment, you will receive a receipt sent to the specified email address and a transaction record in Aghanim Dashboard → Transactions.
| Card Brand | Card Number | CVV | Expiry date | Country |
|---|---|---|---|---|
| VISA (credit) | 4242 4242 4242 4242 | Any 3 digits | Any future date | GB |
Unsuccessful payments
Make an unsuccessful payment just in case you are curious. You will see the transaction in Aghanim Dashboard → Transactions as well.
| Number | CVV | Expiry date | Response code | Description |
|---|---|---|---|---|
4832 2850 6160 9015 | Any 3 digits | Any future date | 16 | Payment declined |
For the live mode, you can find all supported payment methods in Company settings → Payment methods. Turn on or off those you see suitable. Some payment methods are available globally by default. You can’t disable Credit cards, Apple Pay, Google Pay, and PayPal.
In Checkout, the Aghanim evaluates the currency and any restrictions, then dynamically presents only the payment methods available to the player based on evaluation.
When you use the live mode, the payment form shows to the player a setting to save their payment method so they can make a one-click payment in the future.
Handle post-payment events on game server-side
To complete the Checkout, handle items’ granting and chargebacks on your game backend. To do so, implement a webhook system that accepts the item.add and item.remove webhooks. See the code example with the implementation.
Comply with the Aghanim requirements for these webhooks:
- Use HTTPS schema for the single POST webhook endpoint.
- Check that webhooks are generated and signed by the Aghanim.
- Handle the
idempotency_keyfield in the webhook payload to prevent processing duplicate webhooks. - Respond with the HTTP status codes:
2xxfor successfully processed webhooks.4xxand5xxfor errors.
Grant items to player
The Aghanim sends the item.add webhook to let you know about the purchased items and ask for your permission to grant them to the player.
When the Aghanim has your 2xx answer, it can complete the checkout logic and redirect the player to a deep link if provided.
Support refunds and chargebacks
The Aghanim sends the item.remove webhook when a bank or payment system reverses the transaction, or you have requested refund in Aghanim Dashboard → Transactions. Partial refunds are not supported.
The suggested implementation handles the webhooks mentioned before:
item.addfor granting items. You need it for integration.item.removefor refunds and chargebacks. You might need it for integration.
- Python
- Ruby
- Node.js
- Go
# 통합에서 웹훅 이벤트를 처리하기 위해 이 샘플 코드를 사용하세요.
#
# 1. 이 코드를 `server.py`라는 새 파일에 붙여 넣으세요.
#
# 2. 의존성 설치:
#    python -m pip install fastapi[all]
#
# 3. http://localhost:8000에서 서버를 실행합니다
#    python server.py

import fastapi, hashlib, hmac, json, typing
from fastapi.responses import JSONResponse

app = fastapi.FastAPI()

@app.post("/webhook")
async def webhook(request: fastapi.Request) -> dict[str, typing.Any]:
    secret_key = "<YOUR_S2S_KEY>"  # 실제 웹훅 비밀 키로 교체하세요

    raw_payload = await request.body()
    payload = raw_payload.decode()
    timestamp = request.headers["x-aghanim-signature-timestamp"]
    received_signature = request.headers["x-aghanim-signature"]

    if not verify_signature(secret_key, payload, timestamp, received_signature):
        raise fastapi.HTTPException(status_code=403, detail="Invalid signature")

    data = json.loads(payload)
    event_type = data["event_type"]
    event_data = data["event_data"]

    if event_type == "item.add":
        add_item(event_data)
        return {"status": "ok"}

    if event_type == "item.remove":
        remove_item(event_data)
        return {"status": "ok"}

    raise fastapi.HTTPException(status_code=400, detail="Unknown event type")

def verify_signature(secret_key: str, payload: str, timestamp: str, received_signature: str) -> bool:
    signature_data = f"{timestamp}.{payload}"
    computed_hash = hmac.new(secret_key.encode(), signature_data.encode(), hashlib.sha256)
    computed_signature = computed_hash.hexdigest()
    return hmac.compare_digest(computed_signature, received_signature)

def add_item(event_data: dict[str, typing.Any]) -> None:
    # 이벤트를 처리하고 항목을 추가하기 위한 플레이스홀더 로직입니다.
    # 실제 애플리케이션에서는 이 함수가 데이터베이스나 인벤토리 시스템과 상호작용합니다.
    player_id = event_data["player_id"]
    for item in event_data["items"]:
      sku = item["sku"]
      print(f"Item {sku} has been credited to player's {player_id} account.")

def remove_item(event_data: dict[str, typing.Any]) -> None:
    # 이벤트를 처리하고 항목을 제거하기 위한 플레이스홀더 로직입니다.
    # 실제 애플리케이션에서는 이 함수가 데이터베이스나 인벤토리 시스템과 상호작용합니다.
    player_id = event_data["player_id"]
    for item in event_data["items"]:
      sku = item["sku"]
      print(f"Item {sku} has been removed from player's {player_id} account.")

if __name__ == "__main__":
    import uvicorn
    uvicorn.run(app, host="0.0.0.0", port=8000)
# 통합에서 웹훅 이벤트를 처리하기 위해 이 샘플 코드를 사용하세요.
#
# 1. 이 코드를 `server.rb`라는 새 파일에 붙여 넣으세요.
#
# 2. 의존성 설치:
#    gem install sinatra json hmac
#
# 3. http://localhost:8000에서 서버를 실행합니다
#    ruby server.rb

require 'sinatra'
require 'json'
require 'openssl'

post '/webhook' do
  secret_key = "<YOUR_S2S_KEY>"  # 실제 웹훅 비밀 키로 교체하세요

  payload = request.body.read
  timestamp = request.env["HTTP_X_AGHANIM_SIGNATURE_TIMESTAMP"]
  received_signature = request.env["HTTP_X_AGHANIM_SIGNATURE"]

  unless verify_signature(secret_key, payload, timestamp, received_signature)
    halt 403, "Invalid signature"
  end

  data = JSON.parse(payload)
  event_type = data["event_type"]
  event_data = data["event_data"]

  if event_type == "item.add"
    add_item(event_data)
    return { status: "ok" }.to_json
  end

  if event_type == "item.remove"
    remove_item(event_data)
    return { status: "ok" }.to_json
  end

  halt 400, "Unknown event type"
end

def verify_signature(secret_key, payload, timestamp, received_signature)
  signature_data = "#{timestamp}.#{payload}"
  computed_signature = OpenSSL::HMAC.hexdigest('sha256', secret_key, signature_data)
  OpenSSL.secure_compare(computed_signature, received_signature)
end

def add_item(event_data)
  # 이벤트를 처리하고 항목을 추가하기 위한 플레이스홀더 로직입니다.
  # 실제 애플리케이션에서는 이 함수가 데이터베이스나 인벤토리 시스템과 상호작용합니다.
  player_id = event_data["player_id"]
  for item in event_data["items"] do
    sku = item["sku"]
    puts "Item #{sku} has been credited to player's #{player_id} account."
  end
end

def remove_item(event_data)
  # 이벤트를 처리하고 항목을 제거하기 위한 플레이스홀더 로직입니다.
  # 실제 애플리케이션에서는 이 함수가 데이터베이스나 인벤토리 시스템과 상호작용합니다.
  player_id = event_data["player_id"]
  for item in event_data["items"] do
    sku = item["sku"]
    puts "Item #{sku} has been removed from player's #{player_id} account."
  end
end

if __FILE__ == $0
  require 'sinatra'
  set :bind, '0.0.0.0'
  set :port, 8000
end
// 통합에서 웹훅 이벤트를 처리하기 위해 이 샘플 코드를 사용하세요.
//
// 1. 이 코드를 새로운 파일 `server.js`에 붙여 넣으세요.
//
// 2. 의존성 설치:
//    npm install express
//
// 3. http://localhost:8000에서 서버를 실행합니다
//    node server.js

const express = require('express');
const crypto = require('crypto');

const app = express();

app.post('/webhook', express.raw({ type: "*/*" }), async (req, res) => {
  const secretKey = '<YOUR_S2S_KEY>'; // 실제 웹훅 비밀 키로 교체하세요

  const rawPayload = req.body;
  const timestamp = req.headers['x-aghanim-signature-timestamp'];
  const receivedSignature = req.headers['x-aghanim-signature'];

  if (!verifySignature(secretKey, rawPayload, timestamp, receivedSignature)) {
    return res.status(403).send('Invalid signature');
  }

  const payload = JSON.parse(req.body);
  const { event_type, event_data } = payload;

  if (event_type === 'item.add') {
    addItem(event_data);
    return res.json({ status: 'ok' });
  }

  if (event_type === 'item.remove') {
    removeItem(event_data);
    return res.json({ status: 'ok' });
  }

  return res.status(400).send('Unknown event type');
});

function verifySignature(secretKey, payload, timestamp, receivedSignature) {
  const signatureData = `${timestamp}.${payload}`;
  const computedSignature = crypto
    .createHmac('sha256', secretKey)
    .update(signatureData)
    .digest('hex');
  return crypto.timingSafeEqual(Buffer.from(computedSignature), Buffer.from(receivedSignature));
}

function addItem(event_data) {
  // 이벤트를 처리하고 항목을 추가하기 위한 플레이스홀더 로직입니다.
  // 실제 애플리케이션에서는 이 함수가 데이터베이스나 인벤토리 시스템과 상호작용합니다.
  const playerId = event_data.player_id;
  for (const item of event_data.items) {
    const sku = item.sku;
    console.log(`Item ${item.sku} has been credited to player's ${playerId} account.`);
 }
}

function removeItem(event_data) {
  // 이벤트 처리 및 항목 제거를 위한 플레이스홀더 로직입니다.
  // 실제 애플리케이션에서는 이 함수가 데이터베이스나 인벤토리 시스템과 상호작용합니다.
  const playerId = event_data.player_id;
  for (const item of event_data.items) {
    const sku = item.sku;
    console.log(`Item ${item.sku} has been removed from player's ${playerId} account.`);
 }
}

app.listen(8000, () => {
  console.log('Server is running on http://localhost:8000');
});
// 통합에서 웹훅 이벤트를 처리하기 위한 샘플 코드입니다.
//
// 1. 이 코드를 새로운 파일 `server.go`에 붙여넣으세요.
//
// 2. http://localhost:8000에서 서버를 실행하세요
//    go run server.go

package main

import (
  "crypto/hmac"
  "crypto/sha256"
  "encoding/hex"
  "encoding/json"
  "fmt"
  "io/ioutil"
  "net/http"
)

func webhookHandler(w http.ResponseWriter, r *http.Request) {
  secretKey := "<YOUR_S2S_KEY>"  // 실제 웹훅 비밀 키로 교체하세요

  rawPayload, _ := ioutil.ReadAll(r.Body)
  payload := string(rawPayload)
  timestamp := r.Header.Get("X-Aghanim-Signature-Timestamp")
  receivedSignature := r.Header.Get("X-Aghanim-Signature")

  if !verifySignature(secretKey, payload, timestamp, receivedSignature) {
    http.Error(w, "Invalid signature", http.StatusForbidden)
    return
  }

  var data map[string]interface{}
  if err := json.Unmarshal(rawPayload, &data); err != nil {
    http.Error(w, "Invalid payload", http.StatusBadRequest)
    return
  }

  eventType := data["event_type"].(string)
  eventData := data["event_data"].(map[string]interface{})

  if eventType == "item.add" {
    addItem(eventData)
    w.WriteHeader(http.StatusOK)
    json.NewEncoder(w).Encode(map[string]string{"status": "ok"})
    return
  }

  if eventType == "item.remove" {
    removeItem(eventData)
    w.WriteHeader(http.StatusOK)
    json.NewEncoder(w).Encode(map[string]string{"status": "ok"})
    return
  }

  http.Error(w, "Unknown event type", http.StatusBadRequest)
}

func verifySignature(secretKey, payload, timestamp, receivedSignature string) bool {
  signatureData := fmt.Sprintf("%s.%s", timestamp, payload)
  mac := hmac.New(sha256.New, []byte(secretKey))
  mac.Write([]byte(signatureData))
  computedSignature := hex.EncodeToString(mac.Sum(nil))
  return hmac.Equal([]byte(computedSignature), []byte(receivedSignature))
}

func addItem(eventData map[string]interface{}) {
  // 이벤트를 처리하고 항목을 추가하기 위한 플레이스홀더 로직입니다.
  // 실제 애플리케이션에서는 이 함수가 데이터베이스나 인벤토리 시스템과 상호작용합니다.
  playerID := eventData["player_id"].(string)
  items := eventData["items"].([]interface{})
  for _, item := range items {
    itemMap := item.(map[string]interface{})
    sku := itemMap["sku"].(string)
    fmt.Printf("Item %s has been credited to player's %s account.\\n", sku, playerID)
  }
}

func removeItem(eventData map[string]interface{}) {
  // 이벤트 처리 및 항목 제거를 위한 플레이스홀더 로직입니다.
  // 실제 애플리케이션에서는 이 함수가 데이터베이스나 인벤토리 시스템과 상호작용합니다.
  playerID := eventData["player_id"].(string)
  items := eventData["items"].([]interface{})
  for _, item := range items {
    itemMap := item.(map[string]interface{})
    sku := itemMap["sku"].(string)
    fmt.Printf("Item %s has been removed from player's %s account.\\n", sku, playerID)
  }
}

func main() {
  http.HandleFunc("/webhook", webhookHandler)
  fmt.Println("Server is running on http://localhost:8000")
  http.ListenAndServe(":8000", nil)
}
Add webhook endpoint to Aghanim
When the webhook handling is ready, add the endpoint to the account so the Aghanim could start sending the events.
- Dashboard
- API
- Go to Integration → Webhooks.
- Click Add webhook. The site will open the Create webhook window.
- Copy and paste the URL
https://<YOUR_DOMAIN>/webhook. - Click Select events. The site will open the Select events to send window.
- Expand the Main class and select the Item add, Item remove checkboxes.
- Click Apply.
- Click Add. The site will redirect you to the webhook page.
- Click Back.
- cURL
- Python
- Ruby
- Node.js
- Go
curl -X POST https://api.aghanim.com/s2s/v1/webhooks \
  -H 'Content-Type: application/json' \
  -H 'Authorization: Bearer <YOUR_S2S_KEY>' \
  -d '{
    "events": [
      "item.add",
      "item.remove"
    ],
    "url": "https://<YOUR_DOMAIN>/webhook",
    "description": "The endpoint for all webhooks",
    "method": "POST",
    "enabled": true,
    "enabled_logs": true,
    "player_context_enabled": true
  }'
import requests

def create_webhook():
    payload = {
        "events": ["item.add", "item.remove"],
        "url": "https://<YOUR_DOMAIN>/webhook",
        "description": "The endpoint for all webhooks",
        "method": "POST",
        "enabled": True,
        "enabled_logs": True,
        "player_context_enabled": True
    }

    headers = {"Authorization": "Bearer <YOUR_S2S_KEY>", "Content-Type": "application/json"}
    resp = requests.post("https://api.aghanim.com/s2s/v1/webhooks", json=payload, headers=headers)
    return resp.json()
require 'net/http'
require 'json'
require 'uri'

def create_webhook
  uri = URI("https://api.aghanim.com/s2s/v1/webhooks")
  req = Net::HTTP::Post.new(uri, 'Content-Type' => 'application/json', 'Authorization' => 'Bearer <YOUR_S2S_KEY>')
  req.body = {
    events: ["item.add", "item.remove"],
    url: "https://<YOUR_DOMAIN>/webhook",
    description: "The endpoint for all webhooks",
    method: "POST",
    enabled: true,
    enabled_logs: true,
    player_context_enabled: true
  }.to_json

  res = Net::HTTP.start(uri.hostname, uri.port, use_ssl: true) { |http| http.request(req) }
  JSON.parse(res.body)
end
const axios = require('axios');

async function createWebhook() {
  const payload = {
    events: ["item.add", "item.remove"],
    url: "https://<YOUR_DOMAIN>/webhook",
    description: "The endpoint for all webhooks",
    method: "POST",
    enabled: true,
    enabled_logs: true,
    player_context_enabled: true
  };

  const res = await axios.post('https://api.aghanim.com/s2s/v1/webhooks', payload, {
    headers: { 'Authorization': 'Bearer <YOUR_S2S_KEY>', 'Content-Type': 'application/json' }
  });
  return res.data;
}
package main

import (
	"bytes"
	"encoding/json"
	"net/http"
)

func createWebhook() map[string]interface{} {
	payload := map[string]interface{}{
		"events":                 []string{"item.add", "item.remove"},
		"url":                    "https://<YOUR_DOMAIN>/webhook",
		"description":            "The endpoint for all webhooks",
		"method":                 "POST",
		"enabled":                true,
		"enabled_logs":           true,
		"player_context_enabled": true,
	}
	data, _ := json.Marshal(payload)

	req, _ := http.NewRequest("POST", "https://api.aghanim.com/s2s/v1/webhooks", bytes.NewBuffer(data))
	req.Header.Set("Authorization", "Bearer <YOUR_S2S_KEY>")
	req.Header.Set("Content-Type", "application/json")

	client := &http.Client{}
	resp, _ := client.Do(req)
	defer resp.Body.Close()

	var webhook map[string]interface{}
	json.NewDecoder(resp.Body).Decode(&webhook)
	return webhook
}
Test your integration
After you have handled the webhooks, check that the purchased items are in your inventory. That’s all.
Next steps
- See Currency codes and minor units to learn how the Aghanim represents monetary amounts.
- See Payment Webhook to learn about the payment progress when the player visits the payment form.
FAQ
The plugin targets Unreal Engine 5.8 and can stay enabled for Android, iOS, Windows, macOS, and Linux — it compiles and packages everywhere. Checkout availability differs per platform and launch mode:
| Platform | Native | In-app browser | Default browser | WebView |
|---|---|---|---|---|
| Android | ✅ | ✅ | ✅ | ✅ |
| iOS | — | ✅ | ✅ | ✅ |
| Windows / macOS / Linux | — | — | ✅ | — |
Query IsCheckoutLaunchModeAvailable at runtime instead of hardcoding the table, so shared game code keeps working as support evolves.
On Windows, macOS, Linux, and in the editor there is no native Aghanim SDK — the plugin talks to the Aghanim REST API directly. Orders and catalog operations (get order, unconsumed orders, consume, items, price points) work the same as on mobile, but the only checkout launch mode is Default browser: the plugin creates the order and opens the checkout URL in the OS default browser. The Native, In-app browser, and WebView modes report unavailable through IsCheckoutLaunchModeAvailable. To test those modes, run on a physical Android or iOS device.
A successful launch does not mean the player paid: Aghanim Start Checkout completes when the payment form opens, and the payment happens later, possibly outside the app — the player may even finish it on another device. The OnCheckoutClosed event is only a best-effort hint (it never fires for the external browser and can be missed if the app is killed mid-checkout).
Always verify fulfillment through orders: call Aghanim Get Unconsumed Orders on startup, on focus regain, and after a checkout closes; then call Aghanim Consume Order for a returned order and grant its items from that node's On Success pin. An Order ID that stops appearing in that list has been consumed; one that never appears has not been paid for yet. If you run a game server, use the item.add webhook instead.
Android. In-app browser
The Checkout integration mode that opens the payment form in an in-app browser tab over your game: SFSafariViewController on iOS, Custom Tabs on Android. Use when you want the player to stay close to your game without leaving it for an external browser. Available on Android and iOS.
Register with Aghanim and link your game
First, register for an Aghanim account. At the end of registration, add the link to your mobile game. It should be published in Apple App Store or Google Play Store.
Set up environment
If you want to make real payments, you are all set as the live mode is used as default. Otherwise, use a sandbox, an isolated test environment, to simulate the Aghanim events to test payments without real money movement. To turn on the sandbox mode, set the Sandbox toggle to the active position.
Sandbox supports card payments only. Alternative methods (PayPal, wallets, local payment methods) appear only in live. See Test payments for the test cards.
While integrating, you will need an SDK key to authenticate requests to the Aghanim. Keep in mind that the sandbox and live modes have different keys. Find the SDK key in Integration → API keys.
Configure game client-side
Configure your game client to work with the Checkout by setting up the SDK and implementing the necessary code to process its methods.
Install SDK
The Unreal Engine SDK is distributed as a source plugin: the release contains source that compiles with your engine, so there are no prebuilt binaries — instead each release is pinned to the engine it was tested on (currently Unreal Engine 5.8). Your project must be able to compile C++ — a C++ project, or a Blueprint project with a working compiler toolchain.
-
Download a release from Aghanim's public Artifact Registry and unzip it into your project's
Plugins/folder so that the descriptor lives atYourProject/Plugins/AghanimSDK/AghanimSDK.uplugin. The registry is public read, so this is a plain anonymous download — no credentials. ReplaceVERSION/ENGINEwith the release you want, andYourProjectwith the path to your Unreal project.- PowerShell (Windows)
- Bash (macOS/Linux)
$Version = "0.2.0"       # the plugin release to install
$Engine  = "5.8"         # the Unreal Engine version the release is pinned to
$Zip     = "AghanimSDK-v$Version-UE$Engine.zip"
$Base    = "https://artifactregistry.googleapis.com/v1/projects/ag-registry/locations/us-central1/repositories/unreal-engine-sdk/files/unreal-engine-sdk:v${Version}:${Zip}"

# Download the plugin zip and its checksum (public read — no credentials).
Invoke-WebRequest -Uri "${Base}:download?alt=media" -OutFile $Zip
Invoke-WebRequest -Uri "${Base}.sha256:download?alt=media" -OutFile "$Zip.sha256"

# Verify the SHA-256, then abort on mismatch.
$Expected = (Get-Content "$Zip.sha256").Split()[0]
$Actual   = (Get-FileHash $Zip -Algorithm SHA256).Hash.ToLower()
if ($Actual -ne $Expected) { throw "Checksum mismatch — aborting." }

# Unzip into your project's Plugins/ folder (replace YourProject with your
# project's path) — lands at YourProject\Plugins\AghanimSDK\AghanimSDK.uplugin.
Expand-Archive -Path $Zip -DestinationPath YourProject\Plugins\ -ForceVERSION="0.2.0" # the plugin release to install
ENGINE="5.8" # the Unreal Engine version the release is pinned to
ZIP="AghanimSDK-v${VERSION}-UE${ENGINE}.zip"
BASE="https://artifactregistry.googleapis.com/v1/projects/ag-registry/locations/us-central1/repositories/unreal-engine-sdk/files/unreal-engine-sdk:v${VERSION}:${ZIP}"
# Download the plugin zip and its checksum (public read — no credentials).
curl -fSL --retry 3 -o "${ZIP}" "${BASE}:download?alt=media"
curl -fSL --retry 3 -o "${ZIP}.sha256" "${BASE}.sha256:download?alt=media"
# Verify the SHA-256, then abort on mismatch.
shasum -a 256 -c "${ZIP}.sha256"
# Unzip into your project's Plugins/ folder (replace YourProject with your
# project's path) — lands at YourProject/Plugins/AghanimSDK/AghanimSDK.uplugin.
unzip -q "${ZIP}" -d YourProject/Plugins/Use a project plugin underPlugins/The plugin must live under your project's
Plugins/directory. A plugin referenced out-of-tree through the.uproject'sAdditionalPluginDirectoriesis not packaged into the iOS app and fails to load on device. -
Open your project. Unreal enables a plugin placed under
Plugins/automatically; if it is disabled, enable Aghanim SDK under Edit → Plugins (category SDK) and restart the editor. -
Let the editor compile the plugin (or build from your IDE). No further dependency setup is required on any platform:
- Android — the native Aghanim SDK is resolved automatically from Aghanim's public Maven registry when the APK/AAB is packaged, so the packaging machine needs network access to
https://us-central1-maven.pkg.dev/ag-registry/android-sdk. No manual Gradle edits are needed. - iOS — the native SDK ships inside the plugin as vendored frameworks; they are linked and embedded automatically.
- Windows / macOS / Linux (and the editor) — the plugin talks to the Aghanim REST API directly, so the project always compiles and runs in the editor.
- Android — the native Aghanim SDK is resolved automatically from Aghanim's public Maven registry when the APK/AAB is packaged, so the packaging machine needs network access to
Configure SDK API key
The API key is a project setting, read automatically when the game starts.
- Copy the SDK key from Integration → API keys.
- In the Unreal Editor, open Project Settings → Plugins → Aghanim SDK.
- Paste the key into the API Key field.
The value is persisted to your project's DefaultGame.ini, so it travels with the project and applies to packaged builds:
[/Script/AghanimSDK.AghanimSettings]
ApiKey=<YOUR_SDK_KEY>
Initialize SDK
You do not call an initializer manually. The plugin ships a game-instance subsystem, UAghanimSDKSubsystem, that owns the SDK lifetime: when the game instance starts, it reads the API Key from the project settings and, if a key is set, initializes the SDK once for the lifetime of the process.
Get the subsystem wherever you need the SDK:
- C++
// Anywhere you have a game instance (e.g. inside an AActor or UUserWidget):
UAghanimSDKSubsystem* SDK = GetGameInstance()->GetSubsystem<UAghanimSDKSubsystem>();
In Blueprints: use the Get Game Instance Subsystem node with the AghanimSDKSubsystem class, then call the Aghanim SDK nodes on the result.
If you obtain the key at runtime instead (for example, after the player signs in), leave the API Key project setting empty and initialize explicitly once:
- C++
// Only needed when the API Key project setting is left empty
// and you obtain the key at runtime instead:
SDK->InitializeWithApiKey(TEXT("<YOUR_SDK_KEY>"));
Blueprint node: Initialize With Api Key (Aghanim SDK category).
The SDK writes its own diagnostics through Unreal's LogAghanimSDK log category.
Set the verbosity in Project Settings → Plugins → Aghanim SDK → Log Level. Supported levels, each enabling that severity and everything above it: Debug, Info, Warning, Error, and None (the default, which disables SDK logging entirely). The value is applied when the SDK is initialized and persisted next to the API key:
[/Script/AghanimSDK.AghanimSettings]
ApiKey=<YOUR_SDK_KEY>
LogLevel=Info
Use Debug during development to see SDK lifecycle and network activity; switch back to None (or Error) for release builds.
Configure player ID
Since a game instance runs for one player at a time, the SDK allows to set the player ID once to use it in all following method calls. Orders are created on behalf of a player, so set the ID as soon as your game client knows who the player is — before any checkout.
Setting and clearing the ID are asynchronous, so the SDK only has the player once On Success fires. Chain the rest of your startup off that pin rather than off the call.
- C++
// As soon as your game client knows who the player is. Setting the ID is asynchronous,
// so wait for On Success before any checkout or order call.
UAghanimSetPlayerIdAction* SetAction =
    UAghanimSetPlayerIdAction::AghanimSetPlayerId(this, TEXT("player-123"));

SetAction->OnSuccess.AddDynamic(this, &UMyStore::HandlePlayerIdSet); // const FAghanimError& Error
SetAction->OnFailure.AddDynamic(this, &UMyStore::HandleError);       // const FAghanimError& Error
SetAction->Activate();

// Later, e.g. when the player signs out:
UAghanimClearPlayerIdAction* ClearAction =
    UAghanimClearPlayerIdAction::AghanimClearPlayerId(this);

ClearAction->OnSuccess.AddDynamic(this, &UMyStore::HandlePlayerIdCleared);
ClearAction->OnFailure.AddDynamic(this, &UMyStore::HandleError);
ClearAction->Activate();
Blueprint nodes: Aghanim Set Player Id and Aghanim Clear Player Id (Aghanim SDK → Player category; async, with On Success and On Failure pins that each carry an Error).
Calling operations that need a player (Aghanim Get Unconsumed Orders, Aghanim Consume Order, or a checkout) before Aghanim Set Player Id has succeeded fails with the PlayerIdNotSet error type. Set the player ID immediately after authentication and wait for On Success.
Create item
The integration needs the items to be added to the Dashboard. When creating items, each should have its SKU, a unique identifier for the item within your game backend. You can add their prices, currency, sale configuration, and more.
To add an item to the Dashboard:
- Go to SKU Management → Items.
- Click Add Item. The site will open the Add Item page.
- Enter the item name New item.
- Enter the item SKU items.new.ba68a028-2d51-46b4-a854-68fc16af328a.
- In the Price block:
- Select the Fiat price type for a real money item.
- Enter the price 1.99.
- Click Add item.
For integration purposes, we have shortened an item setup. Before going live, use every suitable feature while adding items to the Dashboard.
Create Checkout item
Create an FAghanimCheckoutItem value that references an existing dashboard SKU. The SKU is the only required field; the others let you override the dashboard configuration on a per-checkout basis.
- C++
FAghanimCheckoutItem Item;
Item.Sku      = TEXT("items.new.ba68a028-2d51-46b4-a854-68fc16af328a"); // required

// Optional display overrides:
// Item.Name, Item.Description, Item.ImageUrl
In Blueprints, FAghanimCheckoutItem is a Blueprint struct: fill it with a Make AghanimCheckoutItem node.
Configure deep links
When the Checkout opens outside your game's own UI, the player needs a way back after the payment. That takes two matching halves: a URL scheme your app is registered to handle, and a BackToGameUrl on the checkout params that uses it.
Registering the scheme is the half you can either hand to the plugin or keep for yourself:
- Let the plugin register it. Fill in one project setting and it writes the iOS and Android registration for you when the game is packaged. Take this route unless you have a reason not to.
- Register it yourself. Leave that setting empty and declare the scheme in your own
Info.plistand Android manifest additions. You need this if you already hand-manage those files, or if you bring the player back through verified App Links or Universal Links, which the setting does not cover.
The steps below follow the first route.
-
In the Unreal Editor, open Project Settings → Plugins → Aghanim SDK and set Back To Game URL Scheme to the scheme alone, with no
://. Useyourgamefor a link likeyourgame://checkout/return. It is persisted next to the API key:[/Script/AghanimSDK.AghanimSettings]
ApiKey=<YOUR_SDK_KEY>
BackToGameUrlScheme=yourgameThe plugin registers the scheme on iOS and Android when the game is packaged. Desktop platforms ignore it.
-
Set
BackToGameUrlon the checkout params to a link that uses the same scheme. The host and path are free-form, soyourgame://checkout/returnworks as well as anything else your app routes. You can configure the return link per game in the Dashboard instead of passing it on every checkout.
Your game needs no handler of its own for the incoming link. The plugin and the native SDK route it, and the player lands back in the game.
BackToGameUrl has no effect in the Native launch mode, which never leaves the app, and a desktop external-browser checkout cannot return automatically at all.
Fulfillment never depends on the redirect either way: the player may return through the app switcher, or the app may be killed mid-checkout. Verify purchases through unconsumed orders.
Create Checkout params
When all data variables are ready, create another one that represents Checkout params. Checkout params are the programmatic representation of what the player sees when they are on the payment form. Checkout params are associated with a player and items, they are crucial for the Checkout to work. Pass the BackToGameUrl you defined earlier so the Checkout can route the player back to your game after the payment.
Locale is the locale the Checkout is localized in. It is an EAghanimLocale, so the editor and Blueprint offer the supported values as a dropdown, and it defaults to En. See Checkout → Locales for the full list.
- C++
FAghanimCheckoutParams Params;
Params.Items.Add(Item); // required: at least one item

// All optional:
Params.Locale        = EAghanimLocale::En;
Params.BackToGameUrl = TEXT("yourgame://checkout/return");
In Blueprints, fill the params with a Make AghanimCheckoutParams node. See the field-by-field description in the method reference.
You can attach custom metadata to the Checkout for item tracking purposes. You can access it through webhooks and in API responses from the Aghanim. Metadata has a structure of "key-value" pairs.
- C++
Params.Metadata.Add(TEXT("campaign"), TEXT("summer_sale"));
Params.Metadata.Add(TEXT("source"),   TEXT("store_screen"));
You can choose the behavior of redirecting the player after they have completed the payment successfully with EAghanimRedirectMode. The difference in the provided by the SDK modes is a delay before redirecting or absence of redirecting.
- Immediate
- Delayed
- No redirect
When the player has completed the payment, the SDK redirects them immediately to the deep link from BackToGameUrl.
- C++
Params.RedirectSettings.Mode = EAghanimRedirectMode::Immediate;
When the player has completed the payment, the SDK shows the screen for the successful payment for the given number of seconds and then redirects the player to the deep link from BackToGameUrl.
- C++
Params.RedirectSettings.Mode         = EAghanimRedirectMode::Delayed;
Params.RedirectSettings.DelaySeconds = 5;
When the player has completed the payment, they stay on the screen for the successful payment. To exit it, they manually close it or navigate away. After, you should redirect them to the deep link from BackToGameUrl by yourself.
- C++
// The default: the player stays on the success screen and the
// redirectSettings block is omitted from the created order.
Params.RedirectSettings.Mode = EAghanimRedirectMode::NoRedirect;
You can set the appearance mode for the Checkout UI with EAghanimUiMode. The SDK supports automatic detection based on the system setting, or you can force a specific mode.
- Auto
- Dark
- Light
The SDK automatically detects and applies the appropriate appearance mode based on the system setting.
- C++
// The default: follow the platform/device appearance.
Params.UiSettings.Mode = EAghanimUiMode::Auto;
The SDK forces dark mode appearance for the Checkout UI.
- C++
Params.UiSettings.Mode = EAghanimUiMode::Dark;
The SDK forces light mode appearance for the Checkout UI.
- C++
Params.UiSettings.Mode = EAghanimUiMode::Light;
Launch Checkout
Add a checkout button to your game client that launches the payment form. The SDK creates an order from the provided checkout params and opens it in an in-app browser tab over your game: SFSafariViewController on iOS, Custom Tabs on Android. On success, you receive the Order ID to track the order. On failure, you receive an FAghanimError with debug information for troubleshooting.
The In-app browser mode is available on Android and iOS. Guard the call with IsCheckoutLaunchModeAvailable so shared game code runs unmodified on desktop too.
- C++
const EAghanimCheckoutLaunchMode Mode = EAghanimCheckoutLaunchMode::InAppBrowser;
if (SDK->IsCheckoutLaunchModeAvailable(Mode))
{
    UAghanimStartCheckoutAction* Action =
        UAghanimStartCheckoutAction::AghanimStartCheckout(this, Params, Mode);

    // Handlers take (FString OrderId, const FAghanimError& Error): the Order ID is set
    // only on On Launched, the error only on On Failed.
    Action->OnLaunched.AddDynamic(this, &UMyStore::HandleCheckoutLaunched);
    Action->OnFailed.AddDynamic(this, &UMyStore::HandleCheckoutFailed);
    Action->Activate();
}
Blueprint node: Aghanim Start Checkout (async; pins On Launched and On Failed, each carrying both Order Id and Error), guarded by Is Checkout Launch Mode Available. The ID is filled only on On Launched, the error only on On Failed.
On iOS, when the player closes the in-app browser the subsystem's OnCheckoutClosed event fires with the Order ID — a good moment to check unconsumed orders. Android does not report the close, so rely on the unconsumed-orders check there.
Check unconsumed Orders
After the Checkout has launched and you have an Order ID, the player can step away from the payment form, complete the payment, or abandon it entirely. The launch call only confirms that the Order was created and the form opened — it does not tell you whether the player paid. To know which Orders the player has actually paid for and should be granted to them, ask the SDK for the list of unconsumed paid Orders.
Good moments to check are on startup, when your game regains focus after the player returns from the checkout, and when the subsystem's OnCheckoutClosed event fires. OnCheckoutClosed is best-effort: it only fires for on-screen checkouts (WebView / in-app browser), never for the external browser, and can be missed if the app is killed mid-checkout — treat it as a hint, not a guarantee.
- C++
UAghanimGetUnconsumedOrdersAction* Action =
    UAghanimGetUnconsumedOrdersAction::AghanimGetUnconsumedOrders(this);

// Handlers take (const TArray<FString>& OrderIds, const FAghanimError& Error).
Action->OnSuccess.AddDynamic(this, &UMyStore::HandleUnconsumedOrders);
Action->OnFailure.AddDynamic(this, &UMyStore::HandleUnconsumedOrdersFailed);
Action->Activate();

void UMyStore::HandleUnconsumedOrders(const TArray<FString>& OrderIds, const FAghanimError& Error)
{
    for (const FString& OrderId : OrderIds)
    {
        // Consume the order, then grant its items on the success pin.
    }
}
Blueprint node: Aghanim Get Unconsumed Orders (async; pins On Success and On Failure, each carrying both Order Ids and Error). The IDs are filled only on success, the error only on failure.
Consume paid Orders
Consume the Order the player has paid for, then grant its items once the consume succeeds. Consuming the same Order twice fails, so the grant runs only once. A consumed Order is not returned by the unconsumed-orders query again.
- C++
UAghanimConsumeOrderAction* Action =
    UAghanimConsumeOrderAction::AghanimConsumeOrder(this, OrderId);

// Handlers take (const FAghanimError& Error); the error is empty on success.
Action->OnSuccess.AddDynamic(this, &UMyStore::HandleOrderConsumed);
Action->OnFailure.AddDynamic(this, &UMyStore::HandleError);
Action->Activate();
Blueprint node: Aghanim Consume Order (async; pins On Success and On Failure, each carrying an Error that is empty on success).
The end-to-end loop is: Aghanim Get Unconsumed Orders → Aghanim Consume Order for a returned ID → the grant hangs off that node's On Success pin.
Unconsumed-order polling is meant for games without a dedicated server. If you have a game server, prefer the item.add webhook so your server controls granting.
Full implementation code
A complete client-side flow in one place: a game-instance subsystem that sets the player ID, launches a checkout with any available launch mode, and reconciles paid orders once the player ID is set and whenever a checkout closes.
- C++
// MyStoreSubsystem.h
#pragma once

#include "CoreMinimal.h"
#include "Subsystems/GameInstanceSubsystem.h"
#include "AghanimSDKSubsystem.h"
#include "AghanimAsyncActions.h"
#include "MyStoreSubsystem.generated.h"

UCLASS()
class UMyStoreSubsystem : public UGameInstanceSubsystem
{
    GENERATED_BODY()

public:
    virtual void Initialize(FSubsystemCollectionBase& Collection) override;

    /** Call once your game client knows who the player is. */
    UFUNCTION(BlueprintCallable, Category = "My Store")
    void ConfigurePlayer(const FString& PlayerId);

    /** Call from your store UI. Pick any launch mode that is available on the platform. */
    UFUNCTION(BlueprintCallable, Category = "My Store")
    void BuyItem(const FString& Sku, EAghanimCheckoutLaunchMode LaunchMode);

    /** Call once the player ID is set, and whenever the game regains focus. */
    UFUNCTION(BlueprintCallable, Category = "My Store")
    void ReconcilePaidOrders();

private:
    UFUNCTION() void HandlePlayerIdSet(const FAghanimError& Error);
    UFUNCTION() void HandleCheckoutLaunched(FString OrderId, const FAghanimError& Error);
    UFUNCTION() void HandleCheckoutFailed(FString OrderId, const FAghanimError& Error);
    UFUNCTION() void HandleCheckoutClosed(FString OrderId);
    UFUNCTION() void HandleUnconsumedOrders(const TArray<FString>& OrderIds, const FAghanimError& Error);
    UFUNCTION() void HandleUnconsumedOrdersFailed(const TArray<FString>& OrderIds, const FAghanimError& Error);
    UFUNCTION() void HandleError(const FAghanimError& Error);

    UAghanimSDKSubsystem* GetSdk() const;
};

// MyStoreSubsystem.cpp
void UMyStoreSubsystem::Initialize(FSubsystemCollectionBase& Collection)
{
    Super::Initialize(Collection);

    // Best-effort hint that an on-screen checkout closed (iOS WebView / in-app browser).
    GetSdk()->OnCheckoutClosed.AddDynamic(this, &UMyStoreSubsystem::HandleCheckoutClosed);
}

void UMyStoreSubsystem::ConfigurePlayer(const FString& PlayerId)
{
    // Orders are created on behalf of a player, and setting the ID is asynchronous.
    // Everything that needs a player waits for On Success.
    UAghanimSetPlayerIdAction* Action =
        UAghanimSetPlayerIdAction::AghanimSetPlayerId(this, PlayerId);
    Action->OnSuccess.AddDynamic(this, &UMyStoreSubsystem::HandlePlayerIdSet);
    Action->OnFailure.AddDynamic(this, &UMyStoreSubsystem::HandleError);
    Action->Activate();
}

void UMyStoreSubsystem::HandlePlayerIdSet(const FAghanimError& Error)
{
    ReconcilePaidOrders();
}

void UMyStoreSubsystem::BuyItem(const FString& Sku, EAghanimCheckoutLaunchMode LaunchMode)
{
    if (!GetSdk()->IsCheckoutLaunchModeAvailable(LaunchMode))
    {
        return; // Fall back to another mode or hide the button.
    }

    FAghanimCheckoutItem Item;
    Item.Sku = Sku;

    FAghanimCheckoutParams Params;
    Params.Items.Add(Item);
    Params.BackToGameUrl = TEXT("yourgame://checkout/return");

    UAghanimStartCheckoutAction* Action =
        UAghanimStartCheckoutAction::AghanimStartCheckout(this, Params, LaunchMode);
    Action->OnLaunched.AddDynamic(this, &UMyStoreSubsystem::HandleCheckoutLaunched);
    Action->OnFailed.AddDynamic(this, &UMyStoreSubsystem::HandleCheckoutFailed);
    Action->Activate();
}

void UMyStoreSubsystem::HandleCheckoutLaunched(FString OrderId, const FAghanimError& Error)
{
    // The checkout opened; the payment happens later, possibly outside the app.
    // Keep the OrderId if you want to look the order up with Aghanim Get Order.
}

void UMyStoreSubsystem::HandleCheckoutFailed(FString OrderId, const FAghanimError& Error)
{
    UE_LOG(LogTemp, Warning, TEXT("Checkout failed (%s): %s"), *Error.Type, *Error.DebugMessage);
}

void UMyStoreSubsystem::HandleCheckoutClosed(FString OrderId)
{
    ReconcilePaidOrders();
}

void UMyStoreSubsystem::ReconcilePaidOrders()
{
    UAghanimGetUnconsumedOrdersAction* Action =
        UAghanimGetUnconsumedOrdersAction::AghanimGetUnconsumedOrders(this);
    Action->OnSuccess.AddDynamic(this, &UMyStoreSubsystem::HandleUnconsumedOrders);
    Action->OnFailure.AddDynamic(this, &UMyStoreSubsystem::HandleUnconsumedOrdersFailed);
    Action->Activate();
}

void UMyStoreSubsystem::HandleUnconsumedOrders(const TArray<FString>& OrderIds, const FAghanimError& Error)
{
    for (const FString& OrderId : OrderIds)
    {
        // 1. Grant the order's items in your game logic.
        // 2. Acknowledge the grant so the order is not returned again.
        UAghanimConsumeOrderAction* Action =
            UAghanimConsumeOrderAction::AghanimConsumeOrder(this, OrderId);
        Action->OnFailure.AddDynamic(this, &UMyStoreSubsystem::HandleError);
        Action->Activate();
    }
}

void UMyStoreSubsystem::HandleUnconsumedOrdersFailed(const TArray<FString>& OrderIds, const FAghanimError& Error)
{
    HandleError(Error);
}

void UMyStoreSubsystem::HandleError(const FAghanimError& Error)
{
    UE_LOG(LogTemp, Warning, TEXT("Aghanim SDK error (%s): %s"), *Error.Type, *Error.DebugMessage);
}

UAghanimSDKSubsystem* UMyStoreSubsystem::GetSdk() const
{
    return GetGameInstance()->GetSubsystem<UAghanimSDKSubsystem>();
}
The same flow in Blueprints: Get Game Instance Subsystem (AghanimSDKSubsystem) → Aghanim Set Player Id → from its On Success pin, build the params with Make AghanimCheckoutItem / Make AghanimCheckoutParams → Aghanim Start Checkout; bind the subsystem's On Checkout Closed event and, from it and from On Success, run Aghanim Get Unconsumed Orders → grant the items → Aghanim Consume Order.
Make payment
Make a payment. If you have set the sandbox mode, use the test card below. In the sandbox, you can make payments only with the test cards — alternative methods like PayPal, wallets, and local payment methods appear only in the live environment. The test cards accept any digits as CVV and any future date as expiry date. Don’t forget to fill in an email address to check the receipt is sent and any postal code as a billing address.
Successful payments
After you complete the payment, you will receive a receipt sent to the specified email address and a transaction record in Aghanim Dashboard → Transactions.
| Card Brand | Card Number | CVV | Expiry date | Country |
|---|---|---|---|---|
| VISA (credit) | 4242 4242 4242 4242 | Any 3 digits | Any future date | GB |
Unsuccessful payments
Make an unsuccessful payment just in case you are curious. You will see the transaction in Aghanim Dashboard → Transactions as well.
| Number | CVV | Expiry date | Response code | Description |
|---|---|---|---|---|
4832 2850 6160 9015 | Any 3 digits | Any future date | 16 | Payment declined |
For the live mode, you can find all supported payment methods in Company settings → Payment methods. Turn on or off those you see suitable. Some payment methods are available globally by default. You can’t disable Credit cards, Apple Pay, Google Pay, and PayPal.
In Checkout, the Aghanim evaluates the currency and any restrictions, then dynamically presents only the payment methods available to the player based on evaluation.
When you use the live mode, the payment form shows to the player a setting to save their payment method so they can make a one-click payment in the future.
Handle post-payment events on game server-side
To complete the Checkout, handle items’ granting and chargebacks on your game backend. To do so, implement a webhook system that accepts the item.add and item.remove webhooks. See the code example with the implementation.
Comply with the Aghanim requirements for these webhooks:
- Use HTTPS schema for the single POST webhook endpoint.
- Check that webhooks are generated and signed by the Aghanim.
- Handle the
idempotency_keyfield in the webhook payload to prevent processing duplicate webhooks. - Respond with the HTTP status codes:
2xxfor successfully processed webhooks.4xxand5xxfor errors.
Grant items to player
The Aghanim sends the item.add webhook to let you know about the purchased items and ask for your permission to grant them to the player.
When the Aghanim has your 2xx answer, it can complete the checkout logic and redirect the player to a deep link if provided.
Support refunds and chargebacks
The Aghanim sends the item.remove webhook when a bank or payment system reverses the transaction, or you have requested refund in Aghanim Dashboard → Transactions. Partial refunds are not supported.
The suggested implementation handles the webhooks mentioned before:
item.addfor granting items. You need it for integration.item.removefor refunds and chargebacks. You might need it for integration.
- Python
- Ruby
- Node.js
- Go
# 통합에서 웹훅 이벤트를 처리하기 위해 이 샘플 코드를 사용하세요.
#
# 1. 이 코드를 `server.py`라는 새 파일에 붙여 넣으세요.
#
# 2. 의존성 설치:
#    python -m pip install fastapi[all]
#
# 3. http://localhost:8000에서 서버를 실행합니다
#    python server.py

import fastapi, hashlib, hmac, json, typing
from fastapi.responses import JSONResponse

app = fastapi.FastAPI()

@app.post("/webhook")
async def webhook(request: fastapi.Request) -> dict[str, typing.Any]:
    secret_key = "<YOUR_S2S_KEY>"  # 실제 웹훅 비밀 키로 교체하세요

    raw_payload = await request.body()
    payload = raw_payload.decode()
    timestamp = request.headers["x-aghanim-signature-timestamp"]
    received_signature = request.headers["x-aghanim-signature"]

    if not verify_signature(secret_key, payload, timestamp, received_signature):
        raise fastapi.HTTPException(status_code=403, detail="Invalid signature")

    data = json.loads(payload)
    event_type = data["event_type"]
    event_data = data["event_data"]

    if event_type == "item.add":
        add_item(event_data)
        return {"status": "ok"}

    if event_type == "item.remove":
        remove_item(event_data)
        return {"status": "ok"}

    raise fastapi.HTTPException(status_code=400, detail="Unknown event type")

def verify_signature(secret_key: str, payload: str, timestamp: str, received_signature: str) -> bool:
    signature_data = f"{timestamp}.{payload}"
    computed_hash = hmac.new(secret_key.encode(), signature_data.encode(), hashlib.sha256)
    computed_signature = computed_hash.hexdigest()
    return hmac.compare_digest(computed_signature, received_signature)

def add_item(event_data: dict[str, typing.Any]) -> None:
    # 이벤트를 처리하고 항목을 추가하기 위한 플레이스홀더 로직입니다.
    # 실제 애플리케이션에서는 이 함수가 데이터베이스나 인벤토리 시스템과 상호작용합니다.
    player_id = event_data["player_id"]
    for item in event_data["items"]:
      sku = item["sku"]
      print(f"Item {sku} has been credited to player's {player_id} account.")

def remove_item(event_data: dict[str, typing.Any]) -> None:
    # 이벤트를 처리하고 항목을 제거하기 위한 플레이스홀더 로직입니다.
    # 실제 애플리케이션에서는 이 함수가 데이터베이스나 인벤토리 시스템과 상호작용합니다.
    player_id = event_data["player_id"]
    for item in event_data["items"]:
      sku = item["sku"]
      print(f"Item {sku} has been removed from player's {player_id} account.")

if __name__ == "__main__":
    import uvicorn
    uvicorn.run(app, host="0.0.0.0", port=8000)
# 통합에서 웹훅 이벤트를 처리하기 위해 이 샘플 코드를 사용하세요.
#
# 1. 이 코드를 `server.rb`라는 새 파일에 붙여 넣으세요.
#
# 2. 의존성 설치:
#    gem install sinatra json hmac
#
# 3. http://localhost:8000에서 서버를 실행합니다
#    ruby server.rb

require 'sinatra'
require 'json'
require 'openssl'

post '/webhook' do
  secret_key = "<YOUR_S2S_KEY>"  # 실제 웹훅 비밀 키로 교체하세요

  payload = request.body.read
  timestamp = request.env["HTTP_X_AGHANIM_SIGNATURE_TIMESTAMP"]
  received_signature = request.env["HTTP_X_AGHANIM_SIGNATURE"]

  unless verify_signature(secret_key, payload, timestamp, received_signature)
    halt 403, "Invalid signature"
  end

  data = JSON.parse(payload)
  event_type = data["event_type"]
  event_data = data["event_data"]

  if event_type == "item.add"
    add_item(event_data)
    return { status: "ok" }.to_json
  end

  if event_type == "item.remove"
    remove_item(event_data)
    return { status: "ok" }.to_json
  end

  halt 400, "Unknown event type"
end

def verify_signature(secret_key, payload, timestamp, received_signature)
  signature_data = "#{timestamp}.#{payload}"
  computed_signature = OpenSSL::HMAC.hexdigest('sha256', secret_key, signature_data)
  OpenSSL.secure_compare(computed_signature, received_signature)
end

def add_item(event_data)
  # 이벤트를 처리하고 항목을 추가하기 위한 플레이스홀더 로직입니다.
  # 실제 애플리케이션에서는 이 함수가 데이터베이스나 인벤토리 시스템과 상호작용합니다.
  player_id = event_data["player_id"]
  for item in event_data["items"] do
    sku = item["sku"]
    puts "Item #{sku} has been credited to player's #{player_id} account."
  end
end

def remove_item(event_data)
  # 이벤트를 처리하고 항목을 제거하기 위한 플레이스홀더 로직입니다.
  # 실제 애플리케이션에서는 이 함수가 데이터베이스나 인벤토리 시스템과 상호작용합니다.
  player_id = event_data["player_id"]
  for item in event_data["items"] do
    sku = item["sku"]
    puts "Item #{sku} has been removed from player's #{player_id} account."
  end
end

if __FILE__ == $0
  require 'sinatra'
  set :bind, '0.0.0.0'
  set :port, 8000
end
// 통합에서 웹훅 이벤트를 처리하기 위해 이 샘플 코드를 사용하세요.
//
// 1. 이 코드를 새로운 파일 `server.js`에 붙여 넣으세요.
//
// 2. 의존성 설치:
//    npm install express
//
// 3. http://localhost:8000에서 서버를 실행합니다
//    node server.js

const express = require('express');
const crypto = require('crypto');

const app = express();

app.post('/webhook', express.raw({ type: "*/*" }), async (req, res) => {
  const secretKey = '<YOUR_S2S_KEY>'; // 실제 웹훅 비밀 키로 교체하세요

  const rawPayload = req.body;
  const timestamp = req.headers['x-aghanim-signature-timestamp'];
  const receivedSignature = req.headers['x-aghanim-signature'];

  if (!verifySignature(secretKey, rawPayload, timestamp, receivedSignature)) {
    return res.status(403).send('Invalid signature');
  }

  const payload = JSON.parse(req.body);
  const { event_type, event_data } = payload;

  if (event_type === 'item.add') {
    addItem(event_data);
    return res.json({ status: 'ok' });
  }

  if (event_type === 'item.remove') {
    removeItem(event_data);
    return res.json({ status: 'ok' });
  }

  return res.status(400).send('Unknown event type');
});

function verifySignature(secretKey, payload, timestamp, receivedSignature) {
  const signatureData = `${timestamp}.${payload}`;
  const computedSignature = crypto
    .createHmac('sha256', secretKey)
    .update(signatureData)
    .digest('hex');
  return crypto.timingSafeEqual(Buffer.from(computedSignature), Buffer.from(receivedSignature));
}

function addItem(event_data) {
  // 이벤트를 처리하고 항목을 추가하기 위한 플레이스홀더 로직입니다.
  // 실제 애플리케이션에서는 이 함수가 데이터베이스나 인벤토리 시스템과 상호작용합니다.
  const playerId = event_data.player_id;
  for (const item of event_data.items) {
    const sku = item.sku;
    console.log(`Item ${item.sku} has been credited to player's ${playerId} account.`);
 }
}

function removeItem(event_data) {
  // 이벤트 처리 및 항목 제거를 위한 플레이스홀더 로직입니다.
  // 실제 애플리케이션에서는 이 함수가 데이터베이스나 인벤토리 시스템과 상호작용합니다.
  const playerId = event_data.player_id;
  for (const item of event_data.items) {
    const sku = item.sku;
    console.log(`Item ${item.sku} has been removed from player's ${playerId} account.`);
 }
}

app.listen(8000, () => {
  console.log('Server is running on http://localhost:8000');
});
// 통합에서 웹훅 이벤트를 처리하기 위한 샘플 코드입니다.
//
// 1. 이 코드를 새로운 파일 `server.go`에 붙여넣으세요.
//
// 2. http://localhost:8000에서 서버를 실행하세요
//    go run server.go

package main

import (
  "crypto/hmac"
  "crypto/sha256"
  "encoding/hex"
  "encoding/json"
  "fmt"
  "io/ioutil"
  "net/http"
)

func webhookHandler(w http.ResponseWriter, r *http.Request) {
  secretKey := "<YOUR_S2S_KEY>"  // 실제 웹훅 비밀 키로 교체하세요

  rawPayload, _ := ioutil.ReadAll(r.Body)
  payload := string(rawPayload)
  timestamp := r.Header.Get("X-Aghanim-Signature-Timestamp")
  receivedSignature := r.Header.Get("X-Aghanim-Signature")

  if !verifySignature(secretKey, payload, timestamp, receivedSignature) {
    http.Error(w, "Invalid signature", http.StatusForbidden)
    return
  }

  var data map[string]interface{}
  if err := json.Unmarshal(rawPayload, &data); err != nil {
    http.Error(w, "Invalid payload", http.StatusBadRequest)
    return
  }

  eventType := data["event_type"].(string)
  eventData := data["event_data"].(map[string]interface{})

  if eventType == "item.add" {
    addItem(eventData)
    w.WriteHeader(http.StatusOK)
    json.NewEncoder(w).Encode(map[string]string{"status": "ok"})
    return
  }

  if eventType == "item.remove" {
    removeItem(eventData)
    w.WriteHeader(http.StatusOK)
    json.NewEncoder(w).Encode(map[string]string{"status": "ok"})
    return
  }

  http.Error(w, "Unknown event type", http.StatusBadRequest)
}

func verifySignature(secretKey, payload, timestamp, receivedSignature string) bool {
  signatureData := fmt.Sprintf("%s.%s", timestamp, payload)
  mac := hmac.New(sha256.New, []byte(secretKey))
  mac.Write([]byte(signatureData))
  computedSignature := hex.EncodeToString(mac.Sum(nil))
  return hmac.Equal([]byte(computedSignature), []byte(receivedSignature))
}

func addItem(eventData map[string]interface{}) {
  // 이벤트를 처리하고 항목을 추가하기 위한 플레이스홀더 로직입니다.
  // 실제 애플리케이션에서는 이 함수가 데이터베이스나 인벤토리 시스템과 상호작용합니다.
  playerID := eventData["player_id"].(string)
  items := eventData["items"].([]interface{})
  for _, item := range items {
    itemMap := item.(map[string]interface{})
    sku := itemMap["sku"].(string)
    fmt.Printf("Item %s has been credited to player's %s account.\\n", sku, playerID)
  }
}

func removeItem(eventData map[string]interface{}) {
  // 이벤트 처리 및 항목 제거를 위한 플레이스홀더 로직입니다.
  // 실제 애플리케이션에서는 이 함수가 데이터베이스나 인벤토리 시스템과 상호작용합니다.
  playerID := eventData["player_id"].(string)
  items := eventData["items"].([]interface{})
  for _, item := range items {
    itemMap := item.(map[string]interface{})
    sku := itemMap["sku"].(string)
    fmt.Printf("Item %s has been removed from player's %s account.\\n", sku, playerID)
  }
}

func main() {
  http.HandleFunc("/webhook", webhookHandler)
  fmt.Println("Server is running on http://localhost:8000")
  http.ListenAndServe(":8000", nil)
}
Add webhook endpoint to Aghanim
When the webhook handling is ready, add the endpoint to the account so the Aghanim could start sending the events.
- Dashboard
- API
- Go to Integration → Webhooks.
- Click Add webhook. The site will open the Create webhook window.
- Copy and paste the URL
https://<YOUR_DOMAIN>/webhook. - Click Select events. The site will open the Select events to send window.
- Expand the Main class and select the Item add, Item remove checkboxes.
- Click Apply.
- Click Add. The site will redirect you to the webhook page.
- Click Back.
- cURL
- Python
- Ruby
- Node.js
- Go
curl -X POST https://api.aghanim.com/s2s/v1/webhooks \
  -H 'Content-Type: application/json' \
  -H 'Authorization: Bearer <YOUR_S2S_KEY>' \
  -d '{
    "events": [
      "item.add",
      "item.remove"
    ],
    "url": "https://<YOUR_DOMAIN>/webhook",
    "description": "The endpoint for all webhooks",
    "method": "POST",
    "enabled": true,
    "enabled_logs": true,
    "player_context_enabled": true
  }'
import requests

def create_webhook():
    payload = {
        "events": ["item.add", "item.remove"],
        "url": "https://<YOUR_DOMAIN>/webhook",
        "description": "The endpoint for all webhooks",
        "method": "POST",
        "enabled": True,
        "enabled_logs": True,
        "player_context_enabled": True
    }

    headers = {"Authorization": "Bearer <YOUR_S2S_KEY>", "Content-Type": "application/json"}
    resp = requests.post("https://api.aghanim.com/s2s/v1/webhooks", json=payload, headers=headers)
    return resp.json()
require 'net/http'
require 'json'
require 'uri'

def create_webhook
  uri = URI("https://api.aghanim.com/s2s/v1/webhooks")
  req = Net::HTTP::Post.new(uri, 'Content-Type' => 'application/json', 'Authorization' => 'Bearer <YOUR_S2S_KEY>')
  req.body = {
    events: ["item.add", "item.remove"],
    url: "https://<YOUR_DOMAIN>/webhook",
    description: "The endpoint for all webhooks",
    method: "POST",
    enabled: true,
    enabled_logs: true,
    player_context_enabled: true
  }.to_json

  res = Net::HTTP.start(uri.hostname, uri.port, use_ssl: true) { |http| http.request(req) }
  JSON.parse(res.body)
end
const axios = require('axios');

async function createWebhook() {
  const payload = {
    events: ["item.add", "item.remove"],
    url: "https://<YOUR_DOMAIN>/webhook",
    description: "The endpoint for all webhooks",
    method: "POST",
    enabled: true,
    enabled_logs: true,
    player_context_enabled: true
  };

  const res = await axios.post('https://api.aghanim.com/s2s/v1/webhooks', payload, {
    headers: { 'Authorization': 'Bearer <YOUR_S2S_KEY>', 'Content-Type': 'application/json' }
  });
  return res.data;
}
package main

import (
	"bytes"
	"encoding/json"
	"net/http"
)

func createWebhook() map[string]interface{} {
	payload := map[string]interface{}{
		"events":                 []string{"item.add", "item.remove"},
		"url":                    "https://<YOUR_DOMAIN>/webhook",
		"description":            "The endpoint for all webhooks",
		"method":                 "POST",
		"enabled":                true,
		"enabled_logs":           true,
		"player_context_enabled": true,
	}
	data, _ := json.Marshal(payload)

	req, _ := http.NewRequest("POST", "https://api.aghanim.com/s2s/v1/webhooks", bytes.NewBuffer(data))
	req.Header.Set("Authorization", "Bearer <YOUR_S2S_KEY>")
	req.Header.Set("Content-Type", "application/json")

	client := &http.Client{}
	resp, _ := client.Do(req)
	defer resp.Body.Close()

	var webhook map[string]interface{}
	json.NewDecoder(resp.Body).Decode(&webhook)
	return webhook
}
Test your integration
After you have handled the webhooks, check that the purchased items are in your inventory. That’s all.
Next steps
- See Currency codes and minor units to learn how the Aghanim represents monetary amounts.
- See Payment Webhook to learn about the payment progress when the player visits the payment form.
FAQ
The plugin targets Unreal Engine 5.8 and can stay enabled for Android, iOS, Windows, macOS, and Linux — it compiles and packages everywhere. Checkout availability differs per platform and launch mode:
| Platform | Native | In-app browser | Default browser | WebView |
|---|---|---|---|---|
| Android | ✅ | ✅ | ✅ | ✅ |
| iOS | — | ✅ | ✅ | ✅ |
| Windows / macOS / Linux | — | — | ✅ | — |
Query IsCheckoutLaunchModeAvailable at runtime instead of hardcoding the table, so shared game code keeps working as support evolves.
On Windows, macOS, Linux, and in the editor there is no native Aghanim SDK — the plugin talks to the Aghanim REST API directly. Orders and catalog operations (get order, unconsumed orders, consume, items, price points) work the same as on mobile, but the only checkout launch mode is Default browser: the plugin creates the order and opens the checkout URL in the OS default browser. The Native, In-app browser, and WebView modes report unavailable through IsCheckoutLaunchModeAvailable. To test those modes, run on a physical Android or iOS device.
A successful launch does not mean the player paid: Aghanim Start Checkout completes when the payment form opens, and the payment happens later, possibly outside the app — the player may even finish it on another device. The OnCheckoutClosed event is only a best-effort hint (it never fires for the external browser and can be missed if the app is killed mid-checkout).
Always verify fulfillment through orders: call Aghanim Get Unconsumed Orders on startup, on focus regain, and after a checkout closes; then call Aghanim Consume Order for a returned order and grant its items from that node's On Success pin. An Order ID that stops appearing in that list has been consumed; one that never appears has not been paid for yet. If you run a game server, use the item.add webhook instead.
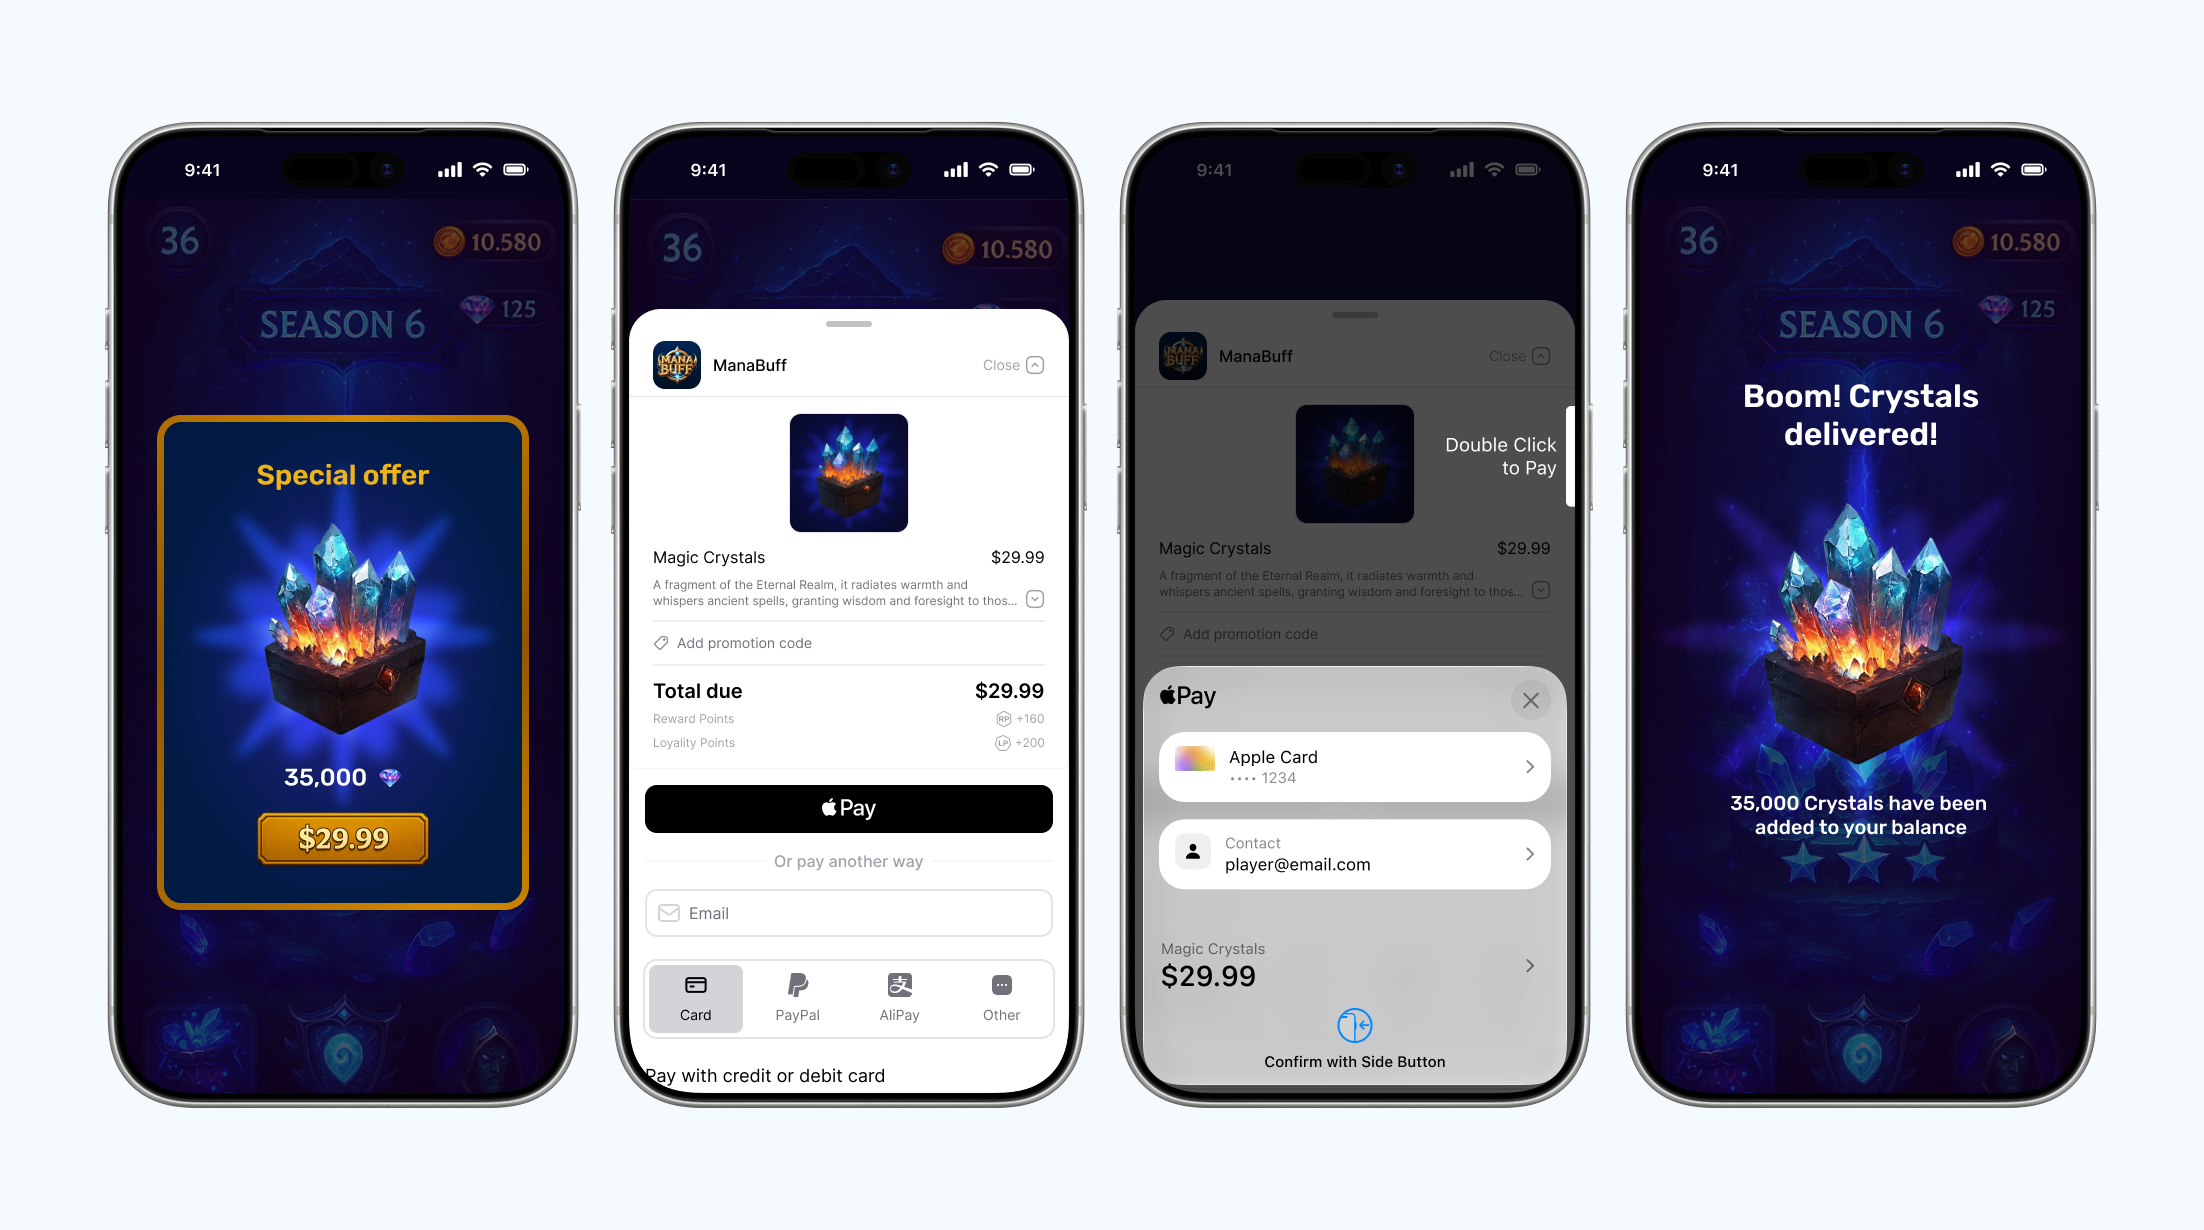
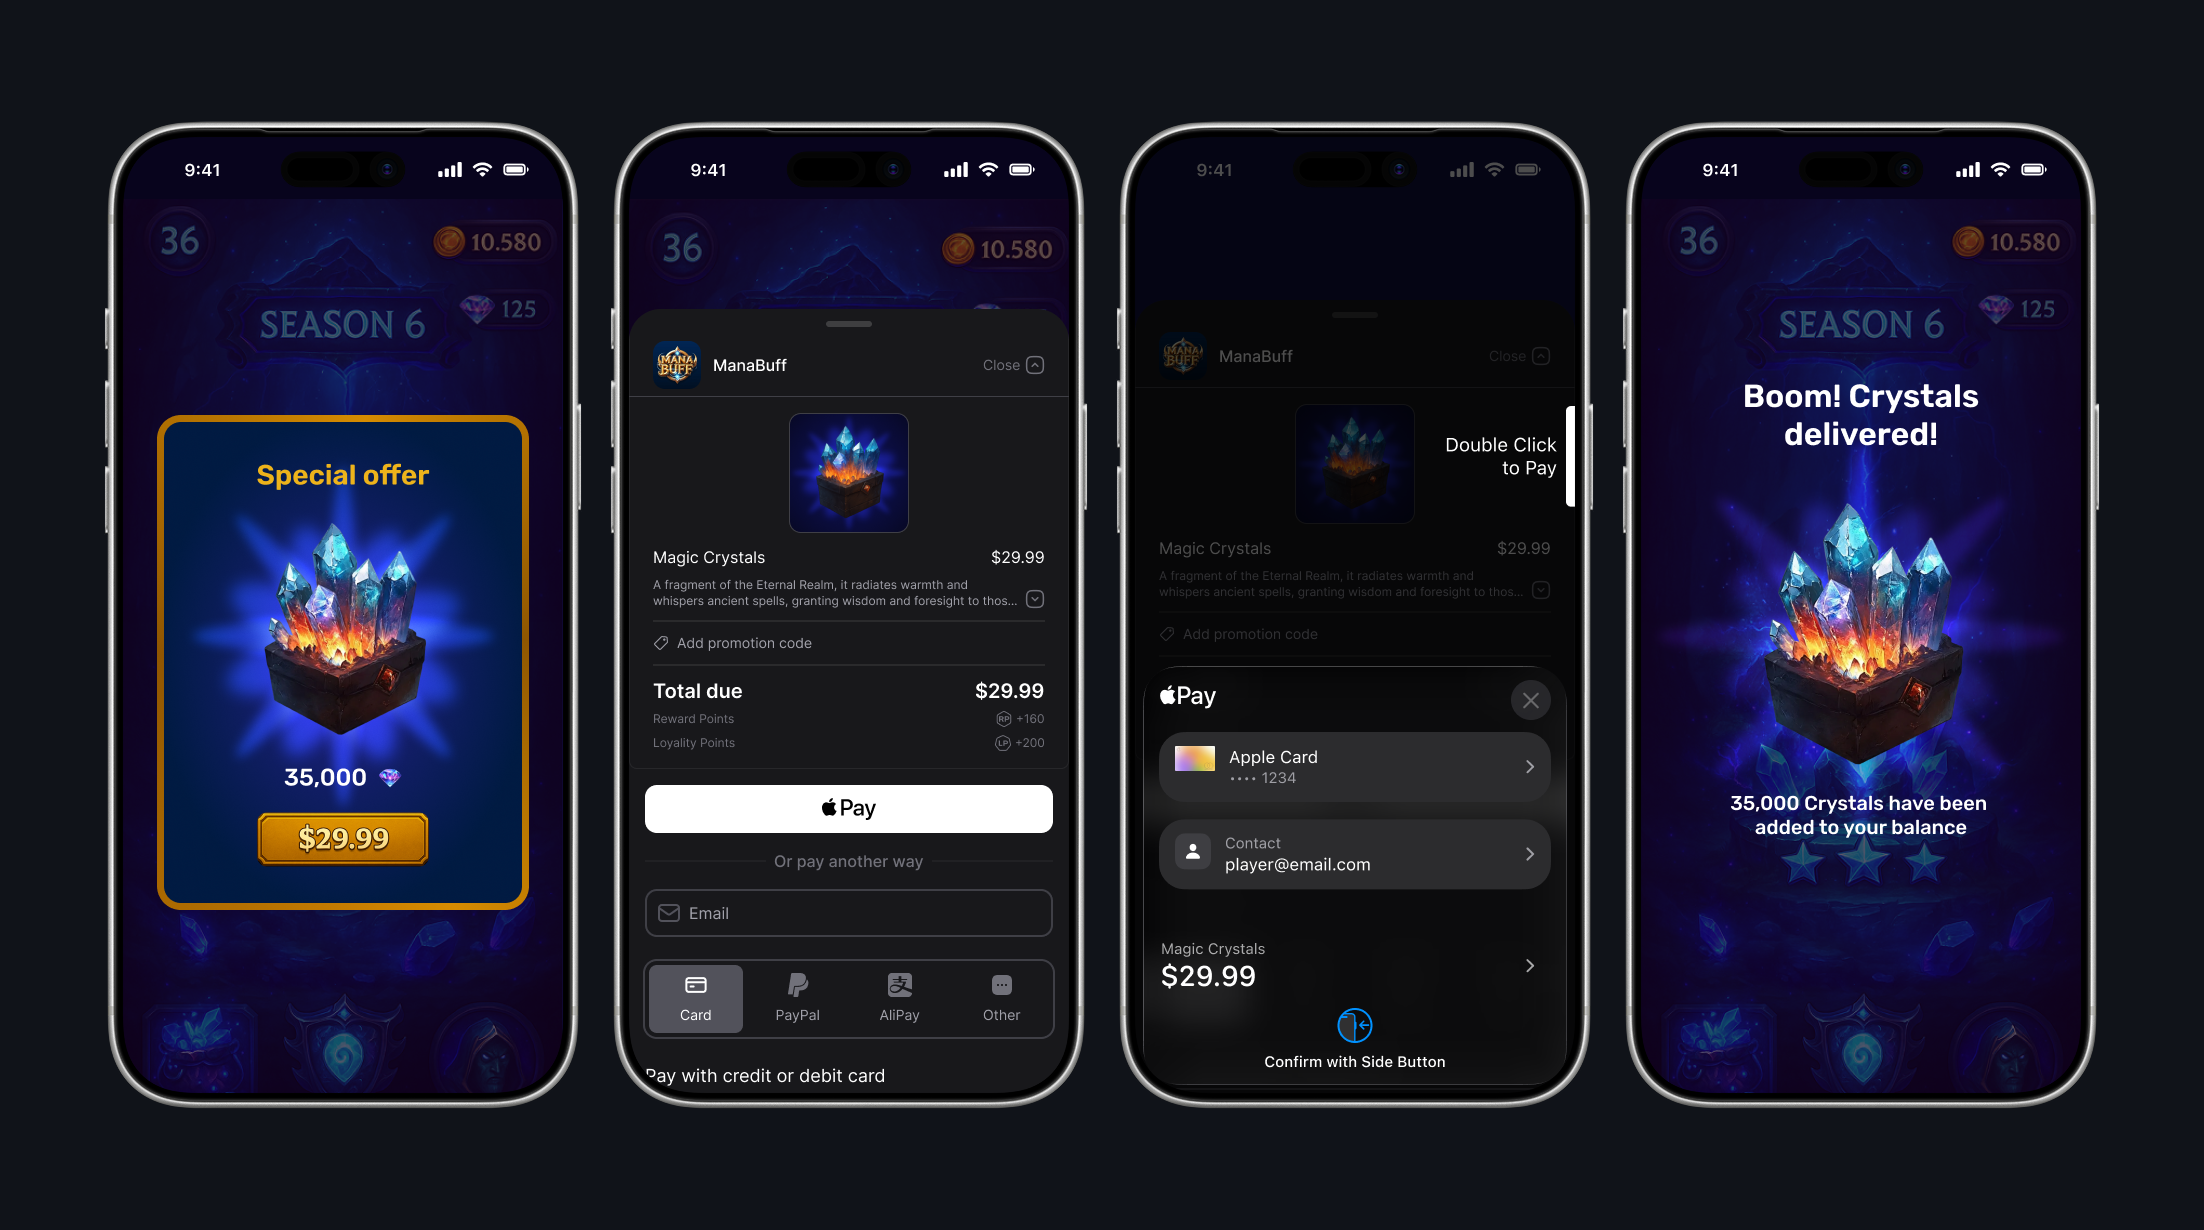
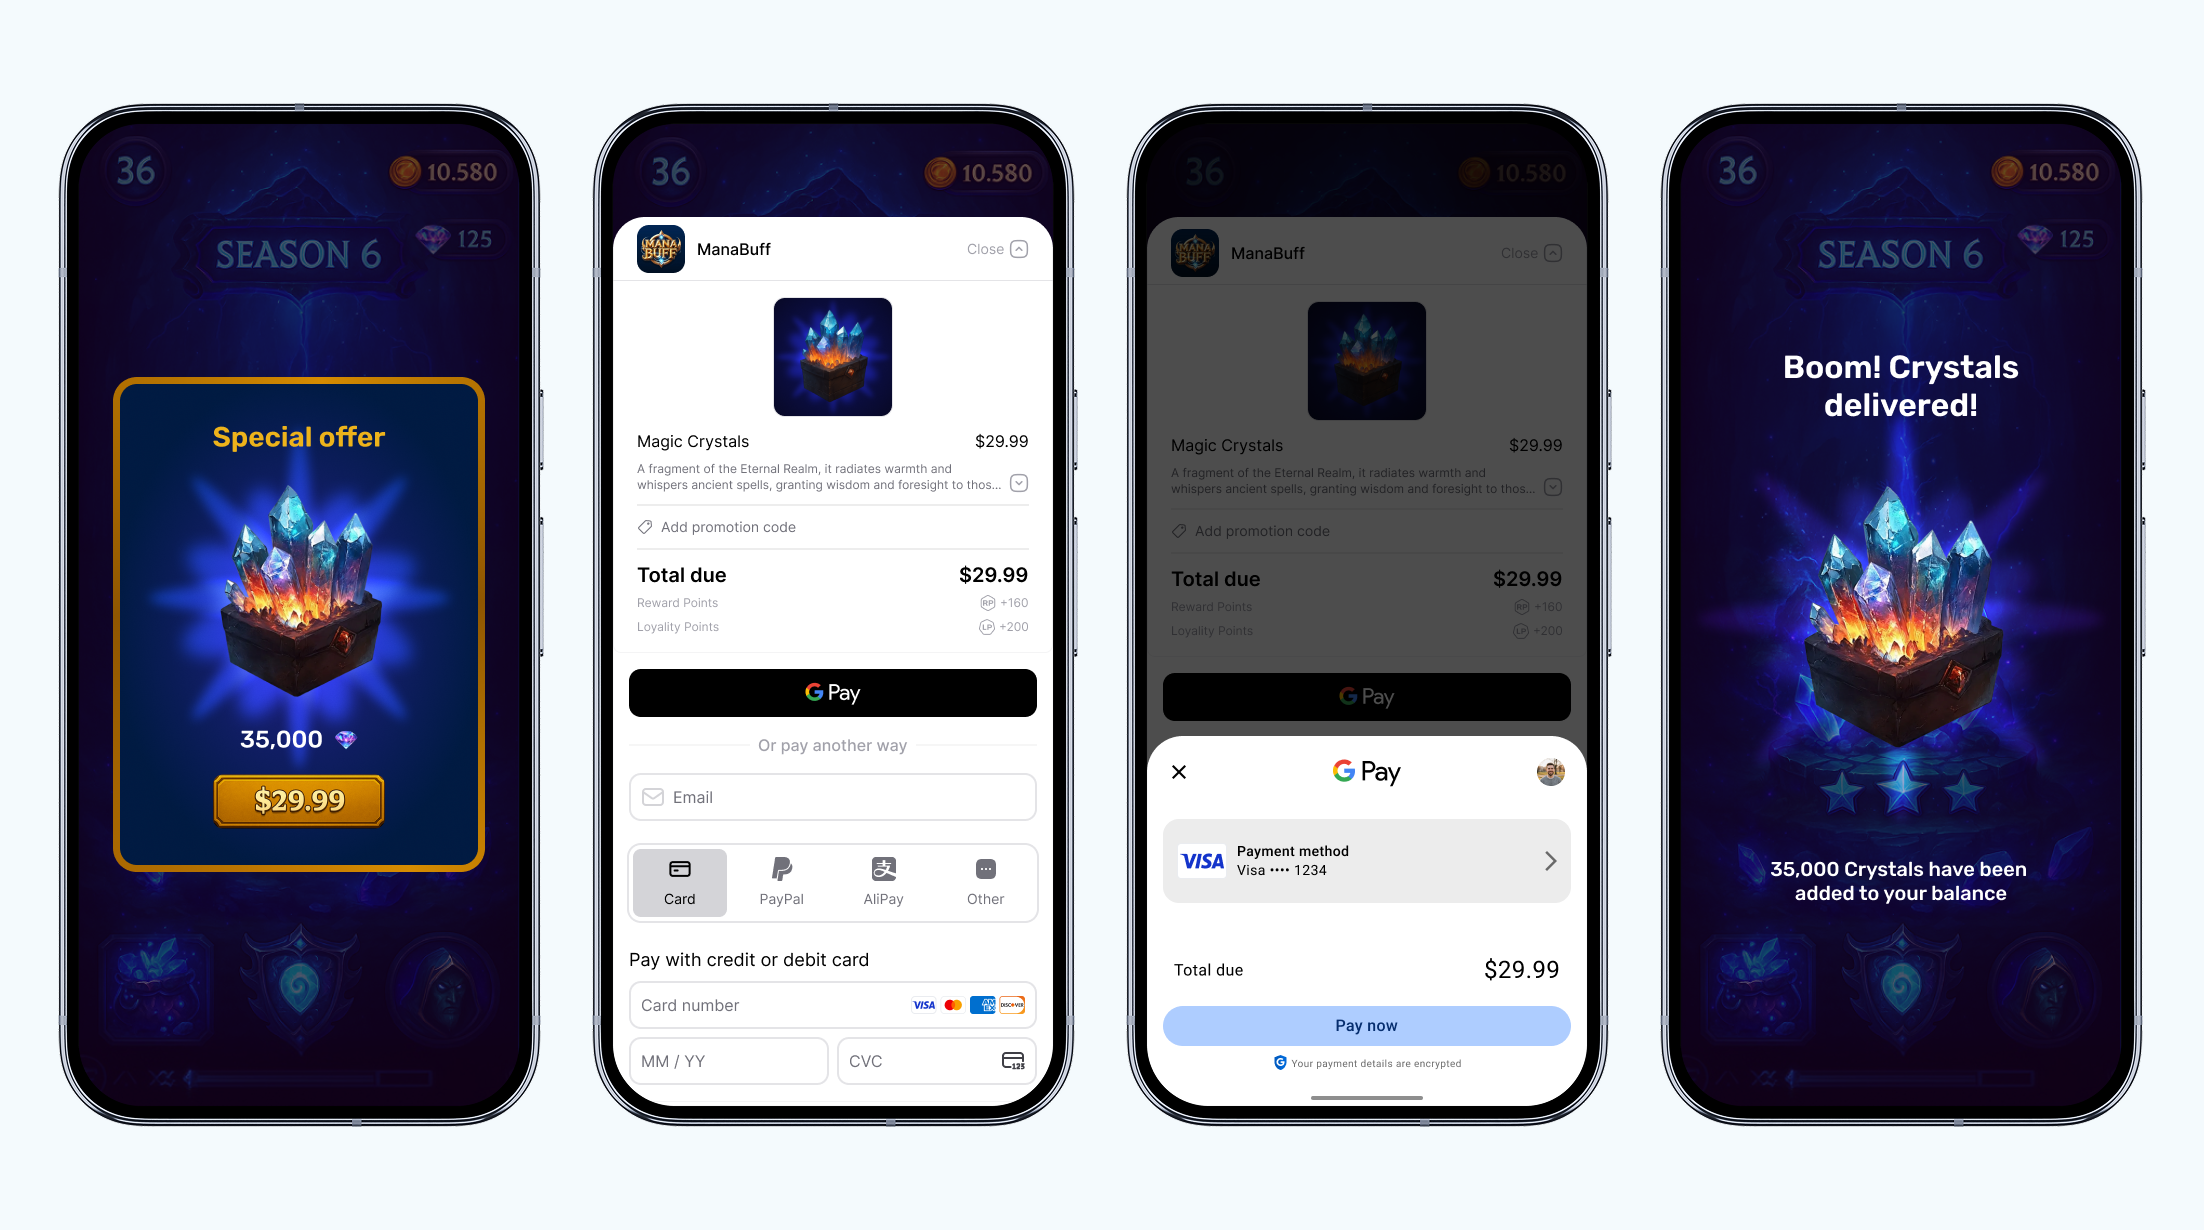
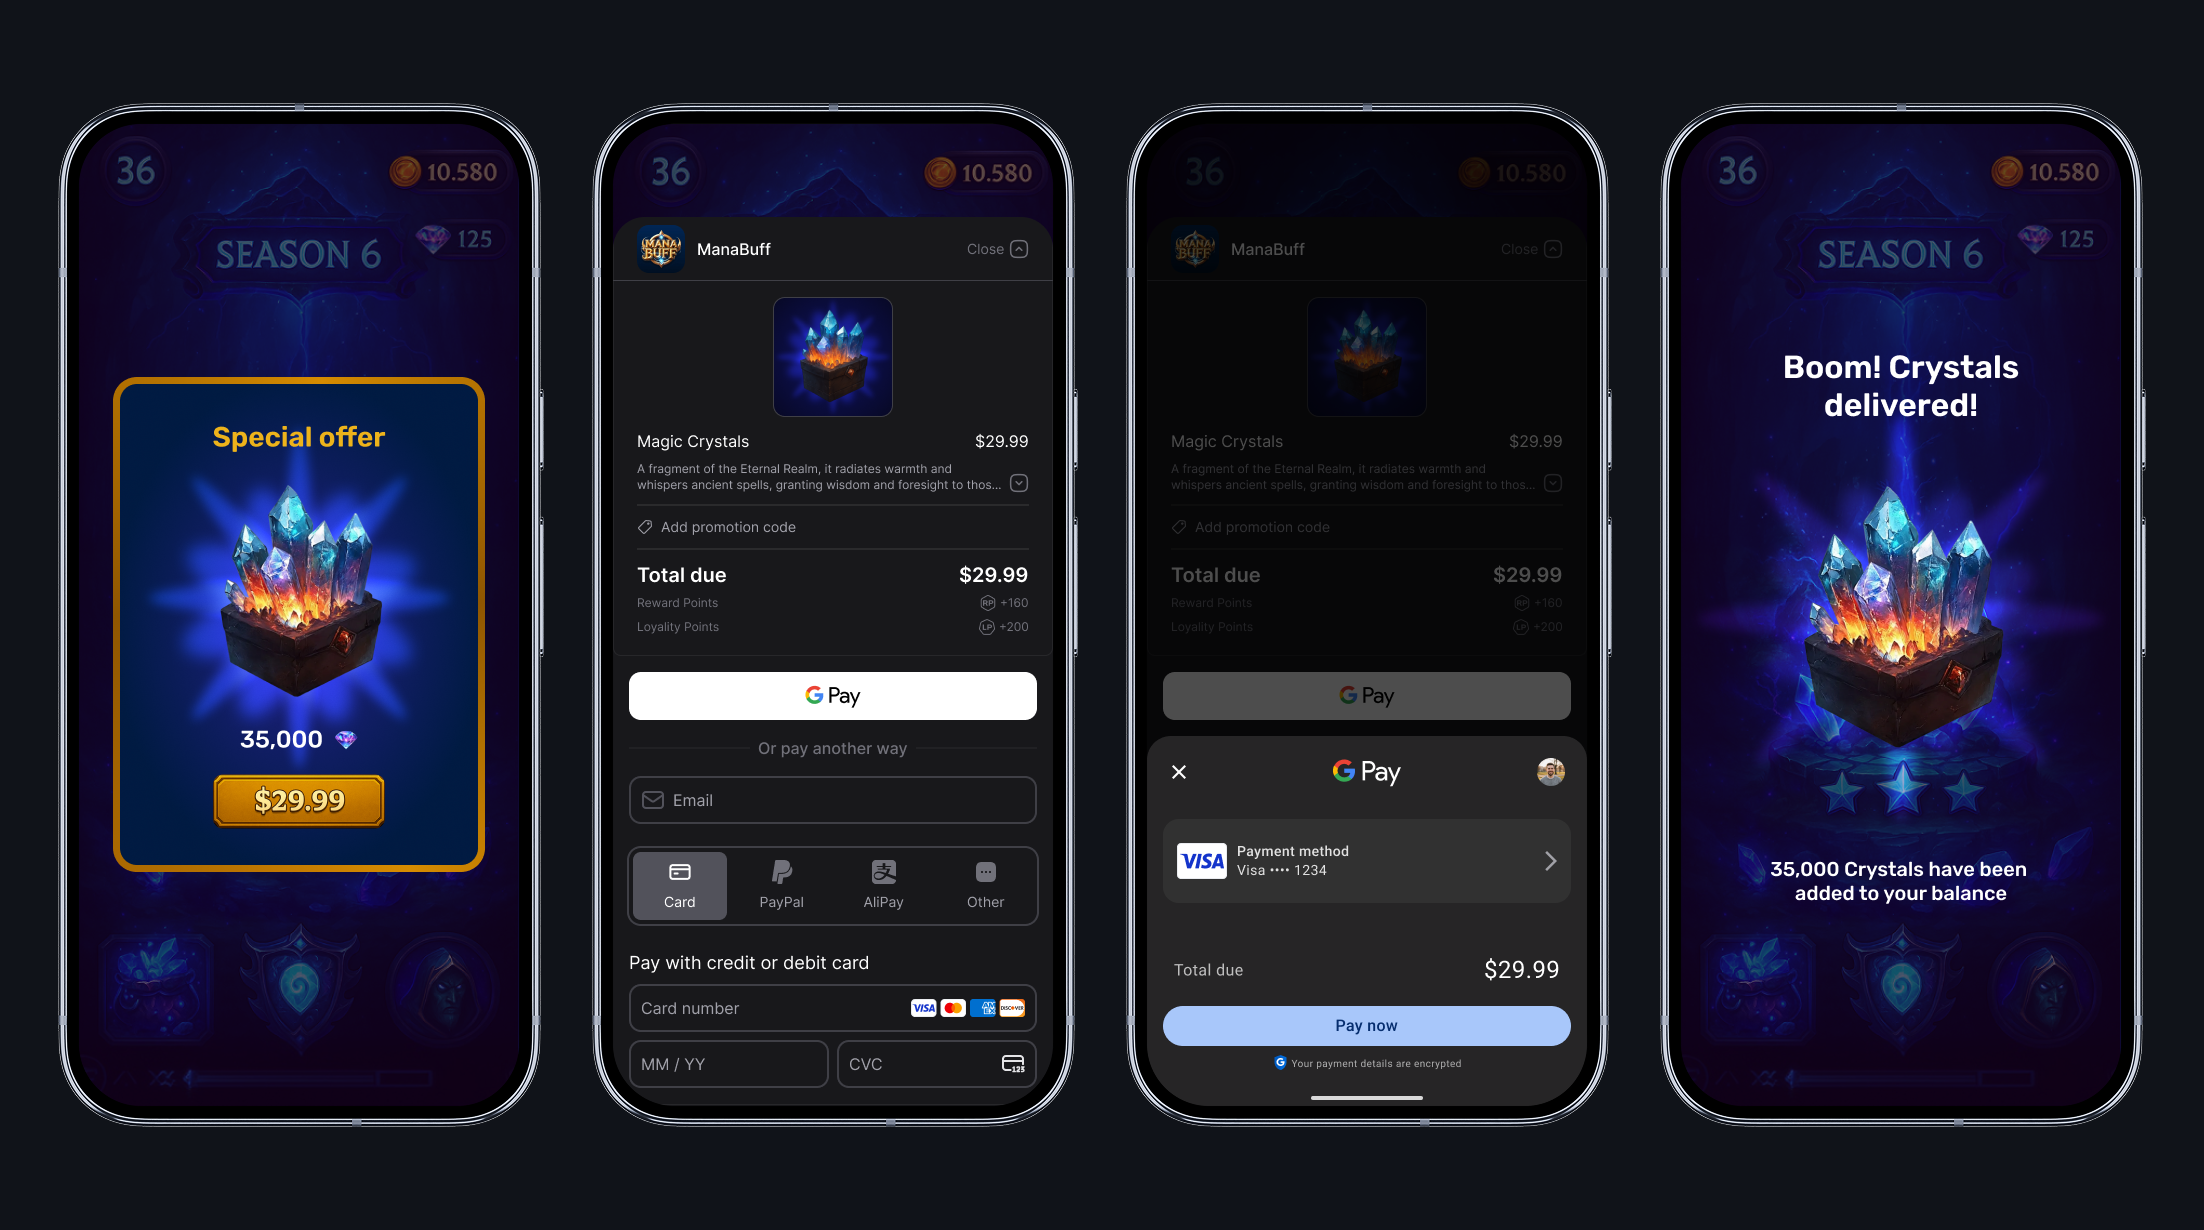
Android. WebView
The Checkout integration mode that opens the payment form in a WebView over your game: a WKWebView in an SDK-owned bottom sheet on iOS, a WebView bottom sheet or full-screen surface on Android. Use when you want the player to stay inside your game. Available on Android and iOS.
Register with Aghanim and link your game
First, register for an Aghanim account. At the end of registration, add the link to your mobile game. It should be published in Apple App Store or Google Play Store.
Set up environment
If you want to make real payments, you are all set as the live mode is used as default. Otherwise, use a sandbox, an isolated test environment, to simulate the Aghanim events to test payments without real money movement. To turn on the sandbox mode, set the Sandbox toggle to the active position.
Sandbox supports card payments only. Alternative methods (PayPal, wallets, local payment methods) appear only in live. See Test payments for the test cards.
While integrating, you will need an SDK key to authenticate requests to the Aghanim. Keep in mind that the sandbox and live modes have different keys. Find the SDK key in Integration → API keys.
Configure game client-side
Configure your game client to work with the Checkout by setting up the SDK and implementing the necessary code to process its methods.
Install SDK
The Unreal Engine SDK is distributed as a source plugin: the release contains source that compiles with your engine, so there are no prebuilt binaries — instead each release is pinned to the engine it was tested on (currently Unreal Engine 5.8). Your project must be able to compile C++ — a C++ project, or a Blueprint project with a working compiler toolchain.
-
Download a release from Aghanim's public Artifact Registry and unzip it into your project's
Plugins/folder so that the descriptor lives atYourProject/Plugins/AghanimSDK/AghanimSDK.uplugin. The registry is public read, so this is a plain anonymous download — no credentials. ReplaceVERSION/ENGINEwith the release you want, andYourProjectwith the path to your Unreal project.- PowerShell (Windows)
- Bash (macOS/Linux)
$Version = "0.2.0"       # the plugin release to install
$Engine  = "5.8"         # the Unreal Engine version the release is pinned to
$Zip     = "AghanimSDK-v$Version-UE$Engine.zip"
$Base    = "https://artifactregistry.googleapis.com/v1/projects/ag-registry/locations/us-central1/repositories/unreal-engine-sdk/files/unreal-engine-sdk:v${Version}:${Zip}"

# Download the plugin zip and its checksum (public read — no credentials).
Invoke-WebRequest -Uri "${Base}:download?alt=media" -OutFile $Zip
Invoke-WebRequest -Uri "${Base}.sha256:download?alt=media" -OutFile "$Zip.sha256"

# Verify the SHA-256, then abort on mismatch.
$Expected = (Get-Content "$Zip.sha256").Split()[0]
$Actual   = (Get-FileHash $Zip -Algorithm SHA256).Hash.ToLower()
if ($Actual -ne $Expected) { throw "Checksum mismatch — aborting." }

# Unzip into your project's Plugins/ folder (replace YourProject with your
# project's path) — lands at YourProject\Plugins\AghanimSDK\AghanimSDK.uplugin.
Expand-Archive -Path $Zip -DestinationPath YourProject\Plugins\ -ForceVERSION="0.2.0" # the plugin release to install
ENGINE="5.8" # the Unreal Engine version the release is pinned to
ZIP="AghanimSDK-v${VERSION}-UE${ENGINE}.zip"
BASE="https://artifactregistry.googleapis.com/v1/projects/ag-registry/locations/us-central1/repositories/unreal-engine-sdk/files/unreal-engine-sdk:v${VERSION}:${ZIP}"
# Download the plugin zip and its checksum (public read — no credentials).
curl -fSL --retry 3 -o "${ZIP}" "${BASE}:download?alt=media"
curl -fSL --retry 3 -o "${ZIP}.sha256" "${BASE}.sha256:download?alt=media"
# Verify the SHA-256, then abort on mismatch.
shasum -a 256 -c "${ZIP}.sha256"
# Unzip into your project's Plugins/ folder (replace YourProject with your
# project's path) — lands at YourProject/Plugins/AghanimSDK/AghanimSDK.uplugin.
unzip -q "${ZIP}" -d YourProject/Plugins/Use a project plugin underPlugins/The plugin must live under your project's
Plugins/directory. A plugin referenced out-of-tree through the.uproject'sAdditionalPluginDirectoriesis not packaged into the iOS app and fails to load on device. -
Open your project. Unreal enables a plugin placed under
Plugins/automatically; if it is disabled, enable Aghanim SDK under Edit → Plugins (category SDK) and restart the editor. -
Let the editor compile the plugin (or build from your IDE). No further dependency setup is required on any platform:
- Android — the native Aghanim SDK is resolved automatically from Aghanim's public Maven registry when the APK/AAB is packaged, so the packaging machine needs network access to
https://us-central1-maven.pkg.dev/ag-registry/android-sdk. No manual Gradle edits are needed. - iOS — the native SDK ships inside the plugin as vendored frameworks; they are linked and embedded automatically.
- Windows / macOS / Linux (and the editor) — the plugin talks to the Aghanim REST API directly, so the project always compiles and runs in the editor.
- Android — the native Aghanim SDK is resolved automatically from Aghanim's public Maven registry when the APK/AAB is packaged, so the packaging machine needs network access to
Configure SDK API key
The API key is a project setting, read automatically when the game starts.
- Copy the SDK key from Integration → API keys.
- In the Unreal Editor, open Project Settings → Plugins → Aghanim SDK.
- Paste the key into the API Key field.
The value is persisted to your project's DefaultGame.ini, so it travels with the project and applies to packaged builds:
[/Script/AghanimSDK.AghanimSettings]
ApiKey=<YOUR_SDK_KEY>
Initialize SDK
You do not call an initializer manually. The plugin ships a game-instance subsystem, UAghanimSDKSubsystem, that owns the SDK lifetime: when the game instance starts, it reads the API Key from the project settings and, if a key is set, initializes the SDK once for the lifetime of the process.
Get the subsystem wherever you need the SDK:
- C++
// Anywhere you have a game instance (e.g. inside an AActor or UUserWidget):
UAghanimSDKSubsystem* SDK = GetGameInstance()->GetSubsystem<UAghanimSDKSubsystem>();
In Blueprints: use the Get Game Instance Subsystem node with the AghanimSDKSubsystem class, then call the Aghanim SDK nodes on the result.
If you obtain the key at runtime instead (for example, after the player signs in), leave the API Key project setting empty and initialize explicitly once:
- C++
// Only needed when the API Key project setting is left empty
// and you obtain the key at runtime instead:
SDK->InitializeWithApiKey(TEXT("<YOUR_SDK_KEY>"));
Blueprint node: Initialize With Api Key (Aghanim SDK category).
The SDK writes its own diagnostics through Unreal's LogAghanimSDK log category.
Set the verbosity in Project Settings → Plugins → Aghanim SDK → Log Level. Supported levels, each enabling that severity and everything above it: Debug, Info, Warning, Error, and None (the default, which disables SDK logging entirely). The value is applied when the SDK is initialized and persisted next to the API key:
[/Script/AghanimSDK.AghanimSettings]
ApiKey=<YOUR_SDK_KEY>
LogLevel=Info
Use Debug during development to see SDK lifecycle and network activity; switch back to None (or Error) for release builds.
Configure player ID
Since a game instance runs for one player at a time, the SDK allows to set the player ID once to use it in all following method calls. Orders are created on behalf of a player, so set the ID as soon as your game client knows who the player is — before any checkout.
Setting and clearing the ID are asynchronous, so the SDK only has the player once On Success fires. Chain the rest of your startup off that pin rather than off the call.
- C++
// As soon as your game client knows who the player is. Setting the ID is asynchronous,
// so wait for On Success before any checkout or order call.
UAghanimSetPlayerIdAction* SetAction =
    UAghanimSetPlayerIdAction::AghanimSetPlayerId(this, TEXT("player-123"));

SetAction->OnSuccess.AddDynamic(this, &UMyStore::HandlePlayerIdSet); // const FAghanimError& Error
SetAction->OnFailure.AddDynamic(this, &UMyStore::HandleError);       // const FAghanimError& Error
SetAction->Activate();

// Later, e.g. when the player signs out:
UAghanimClearPlayerIdAction* ClearAction =
    UAghanimClearPlayerIdAction::AghanimClearPlayerId(this);

ClearAction->OnSuccess.AddDynamic(this, &UMyStore::HandlePlayerIdCleared);
ClearAction->OnFailure.AddDynamic(this, &UMyStore::HandleError);
ClearAction->Activate();
Blueprint nodes: Aghanim Set Player Id and Aghanim Clear Player Id (Aghanim SDK → Player category; async, with On Success and On Failure pins that each carry an Error).
Calling operations that need a player (Aghanim Get Unconsumed Orders, Aghanim Consume Order, or a checkout) before Aghanim Set Player Id has succeeded fails with the PlayerIdNotSet error type. Set the player ID immediately after authentication and wait for On Success.
Create item
The integration needs the items to be added to the Dashboard. When creating items, each should have its SKU, a unique identifier for the item within your game backend. You can add their prices, currency, sale configuration, and more.
To add an item to the Dashboard:
- Go to SKU Management → Items.
- Click Add Item. The site will open the Add Item page.
- Enter the item name New item.
- Enter the item SKU items.new.ba68a028-2d51-46b4-a854-68fc16af328a.
- In the Price block:
- Select the Fiat price type for a real money item.
- Enter the price 1.99.
- Click Add item.
For integration purposes, we have shortened an item setup. Before going live, use every suitable feature while adding items to the Dashboard.
Create Checkout item
Create an FAghanimCheckoutItem value that references an existing dashboard SKU. The SKU is the only required field; the others let you override the dashboard configuration on a per-checkout basis.
- C++
FAghanimCheckoutItem Item;
Item.Sku      = TEXT("items.new.ba68a028-2d51-46b4-a854-68fc16af328a"); // required

// Optional display overrides:
// Item.Name, Item.Description, Item.ImageUrl
In Blueprints, FAghanimCheckoutItem is a Blueprint struct: fill it with a Make AghanimCheckoutItem node.
Configure deep links
When the Checkout opens outside your game's own UI, the player needs a way back after the payment. That takes two matching halves: a URL scheme your app is registered to handle, and a BackToGameUrl on the checkout params that uses it.
Registering the scheme is the half you can either hand to the plugin or keep for yourself:
- Let the plugin register it. Fill in one project setting and it writes the iOS and Android registration for you when the game is packaged. Take this route unless you have a reason not to.
- Register it yourself. Leave that setting empty and declare the scheme in your own
Info.plistand Android manifest additions. You need this if you already hand-manage those files, or if you bring the player back through verified App Links or Universal Links, which the setting does not cover.
The steps below follow the first route.
-
In the Unreal Editor, open Project Settings → Plugins → Aghanim SDK and set Back To Game URL Scheme to the scheme alone, with no
://. Useyourgamefor a link likeyourgame://checkout/return. It is persisted next to the API key:[/Script/AghanimSDK.AghanimSettings]
ApiKey=<YOUR_SDK_KEY>
BackToGameUrlScheme=yourgameThe plugin registers the scheme on iOS and Android when the game is packaged. Desktop platforms ignore it.
-
Set
BackToGameUrlon the checkout params to a link that uses the same scheme. The host and path are free-form, soyourgame://checkout/returnworks as well as anything else your app routes. You can configure the return link per game in the Dashboard instead of passing it on every checkout.
Your game needs no handler of its own for the incoming link. The plugin and the native SDK route it, and the player lands back in the game.
BackToGameUrl has no effect in the Native launch mode, which never leaves the app, and a desktop external-browser checkout cannot return automatically at all.
Fulfillment never depends on the redirect either way: the player may return through the app switcher, or the app may be killed mid-checkout. Verify purchases through unconsumed orders.
Create Checkout params
When all data variables are ready, create another one that represents Checkout params. Checkout params are the programmatic representation of what the player sees when they are on the payment form. Checkout params are associated with a player and items, they are crucial for the Checkout to work.
Locale is the locale the Checkout is localized in. It is an EAghanimLocale, so the editor and Blueprint offer the supported values as a dropdown, and it defaults to En. See Checkout → Locales for the full list.
For the WebView launch mode, you can additionally choose how the WebView is presented: as a modal bottom sheet (the default) or full screen. The choice is honored on Android; iOS always uses the bottom sheet. Query IsWebViewPresentationSupported to know whether the current platform honors it.
- C++
FAghanimCheckoutParams Params;
Params.Items.Add(Item); // required: at least one item

// All optional:
Params.Locale        = EAghanimLocale::En;
Params.BackToGameUrl = TEXT("yourgame://checkout/return");

// WebView only: bottom sheet (default) or full screen. Honored on Android;
// iOS always uses the bottom sheet — see IsWebViewPresentationSupported().
Params.WebViewPresentation = EAghanimCheckoutWebViewPresentation::BottomSheet;
In Blueprints, fill the params with a Make AghanimCheckoutParams node. See the field-by-field description in the method reference.
You can attach custom metadata to the Checkout for item tracking purposes. You can access it through webhooks and in API responses from the Aghanim. Metadata has a structure of "key-value" pairs.
- C++
Params.Metadata.Add(TEXT("campaign"), TEXT("summer_sale"));
Params.Metadata.Add(TEXT("source"),   TEXT("store_screen"));
You can choose the behavior of redirecting the player after they have completed the payment successfully with EAghanimRedirectMode. The difference in the provided by the SDK modes is a delay before redirecting or absence of redirecting.
- Immediate
- Delayed
- No redirect
When the player has completed the payment, the SDK redirects them immediately to the deep link from BackToGameUrl.
- C++
Params.RedirectSettings.Mode = EAghanimRedirectMode::Immediate;
When the player has completed the payment, the SDK shows the screen for the successful payment for the given number of seconds and then redirects the player to the deep link from BackToGameUrl.
- C++
Params.RedirectSettings.Mode         = EAghanimRedirectMode::Delayed;
Params.RedirectSettings.DelaySeconds = 5;
When the player has completed the payment, they stay on the screen for the successful payment. To exit it, they manually close it or navigate away. After, you should redirect them to the deep link from BackToGameUrl by yourself.
- C++
// The default: the player stays on the success screen and the
// redirectSettings block is omitted from the created order.
Params.RedirectSettings.Mode = EAghanimRedirectMode::NoRedirect;
You can set the appearance mode for the Checkout UI with EAghanimUiMode. The SDK supports automatic detection based on the system setting, or you can force a specific mode.
- Auto
- Dark
- Light
The SDK automatically detects and applies the appropriate appearance mode based on the system setting.
- C++
// The default: follow the platform/device appearance.
Params.UiSettings.Mode = EAghanimUiMode::Auto;
The SDK forces dark mode appearance for the Checkout UI.
- C++
Params.UiSettings.Mode = EAghanimUiMode::Dark;
The SDK forces light mode appearance for the Checkout UI.
- C++
Params.UiSettings.Mode = EAghanimUiMode::Light;
Launch Checkout
Add a checkout button to your game client that launches the payment form. The SDK creates an order from the provided checkout params and opens it in a WebView over your game — a WKWebView in an SDK-owned bottom sheet on iOS, a WebView bottom sheet or full-screen surface on Android. On success, you receive the Order ID to track the order. On failure, you receive an FAghanimError with debug information for troubleshooting.
The WebView mode is available on Android and iOS. Guard the call with IsCheckoutLaunchModeAvailable so shared game code runs unmodified on desktop too.
- C++
const EAghanimCheckoutLaunchMode Mode = EAghanimCheckoutLaunchMode::WebView;
if (SDK->IsCheckoutLaunchModeAvailable(Mode))
{
    UAghanimStartCheckoutAction* Action =
        UAghanimStartCheckoutAction::AghanimStartCheckout(this, Params, Mode);

    // Handlers take (FString OrderId, const FAghanimError& Error): the Order ID is set
    // only on On Launched, the error only on On Failed.
    Action->OnLaunched.AddDynamic(this, &UMyStore::HandleCheckoutLaunched);
    Action->OnFailed.AddDynamic(this, &UMyStore::HandleCheckoutFailed);
    Action->Activate();
}
Blueprint node: Aghanim Start Checkout (async; pins On Launched and On Failed, each carrying both Order Id and Error), guarded by Is Checkout Launch Mode Available. The ID is filled only on On Launched, the error only on On Failed.
On iOS, when the player closes the WebView the subsystem's OnCheckoutClosed event fires with the Order ID — a good moment to check unconsumed orders. Android does not report the close, so rely on the unconsumed-orders check there.
Check unconsumed Orders
After the Checkout has launched and you have an Order ID, the player can step away from the payment form, complete the payment, or abandon it entirely. The launch call only confirms that the Order was created and the form opened — it does not tell you whether the player paid. To know which Orders the player has actually paid for and should be granted to them, ask the SDK for the list of unconsumed paid Orders.
Good moments to check are on startup, when your game regains focus after the player returns from the checkout, and when the subsystem's OnCheckoutClosed event fires. OnCheckoutClosed is best-effort: it only fires for on-screen checkouts (WebView / in-app browser), never for the external browser, and can be missed if the app is killed mid-checkout — treat it as a hint, not a guarantee.
- C++
UAghanimGetUnconsumedOrdersAction* Action =
    UAghanimGetUnconsumedOrdersAction::AghanimGetUnconsumedOrders(this);

// Handlers take (const TArray<FString>& OrderIds, const FAghanimError& Error).
Action->OnSuccess.AddDynamic(this, &UMyStore::HandleUnconsumedOrders);
Action->OnFailure.AddDynamic(this, &UMyStore::HandleUnconsumedOrdersFailed);
Action->Activate();

void UMyStore::HandleUnconsumedOrders(const TArray<FString>& OrderIds, const FAghanimError& Error)
{
    for (const FString& OrderId : OrderIds)
    {
        // Consume the order, then grant its items on the success pin.
    }
}
Blueprint node: Aghanim Get Unconsumed Orders (async; pins On Success and On Failure, each carrying both Order Ids and Error). The IDs are filled only on success, the error only on failure.
Consume paid Orders
Consume the Order the player has paid for, then grant its items once the consume succeeds. Consuming the same Order twice fails, so the grant runs only once. A consumed Order is not returned by the unconsumed-orders query again.
- C++
UAghanimConsumeOrderAction* Action =
    UAghanimConsumeOrderAction::AghanimConsumeOrder(this, OrderId);

// Handlers take (const FAghanimError& Error); the error is empty on success.
Action->OnSuccess.AddDynamic(this, &UMyStore::HandleOrderConsumed);
Action->OnFailure.AddDynamic(this, &UMyStore::HandleError);
Action->Activate();
Blueprint node: Aghanim Consume Order (async; pins On Success and On Failure, each carrying an Error that is empty on success).
The end-to-end loop is: Aghanim Get Unconsumed Orders → Aghanim Consume Order for a returned ID → the grant hangs off that node's On Success pin.
Unconsumed-order polling is meant for games without a dedicated server. If you have a game server, prefer the item.add webhook so your server controls granting.
Full implementation code
A complete client-side flow in one place: a game-instance subsystem that sets the player ID, launches a checkout with any available launch mode, and reconciles paid orders once the player ID is set and whenever a checkout closes.
- C++
// MyStoreSubsystem.h
#pragma once

#include "CoreMinimal.h"
#include "Subsystems/GameInstanceSubsystem.h"
#include "AghanimSDKSubsystem.h"
#include "AghanimAsyncActions.h"
#include "MyStoreSubsystem.generated.h"

UCLASS()
class UMyStoreSubsystem : public UGameInstanceSubsystem
{
    GENERATED_BODY()

public:
    virtual void Initialize(FSubsystemCollectionBase& Collection) override;

    /** Call once your game client knows who the player is. */
    UFUNCTION(BlueprintCallable, Category = "My Store")
    void ConfigurePlayer(const FString& PlayerId);

    /** Call from your store UI. Pick any launch mode that is available on the platform. */
    UFUNCTION(BlueprintCallable, Category = "My Store")
    void BuyItem(const FString& Sku, EAghanimCheckoutLaunchMode LaunchMode);

    /** Call once the player ID is set, and whenever the game regains focus. */
    UFUNCTION(BlueprintCallable, Category = "My Store")
    void ReconcilePaidOrders();

private:
    UFUNCTION() void HandlePlayerIdSet(const FAghanimError& Error);
    UFUNCTION() void HandleCheckoutLaunched(FString OrderId, const FAghanimError& Error);
    UFUNCTION() void HandleCheckoutFailed(FString OrderId, const FAghanimError& Error);
    UFUNCTION() void HandleCheckoutClosed(FString OrderId);
    UFUNCTION() void HandleUnconsumedOrders(const TArray<FString>& OrderIds, const FAghanimError& Error);
    UFUNCTION() void HandleUnconsumedOrdersFailed(const TArray<FString>& OrderIds, const FAghanimError& Error);
    UFUNCTION() void HandleError(const FAghanimError& Error);

    UAghanimSDKSubsystem* GetSdk() const;
};

// MyStoreSubsystem.cpp
void UMyStoreSubsystem::Initialize(FSubsystemCollectionBase& Collection)
{
    Super::Initialize(Collection);

    // Best-effort hint that an on-screen checkout closed (iOS WebView / in-app browser).
    GetSdk()->OnCheckoutClosed.AddDynamic(this, &UMyStoreSubsystem::HandleCheckoutClosed);
}

void UMyStoreSubsystem::ConfigurePlayer(const FString& PlayerId)
{
    // Orders are created on behalf of a player, and setting the ID is asynchronous.
    // Everything that needs a player waits for On Success.
    UAghanimSetPlayerIdAction* Action =
        UAghanimSetPlayerIdAction::AghanimSetPlayerId(this, PlayerId);
    Action->OnSuccess.AddDynamic(this, &UMyStoreSubsystem::HandlePlayerIdSet);
    Action->OnFailure.AddDynamic(this, &UMyStoreSubsystem::HandleError);
    Action->Activate();
}

void UMyStoreSubsystem::HandlePlayerIdSet(const FAghanimError& Error)
{
    ReconcilePaidOrders();
}

void UMyStoreSubsystem::BuyItem(const FString& Sku, EAghanimCheckoutLaunchMode LaunchMode)
{
    if (!GetSdk()->IsCheckoutLaunchModeAvailable(LaunchMode))
    {
        return; // Fall back to another mode or hide the button.
    }

    FAghanimCheckoutItem Item;
    Item.Sku = Sku;

    FAghanimCheckoutParams Params;
    Params.Items.Add(Item);
    Params.BackToGameUrl = TEXT("yourgame://checkout/return");

    UAghanimStartCheckoutAction* Action =
        UAghanimStartCheckoutAction::AghanimStartCheckout(this, Params, LaunchMode);
    Action->OnLaunched.AddDynamic(this, &UMyStoreSubsystem::HandleCheckoutLaunched);
    Action->OnFailed.AddDynamic(this, &UMyStoreSubsystem::HandleCheckoutFailed);
    Action->Activate();
}

void UMyStoreSubsystem::HandleCheckoutLaunched(FString OrderId, const FAghanimError& Error)
{
    // The checkout opened; the payment happens later, possibly outside the app.
    // Keep the OrderId if you want to look the order up with Aghanim Get Order.
}

void UMyStoreSubsystem::HandleCheckoutFailed(FString OrderId, const FAghanimError& Error)
{
    UE_LOG(LogTemp, Warning, TEXT("Checkout failed (%s): %s"), *Error.Type, *Error.DebugMessage);
}

void UMyStoreSubsystem::HandleCheckoutClosed(FString OrderId)
{
    ReconcilePaidOrders();
}

void UMyStoreSubsystem::ReconcilePaidOrders()
{
    UAghanimGetUnconsumedOrdersAction* Action =
        UAghanimGetUnconsumedOrdersAction::AghanimGetUnconsumedOrders(this);
    Action->OnSuccess.AddDynamic(this, &UMyStoreSubsystem::HandleUnconsumedOrders);
    Action->OnFailure.AddDynamic(this, &UMyStoreSubsystem::HandleUnconsumedOrdersFailed);
    Action->Activate();
}

void UMyStoreSubsystem::HandleUnconsumedOrders(const TArray<FString>& OrderIds, const FAghanimError& Error)
{
    for (const FString& OrderId : OrderIds)
    {
        // 1. Grant the order's items in your game logic.
        // 2. Acknowledge the grant so the order is not returned again.
        UAghanimConsumeOrderAction* Action =
            UAghanimConsumeOrderAction::AghanimConsumeOrder(this, OrderId);
        Action->OnFailure.AddDynamic(this, &UMyStoreSubsystem::HandleError);
        Action->Activate();
    }
}

void UMyStoreSubsystem::HandleUnconsumedOrdersFailed(const TArray<FString>& OrderIds, const FAghanimError& Error)
{
    HandleError(Error);
}

void UMyStoreSubsystem::HandleError(const FAghanimError& Error)
{
    UE_LOG(LogTemp, Warning, TEXT("Aghanim SDK error (%s): %s"), *Error.Type, *Error.DebugMessage);
}

UAghanimSDKSubsystem* UMyStoreSubsystem::GetSdk() const
{
    return GetGameInstance()->GetSubsystem<UAghanimSDKSubsystem>();
}
The same flow in Blueprints: Get Game Instance Subsystem (AghanimSDKSubsystem) → Aghanim Set Player Id → from its On Success pin, build the params with Make AghanimCheckoutItem / Make AghanimCheckoutParams → Aghanim Start Checkout; bind the subsystem's On Checkout Closed event and, from it and from On Success, run Aghanim Get Unconsumed Orders → grant the items → Aghanim Consume Order.
Make payment
Make a payment. If you have set the sandbox mode, use the test card below. In the sandbox, you can make payments only with the test cards — alternative methods like PayPal, wallets, and local payment methods appear only in the live environment. The test cards accept any digits as CVV and any future date as expiry date. Don’t forget to fill in an email address to check the receipt is sent and any postal code as a billing address.
Successful payments
After you complete the payment, you will receive a receipt sent to the specified email address and a transaction record in Aghanim Dashboard → Transactions.
| Card Brand | Card Number | CVV | Expiry date | Country |
|---|---|---|---|---|
| VISA (credit) | 4242 4242 4242 4242 | Any 3 digits | Any future date | GB |
Unsuccessful payments
Make an unsuccessful payment just in case you are curious. You will see the transaction in Aghanim Dashboard → Transactions as well.
| Number | CVV | Expiry date | Response code | Description |
|---|---|---|---|---|
4832 2850 6160 9015 | Any 3 digits | Any future date | 16 | Payment declined |
For the live mode, you can find all supported payment methods in Company settings → Payment methods. Turn on or off those you see suitable. Some payment methods are available globally by default. You can’t disable Credit cards, Apple Pay, Google Pay, and PayPal.
In Checkout, the Aghanim evaluates the currency and any restrictions, then dynamically presents only the payment methods available to the player based on evaluation.
When you use the live mode, the payment form shows to the player a setting to save their payment method so they can make a one-click payment in the future.
Handle post-payment events on game server-side
To complete the Checkout, handle items’ granting and chargebacks on your game backend. To do so, implement a webhook system that accepts the item.add and item.remove webhooks. See the code example with the implementation.
Comply with the Aghanim requirements for these webhooks:
- Use HTTPS schema for the single POST webhook endpoint.
- Check that webhooks are generated and signed by the Aghanim.
- Handle the
idempotency_keyfield in the webhook payload to prevent processing duplicate webhooks. - Respond with the HTTP status codes:
2xxfor successfully processed webhooks.4xxand5xxfor errors.
Grant items to player
The Aghanim sends the item.add webhook to let you know about the purchased items and ask for your permission to grant them to the player.
When the Aghanim has your 2xx answer, it can complete the checkout logic and redirect the player to a deep link if provided.
Support refunds and chargebacks
The Aghanim sends the item.remove webhook when a bank or payment system reverses the transaction, or you have requested refund in Aghanim Dashboard → Transactions. Partial refunds are not supported.
The suggested implementation handles the webhooks mentioned before:
item.addfor granting items. You need it for integration.item.removefor refunds and chargebacks. You might need it for integration.
- Python
- Ruby
- Node.js
- Go
# 통합에서 웹훅 이벤트를 처리하기 위해 이 샘플 코드를 사용하세요.
#
# 1. 이 코드를 `server.py`라는 새 파일에 붙여 넣으세요.
#
# 2. 의존성 설치:
#    python -m pip install fastapi[all]
#
# 3. http://localhost:8000에서 서버를 실행합니다
#    python server.py

import fastapi, hashlib, hmac, json, typing
from fastapi.responses import JSONResponse

app = fastapi.FastAPI()

@app.post("/webhook")
async def webhook(request: fastapi.Request) -> dict[str, typing.Any]:
    secret_key = "<YOUR_S2S_KEY>"  # 실제 웹훅 비밀 키로 교체하세요

    raw_payload = await request.body()
    payload = raw_payload.decode()
    timestamp = request.headers["x-aghanim-signature-timestamp"]
    received_signature = request.headers["x-aghanim-signature"]

    if not verify_signature(secret_key, payload, timestamp, received_signature):
        raise fastapi.HTTPException(status_code=403, detail="Invalid signature")

    data = json.loads(payload)
    event_type = data["event_type"]
    event_data = data["event_data"]

    if event_type == "item.add":
        add_item(event_data)
        return {"status": "ok"}

    if event_type == "item.remove":
        remove_item(event_data)
        return {"status": "ok"}

    raise fastapi.HTTPException(status_code=400, detail="Unknown event type")

def verify_signature(secret_key: str, payload: str, timestamp: str, received_signature: str) -> bool:
    signature_data = f"{timestamp}.{payload}"
    computed_hash = hmac.new(secret_key.encode(), signature_data.encode(), hashlib.sha256)
    computed_signature = computed_hash.hexdigest()
    return hmac.compare_digest(computed_signature, received_signature)

def add_item(event_data: dict[str, typing.Any]) -> None:
    # 이벤트를 처리하고 항목을 추가하기 위한 플레이스홀더 로직입니다.
    # 실제 애플리케이션에서는 이 함수가 데이터베이스나 인벤토리 시스템과 상호작용합니다.
    player_id = event_data["player_id"]
    for item in event_data["items"]:
      sku = item["sku"]
      print(f"Item {sku} has been credited to player's {player_id} account.")

def remove_item(event_data: dict[str, typing.Any]) -> None:
    # 이벤트를 처리하고 항목을 제거하기 위한 플레이스홀더 로직입니다.
    # 실제 애플리케이션에서는 이 함수가 데이터베이스나 인벤토리 시스템과 상호작용합니다.
    player_id = event_data["player_id"]
    for item in event_data["items"]:
      sku = item["sku"]
      print(f"Item {sku} has been removed from player's {player_id} account.")

if __name__ == "__main__":
    import uvicorn
    uvicorn.run(app, host="0.0.0.0", port=8000)
# 통합에서 웹훅 이벤트를 처리하기 위해 이 샘플 코드를 사용하세요.
#
# 1. 이 코드를 `server.rb`라는 새 파일에 붙여 넣으세요.
#
# 2. 의존성 설치:
#    gem install sinatra json hmac
#
# 3. http://localhost:8000에서 서버를 실행합니다
#    ruby server.rb

require 'sinatra'
require 'json'
require 'openssl'

post '/webhook' do
  secret_key = "<YOUR_S2S_KEY>"  # 실제 웹훅 비밀 키로 교체하세요

  payload = request.body.read
  timestamp = request.env["HTTP_X_AGHANIM_SIGNATURE_TIMESTAMP"]
  received_signature = request.env["HTTP_X_AGHANIM_SIGNATURE"]

  unless verify_signature(secret_key, payload, timestamp, received_signature)
    halt 403, "Invalid signature"
  end

  data = JSON.parse(payload)
  event_type = data["event_type"]
  event_data = data["event_data"]

  if event_type == "item.add"
    add_item(event_data)
    return { status: "ok" }.to_json
  end

  if event_type == "item.remove"
    remove_item(event_data)
    return { status: "ok" }.to_json
  end

  halt 400, "Unknown event type"
end

def verify_signature(secret_key, payload, timestamp, received_signature)
  signature_data = "#{timestamp}.#{payload}"
  computed_signature = OpenSSL::HMAC.hexdigest('sha256', secret_key, signature_data)
  OpenSSL.secure_compare(computed_signature, received_signature)
end

def add_item(event_data)
  # 이벤트를 처리하고 항목을 추가하기 위한 플레이스홀더 로직입니다.
  # 실제 애플리케이션에서는 이 함수가 데이터베이스나 인벤토리 시스템과 상호작용합니다.
  player_id = event_data["player_id"]
  for item in event_data["items"] do
    sku = item["sku"]
    puts "Item #{sku} has been credited to player's #{player_id} account."
  end
end

def remove_item(event_data)
  # 이벤트를 처리하고 항목을 제거하기 위한 플레이스홀더 로직입니다.
  # 실제 애플리케이션에서는 이 함수가 데이터베이스나 인벤토리 시스템과 상호작용합니다.
  player_id = event_data["player_id"]
  for item in event_data["items"] do
    sku = item["sku"]
    puts "Item #{sku} has been removed from player's #{player_id} account."
  end
end

if __FILE__ == $0
  require 'sinatra'
  set :bind, '0.0.0.0'
  set :port, 8000
end
// 통합에서 웹훅 이벤트를 처리하기 위해 이 샘플 코드를 사용하세요.
//
// 1. 이 코드를 새로운 파일 `server.js`에 붙여 넣으세요.
//
// 2. 의존성 설치:
//    npm install express
//
// 3. http://localhost:8000에서 서버를 실행합니다
//    node server.js

const express = require('express');
const crypto = require('crypto');

const app = express();

app.post('/webhook', express.raw({ type: "*/*" }), async (req, res) => {
  const secretKey = '<YOUR_S2S_KEY>'; // 실제 웹훅 비밀 키로 교체하세요

  const rawPayload = req.body;
  const timestamp = req.headers['x-aghanim-signature-timestamp'];
  const receivedSignature = req.headers['x-aghanim-signature'];

  if (!verifySignature(secretKey, rawPayload, timestamp, receivedSignature)) {
    return res.status(403).send('Invalid signature');
  }

  const payload = JSON.parse(req.body);
  const { event_type, event_data } = payload;

  if (event_type === 'item.add') {
    addItem(event_data);
    return res.json({ status: 'ok' });
  }

  if (event_type === 'item.remove') {
    removeItem(event_data);
    return res.json({ status: 'ok' });
  }

  return res.status(400).send('Unknown event type');
});

function verifySignature(secretKey, payload, timestamp, receivedSignature) {
  const signatureData = `${timestamp}.${payload}`;
  const computedSignature = crypto
    .createHmac('sha256', secretKey)
    .update(signatureData)
    .digest('hex');
  return crypto.timingSafeEqual(Buffer.from(computedSignature), Buffer.from(receivedSignature));
}

function addItem(event_data) {
  // 이벤트를 처리하고 항목을 추가하기 위한 플레이스홀더 로직입니다.
  // 실제 애플리케이션에서는 이 함수가 데이터베이스나 인벤토리 시스템과 상호작용합니다.
  const playerId = event_data.player_id;
  for (const item of event_data.items) {
    const sku = item.sku;
    console.log(`Item ${item.sku} has been credited to player's ${playerId} account.`);
 }
}

function removeItem(event_data) {
  // 이벤트 처리 및 항목 제거를 위한 플레이스홀더 로직입니다.
  // 실제 애플리케이션에서는 이 함수가 데이터베이스나 인벤토리 시스템과 상호작용합니다.
  const playerId = event_data.player_id;
  for (const item of event_data.items) {
    const sku = item.sku;
    console.log(`Item ${item.sku} has been removed from player's ${playerId} account.`);
 }
}

app.listen(8000, () => {
  console.log('Server is running on http://localhost:8000');
});
// 통합에서 웹훅 이벤트를 처리하기 위한 샘플 코드입니다.
//
// 1. 이 코드를 새로운 파일 `server.go`에 붙여넣으세요.
//
// 2. http://localhost:8000에서 서버를 실행하세요
//    go run server.go

package main

import (
  "crypto/hmac"
  "crypto/sha256"
  "encoding/hex"
  "encoding/json"
  "fmt"
  "io/ioutil"
  "net/http"
)

func webhookHandler(w http.ResponseWriter, r *http.Request) {
  secretKey := "<YOUR_S2S_KEY>"  // 실제 웹훅 비밀 키로 교체하세요

  rawPayload, _ := ioutil.ReadAll(r.Body)
  payload := string(rawPayload)
  timestamp := r.Header.Get("X-Aghanim-Signature-Timestamp")
  receivedSignature := r.Header.Get("X-Aghanim-Signature")

  if !verifySignature(secretKey, payload, timestamp, receivedSignature) {
    http.Error(w, "Invalid signature", http.StatusForbidden)
    return
  }

  var data map[string]interface{}
  if err := json.Unmarshal(rawPayload, &data); err != nil {
    http.Error(w, "Invalid payload", http.StatusBadRequest)
    return
  }

  eventType := data["event_type"].(string)
  eventData := data["event_data"].(map[string]interface{})

  if eventType == "item.add" {
    addItem(eventData)
    w.WriteHeader(http.StatusOK)
    json.NewEncoder(w).Encode(map[string]string{"status": "ok"})
    return
  }

  if eventType == "item.remove" {
    removeItem(eventData)
    w.WriteHeader(http.StatusOK)
    json.NewEncoder(w).Encode(map[string]string{"status": "ok"})
    return
  }

  http.Error(w, "Unknown event type", http.StatusBadRequest)
}

func verifySignature(secretKey, payload, timestamp, receivedSignature string) bool {
  signatureData := fmt.Sprintf("%s.%s", timestamp, payload)
  mac := hmac.New(sha256.New, []byte(secretKey))
  mac.Write([]byte(signatureData))
  computedSignature := hex.EncodeToString(mac.Sum(nil))
  return hmac.Equal([]byte(computedSignature), []byte(receivedSignature))
}

func addItem(eventData map[string]interface{}) {
  // 이벤트를 처리하고 항목을 추가하기 위한 플레이스홀더 로직입니다.
  // 실제 애플리케이션에서는 이 함수가 데이터베이스나 인벤토리 시스템과 상호작용합니다.
  playerID := eventData["player_id"].(string)
  items := eventData["items"].([]interface{})
  for _, item := range items {
    itemMap := item.(map[string]interface{})
    sku := itemMap["sku"].(string)
    fmt.Printf("Item %s has been credited to player's %s account.\\n", sku, playerID)
  }
}

func removeItem(eventData map[string]interface{}) {
  // 이벤트 처리 및 항목 제거를 위한 플레이스홀더 로직입니다.
  // 실제 애플리케이션에서는 이 함수가 데이터베이스나 인벤토리 시스템과 상호작용합니다.
  playerID := eventData["player_id"].(string)
  items := eventData["items"].([]interface{})
  for _, item := range items {
    itemMap := item.(map[string]interface{})
    sku := itemMap["sku"].(string)
    fmt.Printf("Item %s has been removed from player's %s account.\\n", sku, playerID)
  }
}

func main() {
  http.HandleFunc("/webhook", webhookHandler)
  fmt.Println("Server is running on http://localhost:8000")
  http.ListenAndServe(":8000", nil)
}
Add webhook endpoint to Aghanim
When the webhook handling is ready, add the endpoint to the account so the Aghanim could start sending the events.
- Dashboard
- API
- Go to Integration → Webhooks.
- Click Add webhook. The site will open the Create webhook window.
- Copy and paste the URL
https://<YOUR_DOMAIN>/webhook. - Click Select events. The site will open the Select events to send window.
- Expand the Main class and select the Item add, Item remove checkboxes.
- Click Apply.
- Click Add. The site will redirect you to the webhook page.
- Click Back.
- cURL
- Python
- Ruby
- Node.js
- Go
curl -X POST https://api.aghanim.com/s2s/v1/webhooks \
  -H 'Content-Type: application/json' \
  -H 'Authorization: Bearer <YOUR_S2S_KEY>' \
  -d '{
    "events": [
      "item.add",
      "item.remove"
    ],
    "url": "https://<YOUR_DOMAIN>/webhook",
    "description": "The endpoint for all webhooks",
    "method": "POST",
    "enabled": true,
    "enabled_logs": true,
    "player_context_enabled": true
  }'
import requests

def create_webhook():
    payload = {
        "events": ["item.add", "item.remove"],
        "url": "https://<YOUR_DOMAIN>/webhook",
        "description": "The endpoint for all webhooks",
        "method": "POST",
        "enabled": True,
        "enabled_logs": True,
        "player_context_enabled": True
    }

    headers = {"Authorization": "Bearer <YOUR_S2S_KEY>", "Content-Type": "application/json"}
    resp = requests.post("https://api.aghanim.com/s2s/v1/webhooks", json=payload, headers=headers)
    return resp.json()
require 'net/http'
require 'json'
require 'uri'

def create_webhook
  uri = URI("https://api.aghanim.com/s2s/v1/webhooks")
  req = Net::HTTP::Post.new(uri, 'Content-Type' => 'application/json', 'Authorization' => 'Bearer <YOUR_S2S_KEY>')
  req.body = {
    events: ["item.add", "item.remove"],
    url: "https://<YOUR_DOMAIN>/webhook",
    description: "The endpoint for all webhooks",
    method: "POST",
    enabled: true,
    enabled_logs: true,
    player_context_enabled: true
  }.to_json

  res = Net::HTTP.start(uri.hostname, uri.port, use_ssl: true) { |http| http.request(req) }
  JSON.parse(res.body)
end
const axios = require('axios');

async function createWebhook() {
  const payload = {
    events: ["item.add", "item.remove"],
    url: "https://<YOUR_DOMAIN>/webhook",
    description: "The endpoint for all webhooks",
    method: "POST",
    enabled: true,
    enabled_logs: true,
    player_context_enabled: true
  };

  const res = await axios.post('https://api.aghanim.com/s2s/v1/webhooks', payload, {
    headers: { 'Authorization': 'Bearer <YOUR_S2S_KEY>', 'Content-Type': 'application/json' }
  });
  return res.data;
}
package main

import (
	"bytes"
	"encoding/json"
	"net/http"
)

func createWebhook() map[string]interface{} {
	payload := map[string]interface{}{
		"events":                 []string{"item.add", "item.remove"},
		"url":                    "https://<YOUR_DOMAIN>/webhook",
		"description":            "The endpoint for all webhooks",
		"method":                 "POST",
		"enabled":                true,
		"enabled_logs":           true,
		"player_context_enabled": true,
	}
	data, _ := json.Marshal(payload)

	req, _ := http.NewRequest("POST", "https://api.aghanim.com/s2s/v1/webhooks", bytes.NewBuffer(data))
	req.Header.Set("Authorization", "Bearer <YOUR_S2S_KEY>")
	req.Header.Set("Content-Type", "application/json")

	client := &http.Client{}
	resp, _ := client.Do(req)
	defer resp.Body.Close()

	var webhook map[string]interface{}
	json.NewDecoder(resp.Body).Decode(&webhook)
	return webhook
}
Test your integration
After you have handled the webhooks, check that the purchased items are in your inventory. That’s all.
Next steps
- See Currency codes and minor units to learn how the Aghanim represents monetary amounts.
- See Payment Webhook to learn about the payment progress when the player visits the payment form.
FAQ
The plugin targets Unreal Engine 5.8 and can stay enabled for Android, iOS, Windows, macOS, and Linux — it compiles and packages everywhere. Checkout availability differs per platform and launch mode:
| Platform | Native | In-app browser | Default browser | WebView |
|---|---|---|---|---|
| Android | ✅ | ✅ | ✅ | ✅ |
| iOS | — | ✅ | ✅ | ✅ |
| Windows / macOS / Linux | — | — | ✅ | — |
Query IsCheckoutLaunchModeAvailable at runtime instead of hardcoding the table, so shared game code keeps working as support evolves.
On Windows, macOS, Linux, and in the editor there is no native Aghanim SDK — the plugin talks to the Aghanim REST API directly. Orders and catalog operations (get order, unconsumed orders, consume, items, price points) work the same as on mobile, but the only checkout launch mode is Default browser: the plugin creates the order and opens the checkout URL in the OS default browser. The Native, In-app browser, and WebView modes report unavailable through IsCheckoutLaunchModeAvailable. To test those modes, run on a physical Android or iOS device.
A successful launch does not mean the player paid: Aghanim Start Checkout completes when the payment form opens, and the payment happens later, possibly outside the app — the player may even finish it on another device. The OnCheckoutClosed event is only a best-effort hint (it never fires for the external browser and can be missed if the app is killed mid-checkout).
Always verify fulfillment through orders: call Aghanim Get Unconsumed Orders on startup, on focus regain, and after a checkout closes; then call Aghanim Consume Order for a returned order and grant its items from that node's On Success pin. An Order ID that stops appearing in that list has been consumed; one that never appears has not been paid for yet. If you run a game server, use the item.add webhook instead.
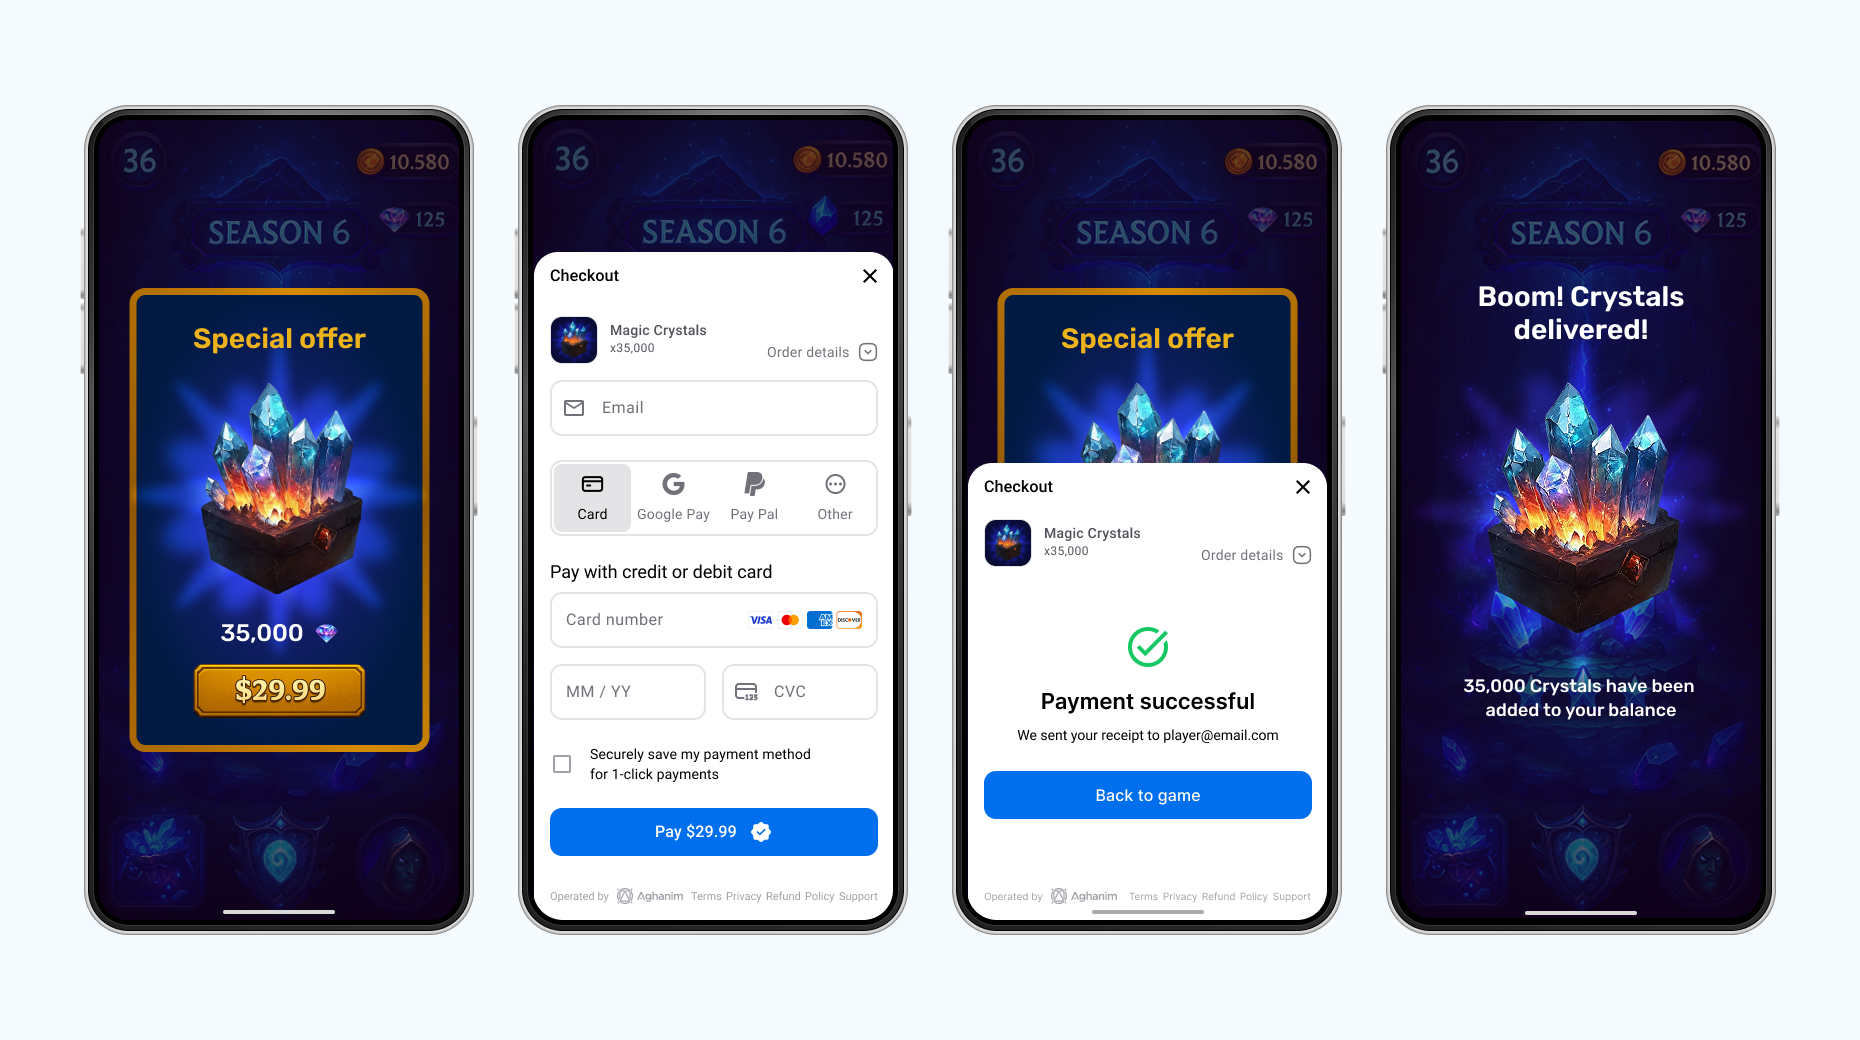
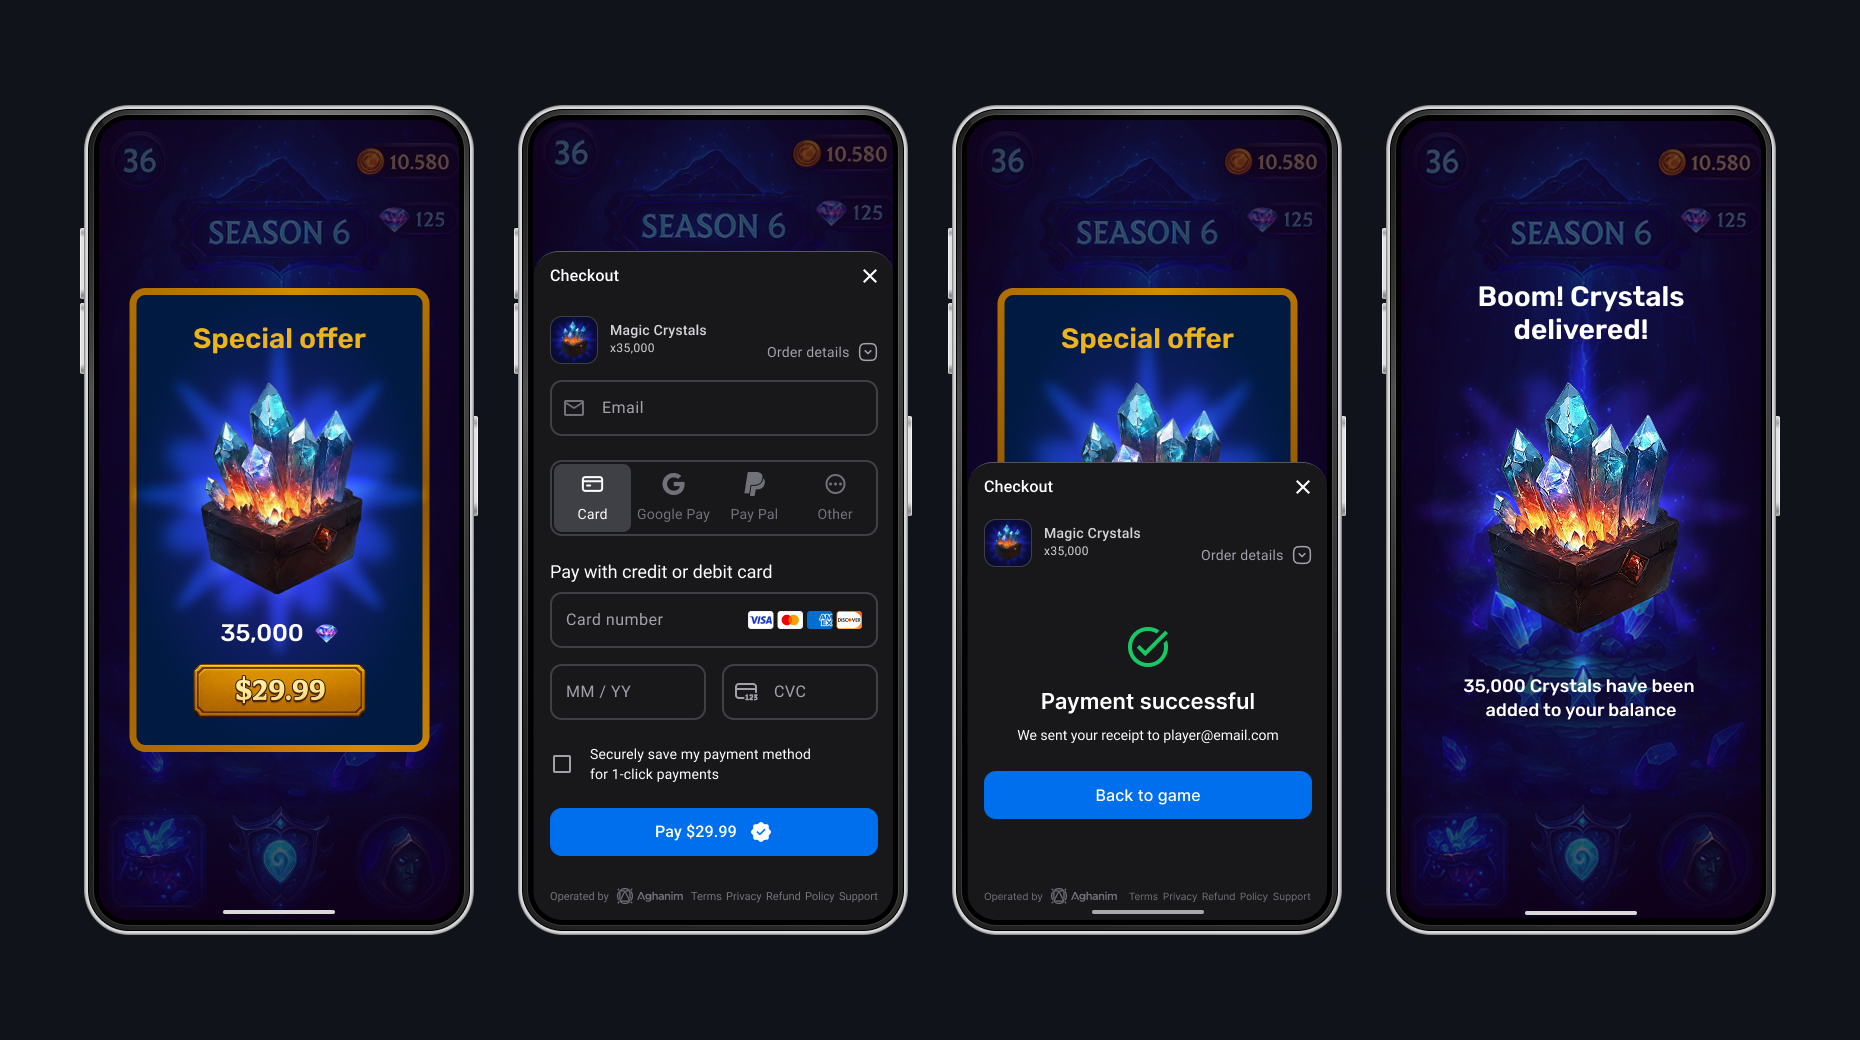
Android. Native UI
The Checkout integration mode that opens the platform-native checkout UI over your game. Use when you want the most integrated experience. Available on Android only — guard with IsCheckoutLaunchModeAvailable and fall back to another mode elsewhere.
Register with Aghanim and link your game
First, register for an Aghanim account. At the end of registration, add the link to your mobile game. It should be published in Apple App Store or Google Play Store.
Set up environment
If you want to make real payments, you are all set as the live mode is used as default. Otherwise, use a sandbox, an isolated test environment, to simulate the Aghanim events to test payments without real money movement. To turn on the sandbox mode, set the Sandbox toggle to the active position.
Sandbox supports card payments only. Alternative methods (PayPal, wallets, local payment methods) appear only in live. See Test payments for the test cards.
While integrating, you will need an SDK key to authenticate requests to the Aghanim. Keep in mind that the sandbox and live modes have different keys. Find the SDK key in Integration → API keys.
Configure game client-side
Configure your game client to work with the Checkout by setting up the SDK and implementing the necessary code to process its methods.
Install SDK
The Unreal Engine SDK is distributed as a source plugin: the release contains source that compiles with your engine, so there are no prebuilt binaries — instead each release is pinned to the engine it was tested on (currently Unreal Engine 5.8). Your project must be able to compile C++ — a C++ project, or a Blueprint project with a working compiler toolchain.
-
Download a release from Aghanim's public Artifact Registry and unzip it into your project's
Plugins/folder so that the descriptor lives atYourProject/Plugins/AghanimSDK/AghanimSDK.uplugin. The registry is public read, so this is a plain anonymous download — no credentials. ReplaceVERSION/ENGINEwith the release you want, andYourProjectwith the path to your Unreal project.- PowerShell (Windows)
- Bash (macOS/Linux)
$Version = "0.2.0"       # the plugin release to install
$Engine  = "5.8"         # the Unreal Engine version the release is pinned to
$Zip     = "AghanimSDK-v$Version-UE$Engine.zip"
$Base    = "https://artifactregistry.googleapis.com/v1/projects/ag-registry/locations/us-central1/repositories/unreal-engine-sdk/files/unreal-engine-sdk:v${Version}:${Zip}"

# Download the plugin zip and its checksum (public read — no credentials).
Invoke-WebRequest -Uri "${Base}:download?alt=media" -OutFile $Zip
Invoke-WebRequest -Uri "${Base}.sha256:download?alt=media" -OutFile "$Zip.sha256"

# Verify the SHA-256, then abort on mismatch.
$Expected = (Get-Content "$Zip.sha256").Split()[0]
$Actual   = (Get-FileHash $Zip -Algorithm SHA256).Hash.ToLower()
if ($Actual -ne $Expected) { throw "Checksum mismatch — aborting." }

# Unzip into your project's Plugins/ folder (replace YourProject with your
# project's path) — lands at YourProject\Plugins\AghanimSDK\AghanimSDK.uplugin.
Expand-Archive -Path $Zip -DestinationPath YourProject\Plugins\ -ForceVERSION="0.2.0" # the plugin release to install
ENGINE="5.8" # the Unreal Engine version the release is pinned to
ZIP="AghanimSDK-v${VERSION}-UE${ENGINE}.zip"
BASE="https://artifactregistry.googleapis.com/v1/projects/ag-registry/locations/us-central1/repositories/unreal-engine-sdk/files/unreal-engine-sdk:v${VERSION}:${ZIP}"
# Download the plugin zip and its checksum (public read — no credentials).
curl -fSL --retry 3 -o "${ZIP}" "${BASE}:download?alt=media"
curl -fSL --retry 3 -o "${ZIP}.sha256" "${BASE}.sha256:download?alt=media"
# Verify the SHA-256, then abort on mismatch.
shasum -a 256 -c "${ZIP}.sha256"
# Unzip into your project's Plugins/ folder (replace YourProject with your
# project's path) — lands at YourProject/Plugins/AghanimSDK/AghanimSDK.uplugin.
unzip -q "${ZIP}" -d YourProject/Plugins/Use a project plugin underPlugins/The plugin must live under your project's
Plugins/directory. A plugin referenced out-of-tree through the.uproject'sAdditionalPluginDirectoriesis not packaged into the iOS app and fails to load on device. -
Open your project. Unreal enables a plugin placed under
Plugins/automatically; if it is disabled, enable Aghanim SDK under Edit → Plugins (category SDK) and restart the editor. -
Let the editor compile the plugin (or build from your IDE). No further dependency setup is required on any platform:
- Android — the native Aghanim SDK is resolved automatically from Aghanim's public Maven registry when the APK/AAB is packaged, so the packaging machine needs network access to
https://us-central1-maven.pkg.dev/ag-registry/android-sdk. No manual Gradle edits are needed. - iOS — the native SDK ships inside the plugin as vendored frameworks; they are linked and embedded automatically.
- Windows / macOS / Linux (and the editor) — the plugin talks to the Aghanim REST API directly, so the project always compiles and runs in the editor.
- Android — the native Aghanim SDK is resolved automatically from Aghanim's public Maven registry when the APK/AAB is packaged, so the packaging machine needs network access to
Configure SDK API key
The API key is a project setting, read automatically when the game starts.
- Copy the SDK key from Integration → API keys.
- In the Unreal Editor, open Project Settings → Plugins → Aghanim SDK.
- Paste the key into the API Key field.
The value is persisted to your project's DefaultGame.ini, so it travels with the project and applies to packaged builds:
[/Script/AghanimSDK.AghanimSettings]
ApiKey=<YOUR_SDK_KEY>
Initialize SDK
You do not call an initializer manually. The plugin ships a game-instance subsystem, UAghanimSDKSubsystem, that owns the SDK lifetime: when the game instance starts, it reads the API Key from the project settings and, if a key is set, initializes the SDK once for the lifetime of the process.
Get the subsystem wherever you need the SDK:
- C++
// Anywhere you have a game instance (e.g. inside an AActor or UUserWidget):
UAghanimSDKSubsystem* SDK = GetGameInstance()->GetSubsystem<UAghanimSDKSubsystem>();
In Blueprints: use the Get Game Instance Subsystem node with the AghanimSDKSubsystem class, then call the Aghanim SDK nodes on the result.
If you obtain the key at runtime instead (for example, after the player signs in), leave the API Key project setting empty and initialize explicitly once:
- C++
// Only needed when the API Key project setting is left empty
// and you obtain the key at runtime instead:
SDK->InitializeWithApiKey(TEXT("<YOUR_SDK_KEY>"));
Blueprint node: Initialize With Api Key (Aghanim SDK category).
The SDK writes its own diagnostics through Unreal's LogAghanimSDK log category.
Set the verbosity in Project Settings → Plugins → Aghanim SDK → Log Level. Supported levels, each enabling that severity and everything above it: Debug, Info, Warning, Error, and None (the default, which disables SDK logging entirely). The value is applied when the SDK is initialized and persisted next to the API key:
[/Script/AghanimSDK.AghanimSettings]
ApiKey=<YOUR_SDK_KEY>
LogLevel=Info
Use Debug during development to see SDK lifecycle and network activity; switch back to None (or Error) for release builds.
Configure player ID
Since a game instance runs for one player at a time, the SDK allows to set the player ID once to use it in all following method calls. Orders are created on behalf of a player, so set the ID as soon as your game client knows who the player is — before any checkout.
Setting and clearing the ID are asynchronous, so the SDK only has the player once On Success fires. Chain the rest of your startup off that pin rather than off the call.
- C++
// As soon as your game client knows who the player is. Setting the ID is asynchronous,
// so wait for On Success before any checkout or order call.
UAghanimSetPlayerIdAction* SetAction =
    UAghanimSetPlayerIdAction::AghanimSetPlayerId(this, TEXT("player-123"));

SetAction->OnSuccess.AddDynamic(this, &UMyStore::HandlePlayerIdSet); // const FAghanimError& Error
SetAction->OnFailure.AddDynamic(this, &UMyStore::HandleError);       // const FAghanimError& Error
SetAction->Activate();

// Later, e.g. when the player signs out:
UAghanimClearPlayerIdAction* ClearAction =
    UAghanimClearPlayerIdAction::AghanimClearPlayerId(this);

ClearAction->OnSuccess.AddDynamic(this, &UMyStore::HandlePlayerIdCleared);
ClearAction->OnFailure.AddDynamic(this, &UMyStore::HandleError);
ClearAction->Activate();
Blueprint nodes: Aghanim Set Player Id and Aghanim Clear Player Id (Aghanim SDK → Player category; async, with On Success and On Failure pins that each carry an Error).
Calling operations that need a player (Aghanim Get Unconsumed Orders, Aghanim Consume Order, or a checkout) before Aghanim Set Player Id has succeeded fails with the PlayerIdNotSet error type. Set the player ID immediately after authentication and wait for On Success.
Create item
The integration needs the items to be added to the Dashboard. When creating items, each should have its SKU, a unique identifier for the item within your game backend. You can add their prices, currency, sale configuration, and more.
To add an item to the Dashboard:
- Go to SKU Management → Items.
- Click Add Item. The site will open the Add Item page.
- Enter the item name New item.
- Enter the item SKU items.new.ba68a028-2d51-46b4-a854-68fc16af328a.
- In the Price block:
- Select the Fiat price type for a real money item.
- Enter the price 1.99.
- Click Add item.
For integration purposes, we have shortened an item setup. Before going live, use every suitable feature while adding items to the Dashboard.
Create Checkout item
Create an FAghanimCheckoutItem value that references an existing dashboard SKU. The SKU is the only required field; the others let you override the dashboard configuration on a per-checkout basis.
- C++
FAghanimCheckoutItem Item;
Item.Sku      = TEXT("items.new.ba68a028-2d51-46b4-a854-68fc16af328a"); // required

// Optional display overrides:
// Item.Name, Item.Description, Item.ImageUrl
In Blueprints, FAghanimCheckoutItem is a Blueprint struct: fill it with a Make AghanimCheckoutItem node.
Create Checkout params
When all data variables are ready, create another one that represents Checkout params. Checkout params are the programmatic representation of what the player sees when they are on the payment form. Checkout params are associated with a player and items, they are crucial for the Checkout to work. Pass the BackToGameUrl you defined earlier so the Checkout can route the player back to your game after the payment.
Locale is the locale the Checkout is localized in. It is an EAghanimLocale, so the editor and Blueprint offer the supported values as a dropdown, and it defaults to En. See Checkout → Locales for the full list.
- C++
FAghanimCheckoutParams Params;
Params.Items.Add(Item); // required: at least one item

// All optional:
Params.Locale        = EAghanimLocale::En;
Params.BackToGameUrl = TEXT("yourgame://checkout/return");
In Blueprints, fill the params with a Make AghanimCheckoutParams node. See the field-by-field description in the method reference.
You can attach custom metadata to the Checkout for item tracking purposes. You can access it through webhooks and in API responses from the Aghanim. Metadata has a structure of "key-value" pairs.
- C++
Params.Metadata.Add(TEXT("campaign"), TEXT("summer_sale"));
Params.Metadata.Add(TEXT("source"),   TEXT("store_screen"));
You can choose the behavior of redirecting the player after they have completed the payment successfully with EAghanimRedirectMode. The difference in the provided by the SDK modes is a delay before redirecting or absence of redirecting.
- Immediate
- Delayed
- No redirect
When the player has completed the payment, the SDK redirects them immediately to the deep link from BackToGameUrl.
- C++
Params.RedirectSettings.Mode = EAghanimRedirectMode::Immediate;
When the player has completed the payment, the SDK shows the screen for the successful payment for the given number of seconds and then redirects the player to the deep link from BackToGameUrl.
- C++
Params.RedirectSettings.Mode         = EAghanimRedirectMode::Delayed;
Params.RedirectSettings.DelaySeconds = 5;
When the player has completed the payment, they stay on the screen for the successful payment. To exit it, they manually close it or navigate away. After, you should redirect them to the deep link from BackToGameUrl by yourself.
- C++
// The default: the player stays on the success screen and the
// redirectSettings block is omitted from the created order.
Params.RedirectSettings.Mode = EAghanimRedirectMode::NoRedirect;
You can set the appearance mode for the Checkout UI with EAghanimUiMode. The SDK supports automatic detection based on the system setting, or you can force a specific mode.
- Auto
- Dark
- Light
The SDK automatically detects and applies the appropriate appearance mode based on the system setting.
- C++
// The default: follow the platform/device appearance.
Params.UiSettings.Mode = EAghanimUiMode::Auto;
The SDK forces dark mode appearance for the Checkout UI.
- C++
Params.UiSettings.Mode = EAghanimUiMode::Dark;
The SDK forces light mode appearance for the Checkout UI.
- C++
Params.UiSettings.Mode = EAghanimUiMode::Light;
Launch Checkout
Add a checkout button to your game client that launches the payment form. The SDK creates an order from the provided checkout params and opens the platform-native checkout UI over your game. On success, you receive the Order ID to track the order. On failure, you receive an FAghanimError with debug information for troubleshooting.
The Native mode is available on Android only. Guard the call with IsCheckoutLaunchModeAvailable and fall back to another mode (or hide the option) elsewhere.
- C++
const EAghanimCheckoutLaunchMode Mode = EAghanimCheckoutLaunchMode::Native;
if (SDK->IsCheckoutLaunchModeAvailable(Mode)) // Android only
{
    UAghanimStartCheckoutAction* Action =
        UAghanimStartCheckoutAction::AghanimStartCheckout(this, Params, Mode);

    // Handlers take (FString OrderId, const FAghanimError& Error): the Order ID is set
    // only on On Launched, the error only on On Failed.
    Action->OnLaunched.AddDynamic(this, &UMyStore::HandleCheckoutLaunched);
    Action->OnFailed.AddDynamic(this, &UMyStore::HandleCheckoutFailed);
    Action->Activate();
}
Blueprint node: Aghanim Start Checkout (async; pins On Launched and On Failed, each carrying both Order Id and Error), guarded by Is Checkout Launch Mode Available. The ID is filled only on On Launched, the error only on On Failed.
Check unconsumed Orders
After the Checkout has launched and you have an Order ID, the player can step away from the payment form, complete the payment, or abandon it entirely. The launch call only confirms that the Order was created and the form opened — it does not tell you whether the player paid. To know which Orders the player has actually paid for and should be granted to them, ask the SDK for the list of unconsumed paid Orders.
Good moments to check are on startup, when your game regains focus after the player returns from the checkout, and when the subsystem's OnCheckoutClosed event fires. OnCheckoutClosed is best-effort: it only fires for on-screen checkouts (WebView / in-app browser), never for the external browser, and can be missed if the app is killed mid-checkout — treat it as a hint, not a guarantee.
- C++
UAghanimGetUnconsumedOrdersAction* Action =
    UAghanimGetUnconsumedOrdersAction::AghanimGetUnconsumedOrders(this);

// Handlers take (const TArray<FString>& OrderIds, const FAghanimError& Error).
Action->OnSuccess.AddDynamic(this, &UMyStore::HandleUnconsumedOrders);
Action->OnFailure.AddDynamic(this, &UMyStore::HandleUnconsumedOrdersFailed);
Action->Activate();

void UMyStore::HandleUnconsumedOrders(const TArray<FString>& OrderIds, const FAghanimError& Error)
{
    for (const FString& OrderId : OrderIds)
    {
        // Consume the order, then grant its items on the success pin.
    }
}
Blueprint node: Aghanim Get Unconsumed Orders (async; pins On Success and On Failure, each carrying both Order Ids and Error). The IDs are filled only on success, the error only on failure.
Consume paid Orders
Consume the Order the player has paid for, then grant its items once the consume succeeds. Consuming the same Order twice fails, so the grant runs only once. A consumed Order is not returned by the unconsumed-orders query again.
- C++
UAghanimConsumeOrderAction* Action =
    UAghanimConsumeOrderAction::AghanimConsumeOrder(this, OrderId);

// Handlers take (const FAghanimError& Error); the error is empty on success.
Action->OnSuccess.AddDynamic(this, &UMyStore::HandleOrderConsumed);
Action->OnFailure.AddDynamic(this, &UMyStore::HandleError);
Action->Activate();
Blueprint node: Aghanim Consume Order (async; pins On Success and On Failure, each carrying an Error that is empty on success).
The end-to-end loop is: Aghanim Get Unconsumed Orders → Aghanim Consume Order for a returned ID → the grant hangs off that node's On Success pin.
Unconsumed-order polling is meant for games without a dedicated server. If you have a game server, prefer the item.add webhook so your server controls granting.
Full implementation code
A complete client-side flow in one place: a game-instance subsystem that sets the player ID, launches a checkout with any available launch mode, and reconciles paid orders once the player ID is set and whenever a checkout closes.
- C++
// MyStoreSubsystem.h
#pragma once

#include "CoreMinimal.h"
#include "Subsystems/GameInstanceSubsystem.h"
#include "AghanimSDKSubsystem.h"
#include "AghanimAsyncActions.h"
#include "MyStoreSubsystem.generated.h"

UCLASS()
class UMyStoreSubsystem : public UGameInstanceSubsystem
{
    GENERATED_BODY()

public:
    virtual void Initialize(FSubsystemCollectionBase& Collection) override;

    /** Call once your game client knows who the player is. */
    UFUNCTION(BlueprintCallable, Category = "My Store")
    void ConfigurePlayer(const FString& PlayerId);

    /** Call from your store UI. Pick any launch mode that is available on the platform. */
    UFUNCTION(BlueprintCallable, Category = "My Store")
    void BuyItem(const FString& Sku, EAghanimCheckoutLaunchMode LaunchMode);

    /** Call once the player ID is set, and whenever the game regains focus. */
    UFUNCTION(BlueprintCallable, Category = "My Store")
    void ReconcilePaidOrders();

private:
    UFUNCTION() void HandlePlayerIdSet(const FAghanimError& Error);
    UFUNCTION() void HandleCheckoutLaunched(FString OrderId, const FAghanimError& Error);
    UFUNCTION() void HandleCheckoutFailed(FString OrderId, const FAghanimError& Error);
    UFUNCTION() void HandleCheckoutClosed(FString OrderId);
    UFUNCTION() void HandleUnconsumedOrders(const TArray<FString>& OrderIds, const FAghanimError& Error);
    UFUNCTION() void HandleUnconsumedOrdersFailed(const TArray<FString>& OrderIds, const FAghanimError& Error);
    UFUNCTION() void HandleError(const FAghanimError& Error);

    UAghanimSDKSubsystem* GetSdk() const;
};

// MyStoreSubsystem.cpp
void UMyStoreSubsystem::Initialize(FSubsystemCollectionBase& Collection)
{
    Super::Initialize(Collection);

    // Best-effort hint that an on-screen checkout closed (iOS WebView / in-app browser).
    GetSdk()->OnCheckoutClosed.AddDynamic(this, &UMyStoreSubsystem::HandleCheckoutClosed);
}

void UMyStoreSubsystem::ConfigurePlayer(const FString& PlayerId)
{
    // Orders are created on behalf of a player, and setting the ID is asynchronous.
    // Everything that needs a player waits for On Success.
    UAghanimSetPlayerIdAction* Action =
        UAghanimSetPlayerIdAction::AghanimSetPlayerId(this, PlayerId);
    Action->OnSuccess.AddDynamic(this, &UMyStoreSubsystem::HandlePlayerIdSet);
    Action->OnFailure.AddDynamic(this, &UMyStoreSubsystem::HandleError);
    Action->Activate();
}

void UMyStoreSubsystem::HandlePlayerIdSet(const FAghanimError& Error)
{
    ReconcilePaidOrders();
}

void UMyStoreSubsystem::BuyItem(const FString& Sku, EAghanimCheckoutLaunchMode LaunchMode)
{
    if (!GetSdk()->IsCheckoutLaunchModeAvailable(LaunchMode))
    {
        return; // Fall back to another mode or hide the button.
    }

    FAghanimCheckoutItem Item;
    Item.Sku = Sku;

    FAghanimCheckoutParams Params;
    Params.Items.Add(Item);
    Params.BackToGameUrl = TEXT("yourgame://checkout/return");

    UAghanimStartCheckoutAction* Action =
        UAghanimStartCheckoutAction::AghanimStartCheckout(this, Params, LaunchMode);
    Action->OnLaunched.AddDynamic(this, &UMyStoreSubsystem::HandleCheckoutLaunched);
    Action->OnFailed.AddDynamic(this, &UMyStoreSubsystem::HandleCheckoutFailed);
    Action->Activate();
}

void UMyStoreSubsystem::HandleCheckoutLaunched(FString OrderId, const FAghanimError& Error)
{
    // The checkout opened; the payment happens later, possibly outside the app.
    // Keep the OrderId if you want to look the order up with Aghanim Get Order.
}

void UMyStoreSubsystem::HandleCheckoutFailed(FString OrderId, const FAghanimError& Error)
{
    UE_LOG(LogTemp, Warning, TEXT("Checkout failed (%s): %s"), *Error.Type, *Error.DebugMessage);
}

void UMyStoreSubsystem::HandleCheckoutClosed(FString OrderId)
{
    ReconcilePaidOrders();
}

void UMyStoreSubsystem::ReconcilePaidOrders()
{
    UAghanimGetUnconsumedOrdersAction* Action =
        UAghanimGetUnconsumedOrdersAction::AghanimGetUnconsumedOrders(this);
    Action->OnSuccess.AddDynamic(this, &UMyStoreSubsystem::HandleUnconsumedOrders);
    Action->OnFailure.AddDynamic(this, &UMyStoreSubsystem::HandleUnconsumedOrdersFailed);
    Action->Activate();
}

void UMyStoreSubsystem::HandleUnconsumedOrders(const TArray<FString>& OrderIds, const FAghanimError& Error)
{
    for (const FString& OrderId : OrderIds)
    {
        // 1. Grant the order's items in your game logic.
        // 2. Acknowledge the grant so the order is not returned again.
        UAghanimConsumeOrderAction* Action =
            UAghanimConsumeOrderAction::AghanimConsumeOrder(this, OrderId);
        Action->OnFailure.AddDynamic(this, &UMyStoreSubsystem::HandleError);
        Action->Activate();
    }
}

void UMyStoreSubsystem::HandleUnconsumedOrdersFailed(const TArray<FString>& OrderIds, const FAghanimError& Error)
{
    HandleError(Error);
}

void UMyStoreSubsystem::HandleError(const FAghanimError& Error)
{
    UE_LOG(LogTemp, Warning, TEXT("Aghanim SDK error (%s): %s"), *Error.Type, *Error.DebugMessage);
}

UAghanimSDKSubsystem* UMyStoreSubsystem::GetSdk() const
{
    return GetGameInstance()->GetSubsystem<UAghanimSDKSubsystem>();
}
The same flow in Blueprints: Get Game Instance Subsystem (AghanimSDKSubsystem) → Aghanim Set Player Id → from its On Success pin, build the params with Make AghanimCheckoutItem / Make AghanimCheckoutParams → Aghanim Start Checkout; bind the subsystem's On Checkout Closed event and, from it and from On Success, run Aghanim Get Unconsumed Orders → grant the items → Aghanim Consume Order.
Make payment
Make a payment. If you have set the sandbox mode, use the test card below. In the sandbox, you can make payments only with the test cards — alternative methods like PayPal, wallets, and local payment methods appear only in the live environment. The test cards accept any digits as CVV and any future date as expiry date. Don’t forget to fill in an email address to check the receipt is sent and any postal code as a billing address.
Successful payments
After you complete the payment, you will receive a receipt sent to the specified email address and a transaction record in Aghanim Dashboard → Transactions.
| Card Brand | Card Number | CVV | Expiry date | Country |
|---|---|---|---|---|
| VISA (credit) | 4242 4242 4242 4242 | Any 3 digits | Any future date | GB |
Unsuccessful payments
Make an unsuccessful payment just in case you are curious. You will see the transaction in Aghanim Dashboard → Transactions as well.
| Number | CVV | Expiry date | Response code | Description |
|---|---|---|---|---|
4832 2850 6160 9015 | Any 3 digits | Any future date | 16 | Payment declined |
For the live mode, you can find all supported payment methods in Company settings → Payment methods. Turn on or off those you see suitable. Some payment methods are available globally by default. You can’t disable Credit cards, Apple Pay, Google Pay, and PayPal.
In Checkout, the Aghanim evaluates the currency and any restrictions, then dynamically presents only the payment methods available to the player based on evaluation.
When you use the live mode, the payment form shows to the player a setting to save their payment method so they can make a one-click payment in the future.
Handle post-payment events on game server-side
To complete the Checkout, handle items’ granting and chargebacks on your game backend. To do so, implement a webhook system that accepts the item.add and item.remove webhooks. See the code example with the implementation.
Comply with the Aghanim requirements for these webhooks:
- Use HTTPS schema for the single POST webhook endpoint.
- Check that webhooks are generated and signed by the Aghanim.
- Handle the
idempotency_keyfield in the webhook payload to prevent processing duplicate webhooks. - Respond with the HTTP status codes:
2xxfor successfully processed webhooks.4xxand5xxfor errors.
Grant items to player
The Aghanim sends the item.add webhook to let you know about the purchased items and ask for your permission to grant them to the player.
When the Aghanim has your 2xx answer, it can complete the checkout logic and redirect the player to a deep link if provided.
Support refunds and chargebacks
The Aghanim sends the item.remove webhook when a bank or payment system reverses the transaction, or you have requested refund in Aghanim Dashboard → Transactions. Partial refunds are not supported.
The suggested implementation handles the webhooks mentioned before:
item.addfor granting items. You need it for integration.item.removefor refunds and chargebacks. You might need it for integration.
- Python
- Ruby
- Node.js
- Go
# 통합에서 웹훅 이벤트를 처리하기 위해 이 샘플 코드를 사용하세요.
#
# 1. 이 코드를 `server.py`라는 새 파일에 붙여 넣으세요.
#
# 2. 의존성 설치:
#    python -m pip install fastapi[all]
#
# 3. http://localhost:8000에서 서버를 실행합니다
#    python server.py

import fastapi, hashlib, hmac, json, typing
from fastapi.responses import JSONResponse

app = fastapi.FastAPI()

@app.post("/webhook")
async def webhook(request: fastapi.Request) -> dict[str, typing.Any]:
    secret_key = "<YOUR_S2S_KEY>"  # 실제 웹훅 비밀 키로 교체하세요

    raw_payload = await request.body()
    payload = raw_payload.decode()
    timestamp = request.headers["x-aghanim-signature-timestamp"]
    received_signature = request.headers["x-aghanim-signature"]

    if not verify_signature(secret_key, payload, timestamp, received_signature):
        raise fastapi.HTTPException(status_code=403, detail="Invalid signature")

    data = json.loads(payload)
    event_type = data["event_type"]
    event_data = data["event_data"]

    if event_type == "item.add":
        add_item(event_data)
        return {"status": "ok"}

    if event_type == "item.remove":
        remove_item(event_data)
        return {"status": "ok"}

    raise fastapi.HTTPException(status_code=400, detail="Unknown event type")

def verify_signature(secret_key: str, payload: str, timestamp: str, received_signature: str) -> bool:
    signature_data = f"{timestamp}.{payload}"
    computed_hash = hmac.new(secret_key.encode(), signature_data.encode(), hashlib.sha256)
    computed_signature = computed_hash.hexdigest()
    return hmac.compare_digest(computed_signature, received_signature)

def add_item(event_data: dict[str, typing.Any]) -> None:
    # 이벤트를 처리하고 항목을 추가하기 위한 플레이스홀더 로직입니다.
    # 실제 애플리케이션에서는 이 함수가 데이터베이스나 인벤토리 시스템과 상호작용합니다.
    player_id = event_data["player_id"]
    for item in event_data["items"]:
      sku = item["sku"]
      print(f"Item {sku} has been credited to player's {player_id} account.")

def remove_item(event_data: dict[str, typing.Any]) -> None:
    # 이벤트를 처리하고 항목을 제거하기 위한 플레이스홀더 로직입니다.
    # 실제 애플리케이션에서는 이 함수가 데이터베이스나 인벤토리 시스템과 상호작용합니다.
    player_id = event_data["player_id"]
    for item in event_data["items"]:
      sku = item["sku"]
      print(f"Item {sku} has been removed from player's {player_id} account.")

if __name__ == "__main__":
    import uvicorn
    uvicorn.run(app, host="0.0.0.0", port=8000)
# 통합에서 웹훅 이벤트를 처리하기 위해 이 샘플 코드를 사용하세요.
#
# 1. 이 코드를 `server.rb`라는 새 파일에 붙여 넣으세요.
#
# 2. 의존성 설치:
#    gem install sinatra json hmac
#
# 3. http://localhost:8000에서 서버를 실행합니다
#    ruby server.rb

require 'sinatra'
require 'json'
require 'openssl'

post '/webhook' do
  secret_key = "<YOUR_S2S_KEY>"  # 실제 웹훅 비밀 키로 교체하세요

  payload = request.body.read
  timestamp = request.env["HTTP_X_AGHANIM_SIGNATURE_TIMESTAMP"]
  received_signature = request.env["HTTP_X_AGHANIM_SIGNATURE"]

  unless verify_signature(secret_key, payload, timestamp, received_signature)
    halt 403, "Invalid signature"
  end

  data = JSON.parse(payload)
  event_type = data["event_type"]
  event_data = data["event_data"]

  if event_type == "item.add"
    add_item(event_data)
    return { status: "ok" }.to_json
  end

  if event_type == "item.remove"
    remove_item(event_data)
    return { status: "ok" }.to_json
  end

  halt 400, "Unknown event type"
end

def verify_signature(secret_key, payload, timestamp, received_signature)
  signature_data = "#{timestamp}.#{payload}"
  computed_signature = OpenSSL::HMAC.hexdigest('sha256', secret_key, signature_data)
  OpenSSL.secure_compare(computed_signature, received_signature)
end

def add_item(event_data)
  # 이벤트를 처리하고 항목을 추가하기 위한 플레이스홀더 로직입니다.
  # 실제 애플리케이션에서는 이 함수가 데이터베이스나 인벤토리 시스템과 상호작용합니다.
  player_id = event_data["player_id"]
  for item in event_data["items"] do
    sku = item["sku"]
    puts "Item #{sku} has been credited to player's #{player_id} account."
  end
end

def remove_item(event_data)
  # 이벤트를 처리하고 항목을 제거하기 위한 플레이스홀더 로직입니다.
  # 실제 애플리케이션에서는 이 함수가 데이터베이스나 인벤토리 시스템과 상호작용합니다.
  player_id = event_data["player_id"]
  for item in event_data["items"] do
    sku = item["sku"]
    puts "Item #{sku} has been removed from player's #{player_id} account."
  end
end

if __FILE__ == $0
  require 'sinatra'
  set :bind, '0.0.0.0'
  set :port, 8000
end
// 통합에서 웹훅 이벤트를 처리하기 위해 이 샘플 코드를 사용하세요.
//
// 1. 이 코드를 새로운 파일 `server.js`에 붙여 넣으세요.
//
// 2. 의존성 설치:
//    npm install express
//
// 3. http://localhost:8000에서 서버를 실행합니다
//    node server.js

const express = require('express');
const crypto = require('crypto');

const app = express();

app.post('/webhook', express.raw({ type: "*/*" }), async (req, res) => {
  const secretKey = '<YOUR_S2S_KEY>'; // 실제 웹훅 비밀 키로 교체하세요

  const rawPayload = req.body;
  const timestamp = req.headers['x-aghanim-signature-timestamp'];
  const receivedSignature = req.headers['x-aghanim-signature'];

  if (!verifySignature(secretKey, rawPayload, timestamp, receivedSignature)) {
    return res.status(403).send('Invalid signature');
  }

  const payload = JSON.parse(req.body);
  const { event_type, event_data } = payload;

  if (event_type === 'item.add') {
    addItem(event_data);
    return res.json({ status: 'ok' });
  }

  if (event_type === 'item.remove') {
    removeItem(event_data);
    return res.json({ status: 'ok' });
  }

  return res.status(400).send('Unknown event type');
});

function verifySignature(secretKey, payload, timestamp, receivedSignature) {
  const signatureData = `${timestamp}.${payload}`;
  const computedSignature = crypto
    .createHmac('sha256', secretKey)
    .update(signatureData)
    .digest('hex');
  return crypto.timingSafeEqual(Buffer.from(computedSignature), Buffer.from(receivedSignature));
}

function addItem(event_data) {
  // 이벤트를 처리하고 항목을 추가하기 위한 플레이스홀더 로직입니다.
  // 실제 애플리케이션에서는 이 함수가 데이터베이스나 인벤토리 시스템과 상호작용합니다.
  const playerId = event_data.player_id;
  for (const item of event_data.items) {
    const sku = item.sku;
    console.log(`Item ${item.sku} has been credited to player's ${playerId} account.`);
 }
}

function removeItem(event_data) {
  // 이벤트 처리 및 항목 제거를 위한 플레이스홀더 로직입니다.
  // 실제 애플리케이션에서는 이 함수가 데이터베이스나 인벤토리 시스템과 상호작용합니다.
  const playerId = event_data.player_id;
  for (const item of event_data.items) {
    const sku = item.sku;
    console.log(`Item ${item.sku} has been removed from player's ${playerId} account.`);
 }
}

app.listen(8000, () => {
  console.log('Server is running on http://localhost:8000');
});
// 통합에서 웹훅 이벤트를 처리하기 위한 샘플 코드입니다.
//
// 1. 이 코드를 새로운 파일 `server.go`에 붙여넣으세요.
//
// 2. http://localhost:8000에서 서버를 실행하세요
//    go run server.go

package main

import (
  "crypto/hmac"
  "crypto/sha256"
  "encoding/hex"
  "encoding/json"
  "fmt"
  "io/ioutil"
  "net/http"
)

func webhookHandler(w http.ResponseWriter, r *http.Request) {
  secretKey := "<YOUR_S2S_KEY>"  // 실제 웹훅 비밀 키로 교체하세요

  rawPayload, _ := ioutil.ReadAll(r.Body)
  payload := string(rawPayload)
  timestamp := r.Header.Get("X-Aghanim-Signature-Timestamp")
  receivedSignature := r.Header.Get("X-Aghanim-Signature")

  if !verifySignature(secretKey, payload, timestamp, receivedSignature) {
    http.Error(w, "Invalid signature", http.StatusForbidden)
    return
  }

  var data map[string]interface{}
  if err := json.Unmarshal(rawPayload, &data); err != nil {
    http.Error(w, "Invalid payload", http.StatusBadRequest)
    return
  }

  eventType := data["event_type"].(string)
  eventData := data["event_data"].(map[string]interface{})

  if eventType == "item.add" {
    addItem(eventData)
    w.WriteHeader(http.StatusOK)
    json.NewEncoder(w).Encode(map[string]string{"status": "ok"})
    return
  }

  if eventType == "item.remove" {
    removeItem(eventData)
    w.WriteHeader(http.StatusOK)
    json.NewEncoder(w).Encode(map[string]string{"status": "ok"})
    return
  }

  http.Error(w, "Unknown event type", http.StatusBadRequest)
}

func verifySignature(secretKey, payload, timestamp, receivedSignature string) bool {
  signatureData := fmt.Sprintf("%s.%s", timestamp, payload)
  mac := hmac.New(sha256.New, []byte(secretKey))
  mac.Write([]byte(signatureData))
  computedSignature := hex.EncodeToString(mac.Sum(nil))
  return hmac.Equal([]byte(computedSignature), []byte(receivedSignature))
}

func addItem(eventData map[string]interface{}) {
  // 이벤트를 처리하고 항목을 추가하기 위한 플레이스홀더 로직입니다.
  // 실제 애플리케이션에서는 이 함수가 데이터베이스나 인벤토리 시스템과 상호작용합니다.
  playerID := eventData["player_id"].(string)
  items := eventData["items"].([]interface{})
  for _, item := range items {
    itemMap := item.(map[string]interface{})
    sku := itemMap["sku"].(string)
    fmt.Printf("Item %s has been credited to player's %s account.\\n", sku, playerID)
  }
}

func removeItem(eventData map[string]interface{}) {
  // 이벤트 처리 및 항목 제거를 위한 플레이스홀더 로직입니다.
  // 실제 애플리케이션에서는 이 함수가 데이터베이스나 인벤토리 시스템과 상호작용합니다.
  playerID := eventData["player_id"].(string)
  items := eventData["items"].([]interface{})
  for _, item := range items {
    itemMap := item.(map[string]interface{})
    sku := itemMap["sku"].(string)
    fmt.Printf("Item %s has been removed from player's %s account.\\n", sku, playerID)
  }
}

func main() {
  http.HandleFunc("/webhook", webhookHandler)
  fmt.Println("Server is running on http://localhost:8000")
  http.ListenAndServe(":8000", nil)
}
Add webhook endpoint to Aghanim
When the webhook handling is ready, add the endpoint to the account so the Aghanim could start sending the events.
- Dashboard
- API
- Go to Integration → Webhooks.
- Click Add webhook. The site will open the Create webhook window.
- Copy and paste the URL
https://<YOUR_DOMAIN>/webhook. - Click Select events. The site will open the Select events to send window.
- Expand the Main class and select the Item add, Item remove checkboxes.
- Click Apply.
- Click Add. The site will redirect you to the webhook page.
- Click Back.
- cURL
- Python
- Ruby
- Node.js
- Go
curl -X POST https://api.aghanim.com/s2s/v1/webhooks \
  -H 'Content-Type: application/json' \
  -H 'Authorization: Bearer <YOUR_S2S_KEY>' \
  -d '{
    "events": [
      "item.add",
      "item.remove"
    ],
    "url": "https://<YOUR_DOMAIN>/webhook",
    "description": "The endpoint for all webhooks",
    "method": "POST",
    "enabled": true,
    "enabled_logs": true,
    "player_context_enabled": true
  }'
import requests

def create_webhook():
    payload = {
        "events": ["item.add", "item.remove"],
        "url": "https://<YOUR_DOMAIN>/webhook",
        "description": "The endpoint for all webhooks",
        "method": "POST",
        "enabled": True,
        "enabled_logs": True,
        "player_context_enabled": True
    }

    headers = {"Authorization": "Bearer <YOUR_S2S_KEY>", "Content-Type": "application/json"}
    resp = requests.post("https://api.aghanim.com/s2s/v1/webhooks", json=payload, headers=headers)
    return resp.json()
require 'net/http'
require 'json'
require 'uri'

def create_webhook
  uri = URI("https://api.aghanim.com/s2s/v1/webhooks")
  req = Net::HTTP::Post.new(uri, 'Content-Type' => 'application/json', 'Authorization' => 'Bearer <YOUR_S2S_KEY>')
  req.body = {
    events: ["item.add", "item.remove"],
    url: "https://<YOUR_DOMAIN>/webhook",
    description: "The endpoint for all webhooks",
    method: "POST",
    enabled: true,
    enabled_logs: true,
    player_context_enabled: true
  }.to_json

  res = Net::HTTP.start(uri.hostname, uri.port, use_ssl: true) { |http| http.request(req) }
  JSON.parse(res.body)
end
const axios = require('axios');

async function createWebhook() {
  const payload = {
    events: ["item.add", "item.remove"],
    url: "https://<YOUR_DOMAIN>/webhook",
    description: "The endpoint for all webhooks",
    method: "POST",
    enabled: true,
    enabled_logs: true,
    player_context_enabled: true
  };

  const res = await axios.post('https://api.aghanim.com/s2s/v1/webhooks', payload, {
    headers: { 'Authorization': 'Bearer <YOUR_S2S_KEY>', 'Content-Type': 'application/json' }
  });
  return res.data;
}
package main

import (
	"bytes"
	"encoding/json"
	"net/http"
)

func createWebhook() map[string]interface{} {
	payload := map[string]interface{}{
		"events":                 []string{"item.add", "item.remove"},
		"url":                    "https://<YOUR_DOMAIN>/webhook",
		"description":            "The endpoint for all webhooks",
		"method":                 "POST",
		"enabled":                true,
		"enabled_logs":           true,
		"player_context_enabled": true,
	}
	data, _ := json.Marshal(payload)

	req, _ := http.NewRequest("POST", "https://api.aghanim.com/s2s/v1/webhooks", bytes.NewBuffer(data))
	req.Header.Set("Authorization", "Bearer <YOUR_S2S_KEY>")
	req.Header.Set("Content-Type", "application/json")

	client := &http.Client{}
	resp, _ := client.Do(req)
	defer resp.Body.Close()

	var webhook map[string]interface{}
	json.NewDecoder(resp.Body).Decode(&webhook)
	return webhook
}
Test your integration
After you have handled the webhooks, check that the purchased items are in your inventory. That’s all.
Next steps
- See Currency codes and minor units to learn how the Aghanim represents monetary amounts.
- See Payment Webhook to learn about the payment progress when the player visits the payment form.
FAQ
The plugin targets Unreal Engine 5.8 and can stay enabled for Android, iOS, Windows, macOS, and Linux — it compiles and packages everywhere. Checkout availability differs per platform and launch mode:
| Platform | Native | In-app browser | Default browser | WebView |
|---|---|---|---|---|
| Android | ✅ | ✅ | ✅ | ✅ |
| iOS | — | ✅ | ✅ | ✅ |
| Windows / macOS / Linux | — | — | ✅ | — |
Query IsCheckoutLaunchModeAvailable at runtime instead of hardcoding the table, so shared game code keeps working as support evolves.
On Windows, macOS, Linux, and in the editor there is no native Aghanim SDK — the plugin talks to the Aghanim REST API directly. Orders and catalog operations (get order, unconsumed orders, consume, items, price points) work the same as on mobile, but the only checkout launch mode is Default browser: the plugin creates the order and opens the checkout URL in the OS default browser. The Native, In-app browser, and WebView modes report unavailable through IsCheckoutLaunchModeAvailable. To test those modes, run on a physical Android or iOS device.
A successful launch does not mean the player paid: Aghanim Start Checkout completes when the payment form opens, and the payment happens later, possibly outside the app — the player may even finish it on another device. The OnCheckoutClosed event is only a best-effort hint (it never fires for the external browser and can be missed if the app is killed mid-checkout).
Always verify fulfillment through orders: call Aghanim Get Unconsumed Orders on startup, on focus regain, and after a checkout closes; then call Aghanim Consume Order for a returned order and grant its items from that node's On Success pin. An Order ID that stops appearing in that list has been consumed; one that never appears has not been paid for yet. If you run a game server, use the item.add webhook instead.
도움이 필요하세요?
통합팀에 문의하십시오 [email protected]